|
JUST DO IT |
|
or
|
|
by John Niolon |
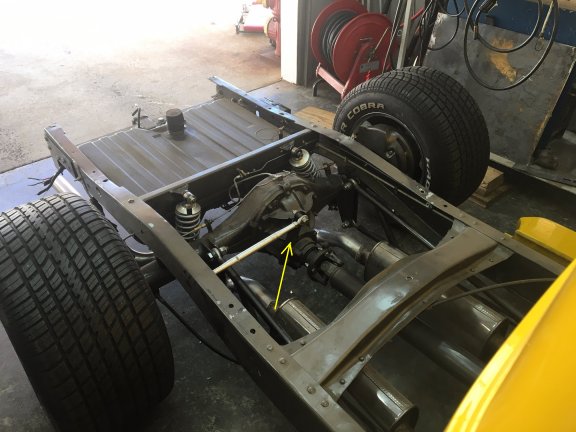
| Long story short, I broke a pinion cover bolt off in the chunk. Nearly impossible to get it out with all the stuff interfering with tapping and drilling and ease-outing. It was the top bolt on the pinion cover. I also wanted to beef up the panhard bar bracket and working from above is much more desirable than from below on a creeper...no lift. |
| I thought about this till it caused a nap .....then asked the gurus on the forum ford-trucks.com/forums/forum41/ what they would do..., One good suggestion was remove the bed and just do it! So ? There you go. |
| Now, I'm 74 years old and because I've taken care of my body so well...I have the joints of a 94 year old. Shoulders that need cortisone quarterly to work (somewhat work) Hips (one replaced) that struggle ... masochistic knees that just dare me to get down on the floor and attempt to get back up and absolutely no help available without two weeks of planning and a bribe. |
|
First step...As
I've aged I've gotten less satisfied with jack stands...especially
high ones... When you get one end up on tall stands and start on the
other end things can get a little shaky, or you have to do it in
three or four raises... so I did something different
I jacked up the truck and put the home made wheel cribs under the
front wheels
these are much more stable than jack stands and I get the wheels 12" off the floor...plenty of creeper room for a fat boy. I didn't have room for the cribs in the rear and still be able to get to all the hardware on the creeper so I used my tightest fitting/sturdiest jack stands there... Making sure they were well placed and stable.. Shake the truck some to test the stability and adjust accordingly.. Second step disconnect all wiring...tail lights, tag light, backup lights (if any) and camera (if any) and anything else would get snatched loose as you lift. If you have an in-bed fuel filler, get that out of the way too. This will all take a minute and somewhere between 50 and 5,500 times getting up and down off a creeper. |
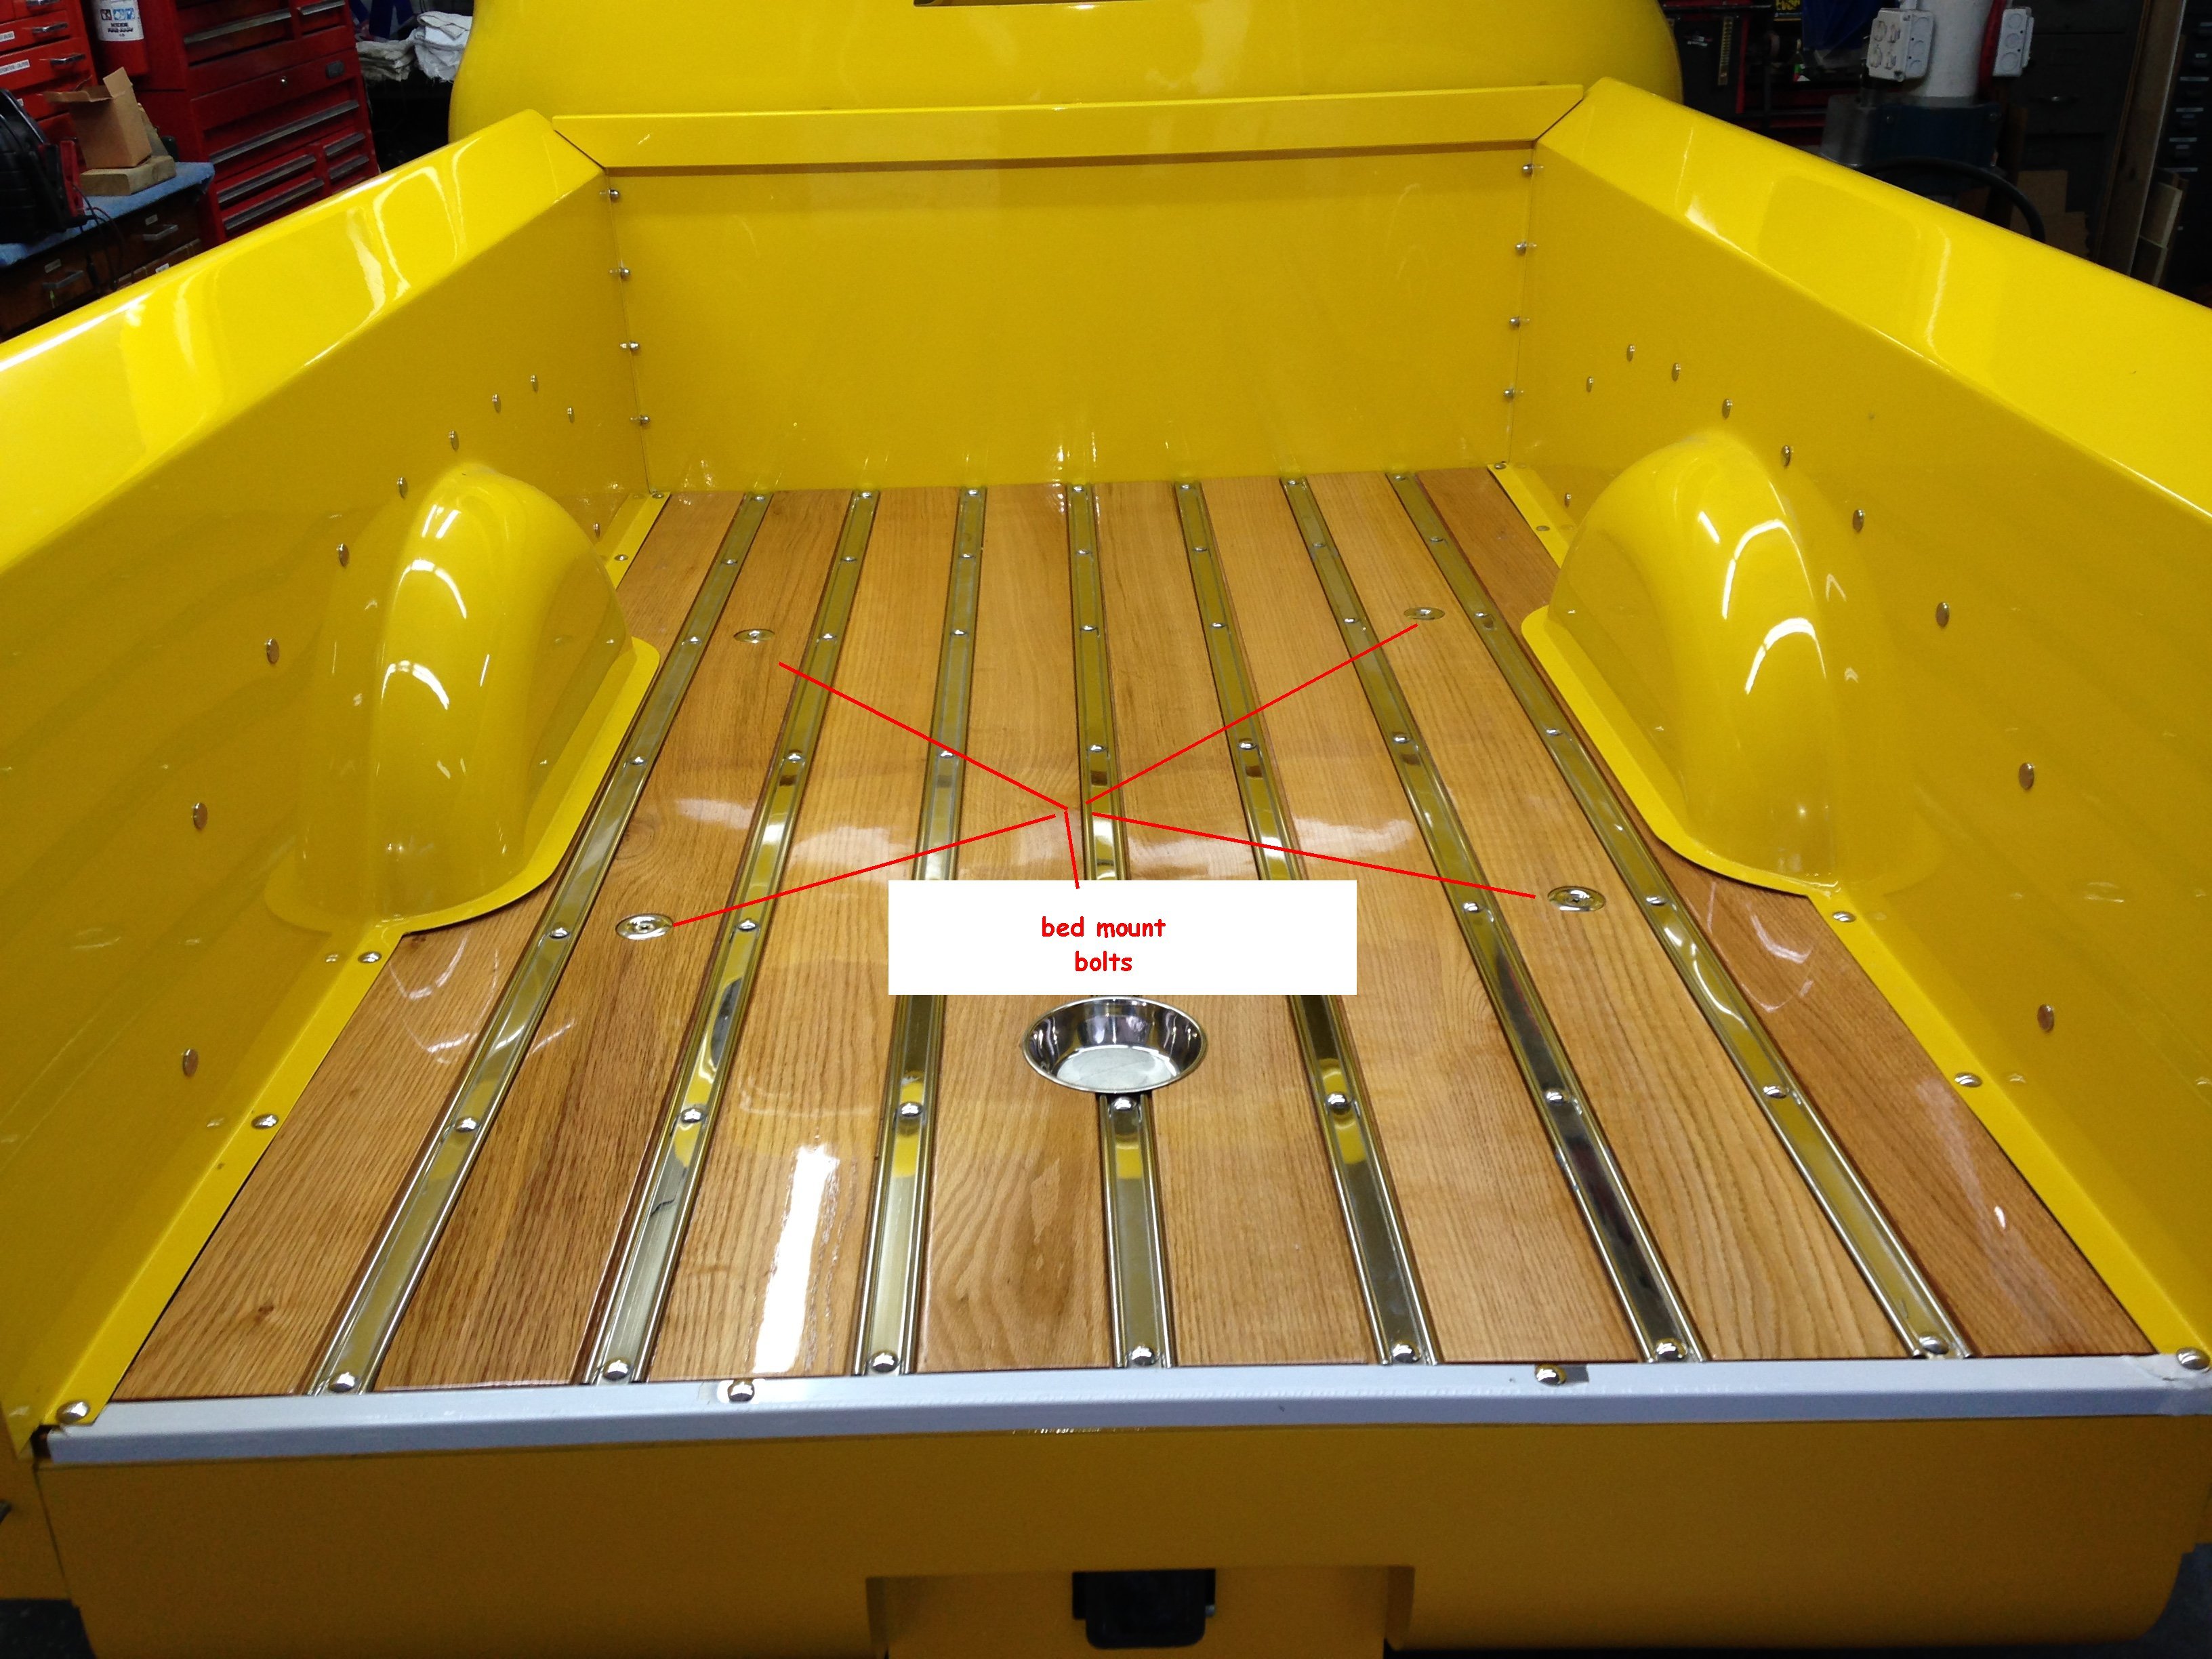
| Third step Preparing to lift the bed.. Most folks on the forum suggested getting 3-5 guys, pick it up and just walk it off the frame... good idea... I don't have those guys available, so did the 'one old guy' plan instead. I saw a nice plan from a Canadian friend where he fabbed up angle iron brackets that hooked under the bed side roll with cross bars to attach the lifting machine... it looked great and started that direction, but not being as confident as John was, I opted for small change. I decided to replace his brackets with eye bolts replacing the 4 bed mounting bolts. To do that you need to remove the front bolts that fasten outside the frame rail and the two back bolts that fasten thru the frame rails, then remove the 4 bed mount bolts...then jack up the bed enough to drop the eyebolt thru the wood and the cross member and attach a large fender washer and a nut (don't bolt it back thru the frame rail) I blocked the bed up with 4x4 blocks to have some room for my fingers. I also found it easier to hot glue the fender washer and nut together. As a unit it was easier to handle in limited space... do this 4 times. |
|
|
| Fourth step the lifting machine. I installed the bed with a engine hoist and ratchet straps, but without the wood...which adds considerable weight. I needed a mechanical advantage. My very generous son-in-law gave me a 120v hoist for Christmas that was intended on being installed in the attic of the house to hoist Christmas trees and decorations into the attic. He was tired of helping me with a block and tackle storing them... |
|
|
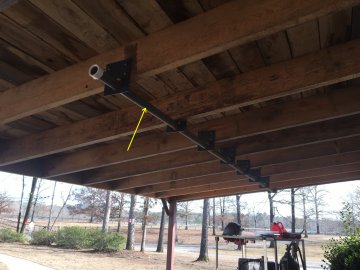
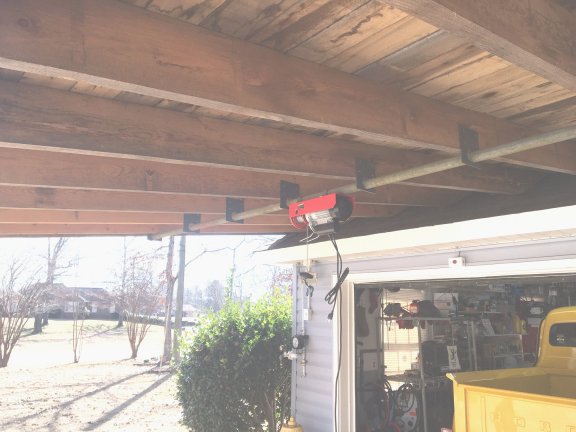
| I have a 25' x 12' lean too on the front of my shop and planned on using the rafters as my lifting point but was concerned about the spreading the weight over several rafters...My mechanical neighbor guru (and builder of the lean too) suggested a beam/bar spanning several with the hoist attached to them and even wanted to add deadman supports at each end. So I started fabbing... |
| Using a 2" piece of schedule 40 pipe 16' long I spanned 8 rafters...Pipe was supported by 3/16" plate hangers bolted to each rafter. I can position the hoist between any two rafters either by unbolting one bracket and sliding it or by unbolting the hoist hangers and just putting where it needs to be. I think most lifts will be done in front and centered on the roll up door. |
|
|
| Next I hung the hoist on the pipe, centered on the door opening. That was fun... 40# hoist --8'4" from ground...with a six foot ladder. Done, so we're almost ready to lift |
|
|
|
Fifth step
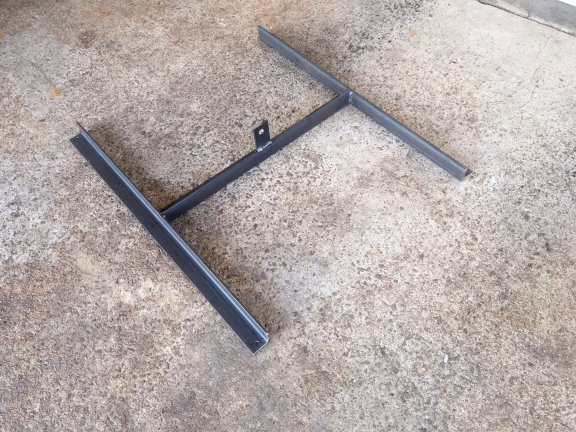
the lifting mechanism (the rigging) My buddy John used
two cross bars with his bed lift with a middle bar to keep the rig together and his bed lift brackets...
|
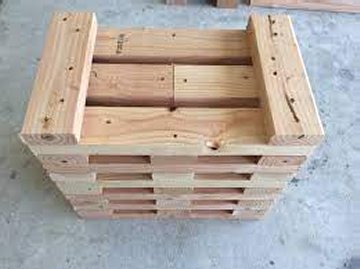
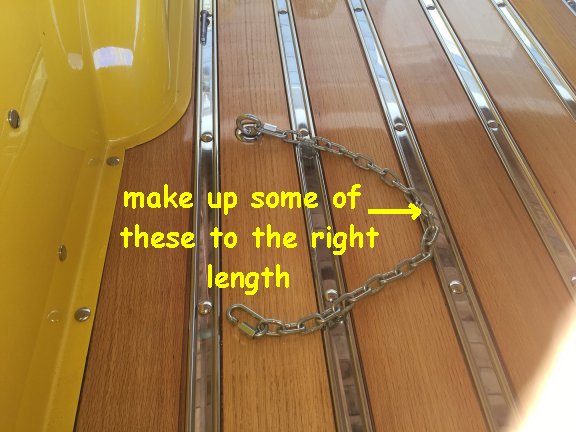
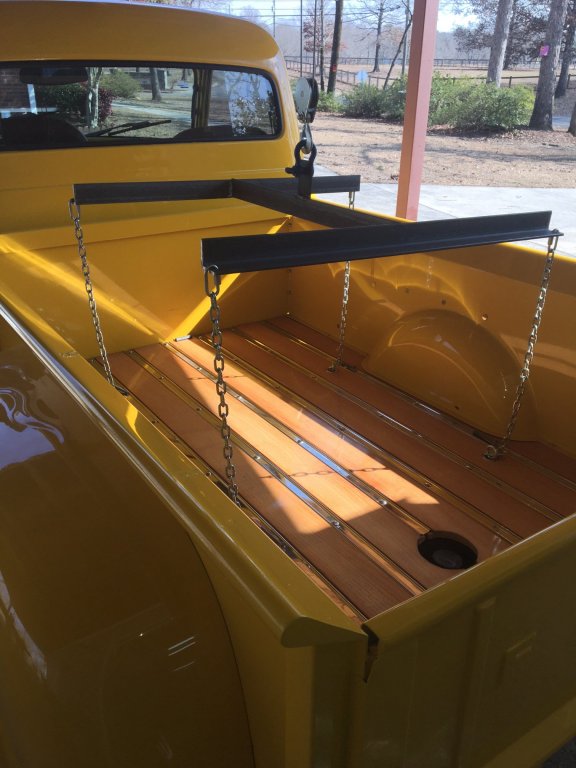
| worked great for him but mine had to be altered a little. I used 2x2x1/4" angle iron in the same fashion but sized to fit inside the bed over the bed mount bolts, with a lifting lug at the balance point. Drilled it at each corner for the lift chains and quick links and attached it to the hoist with a shackle. |
|
;
|
|
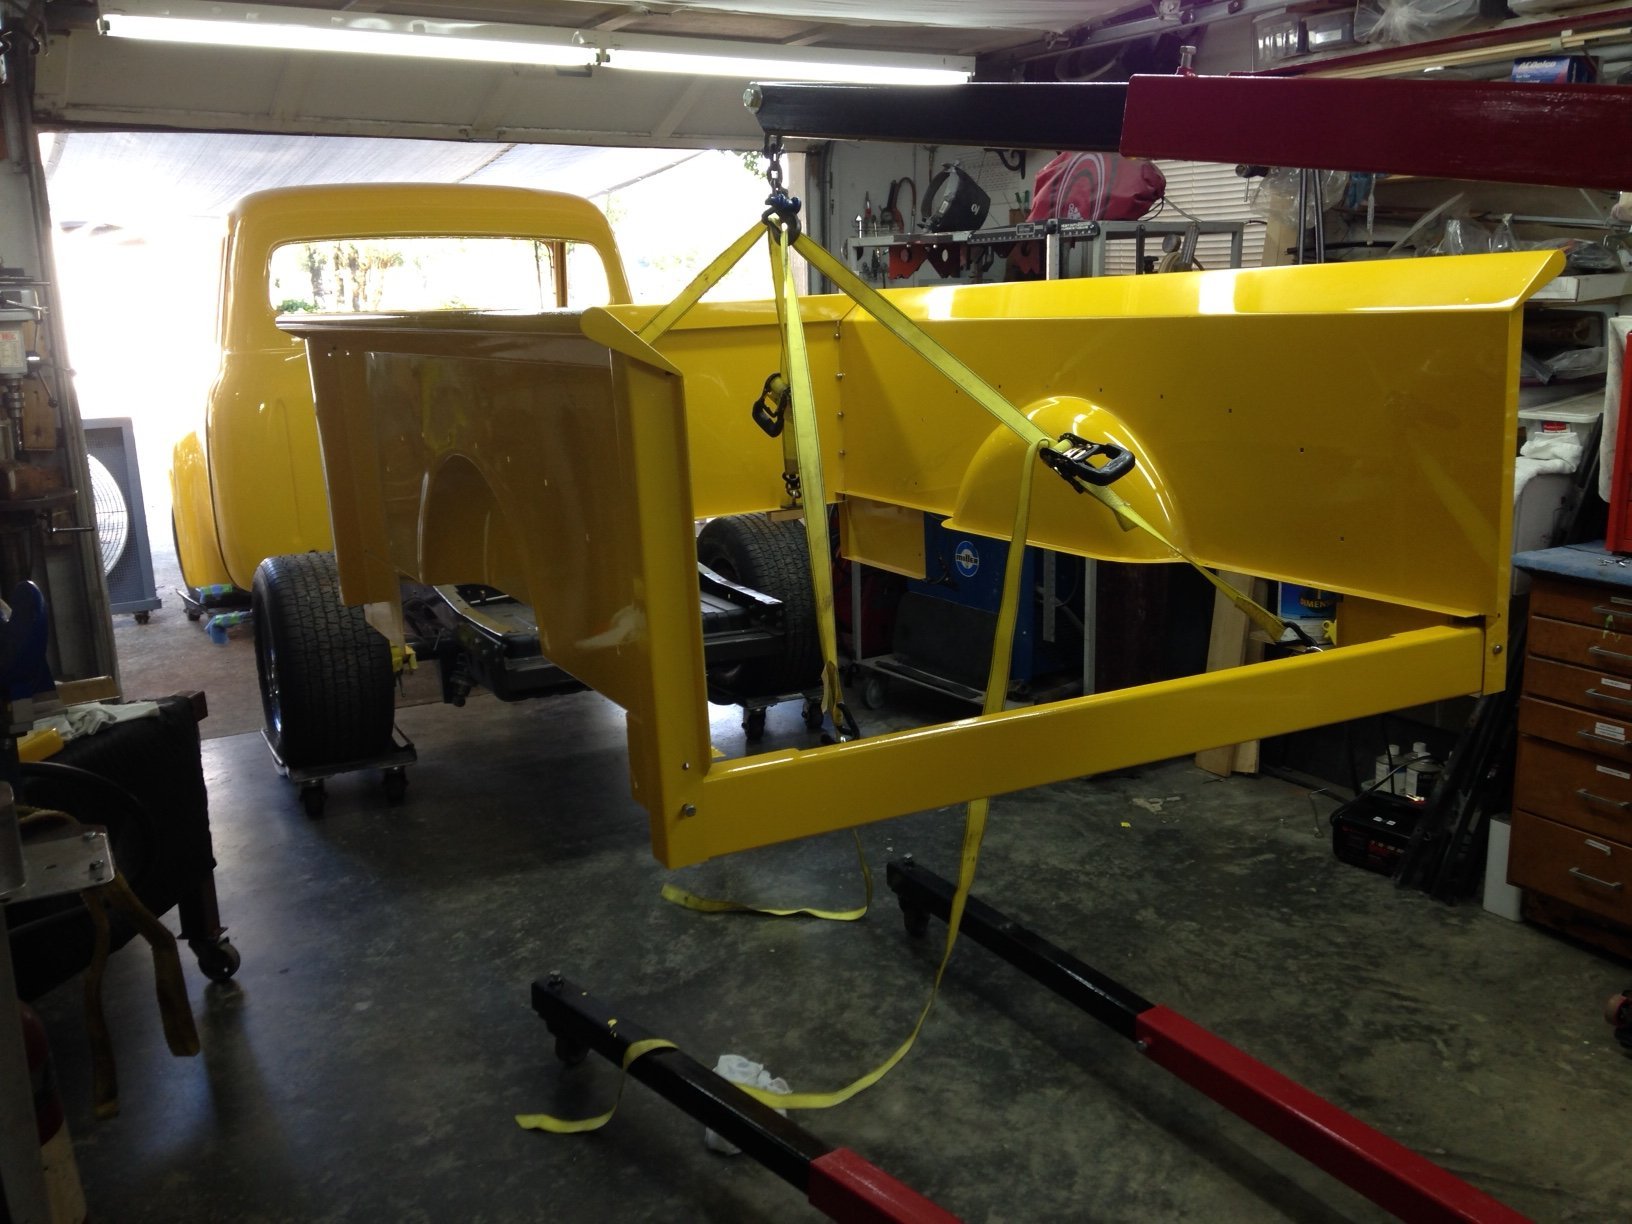
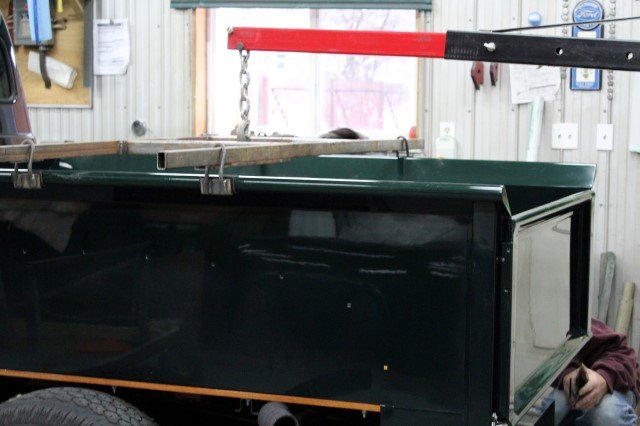
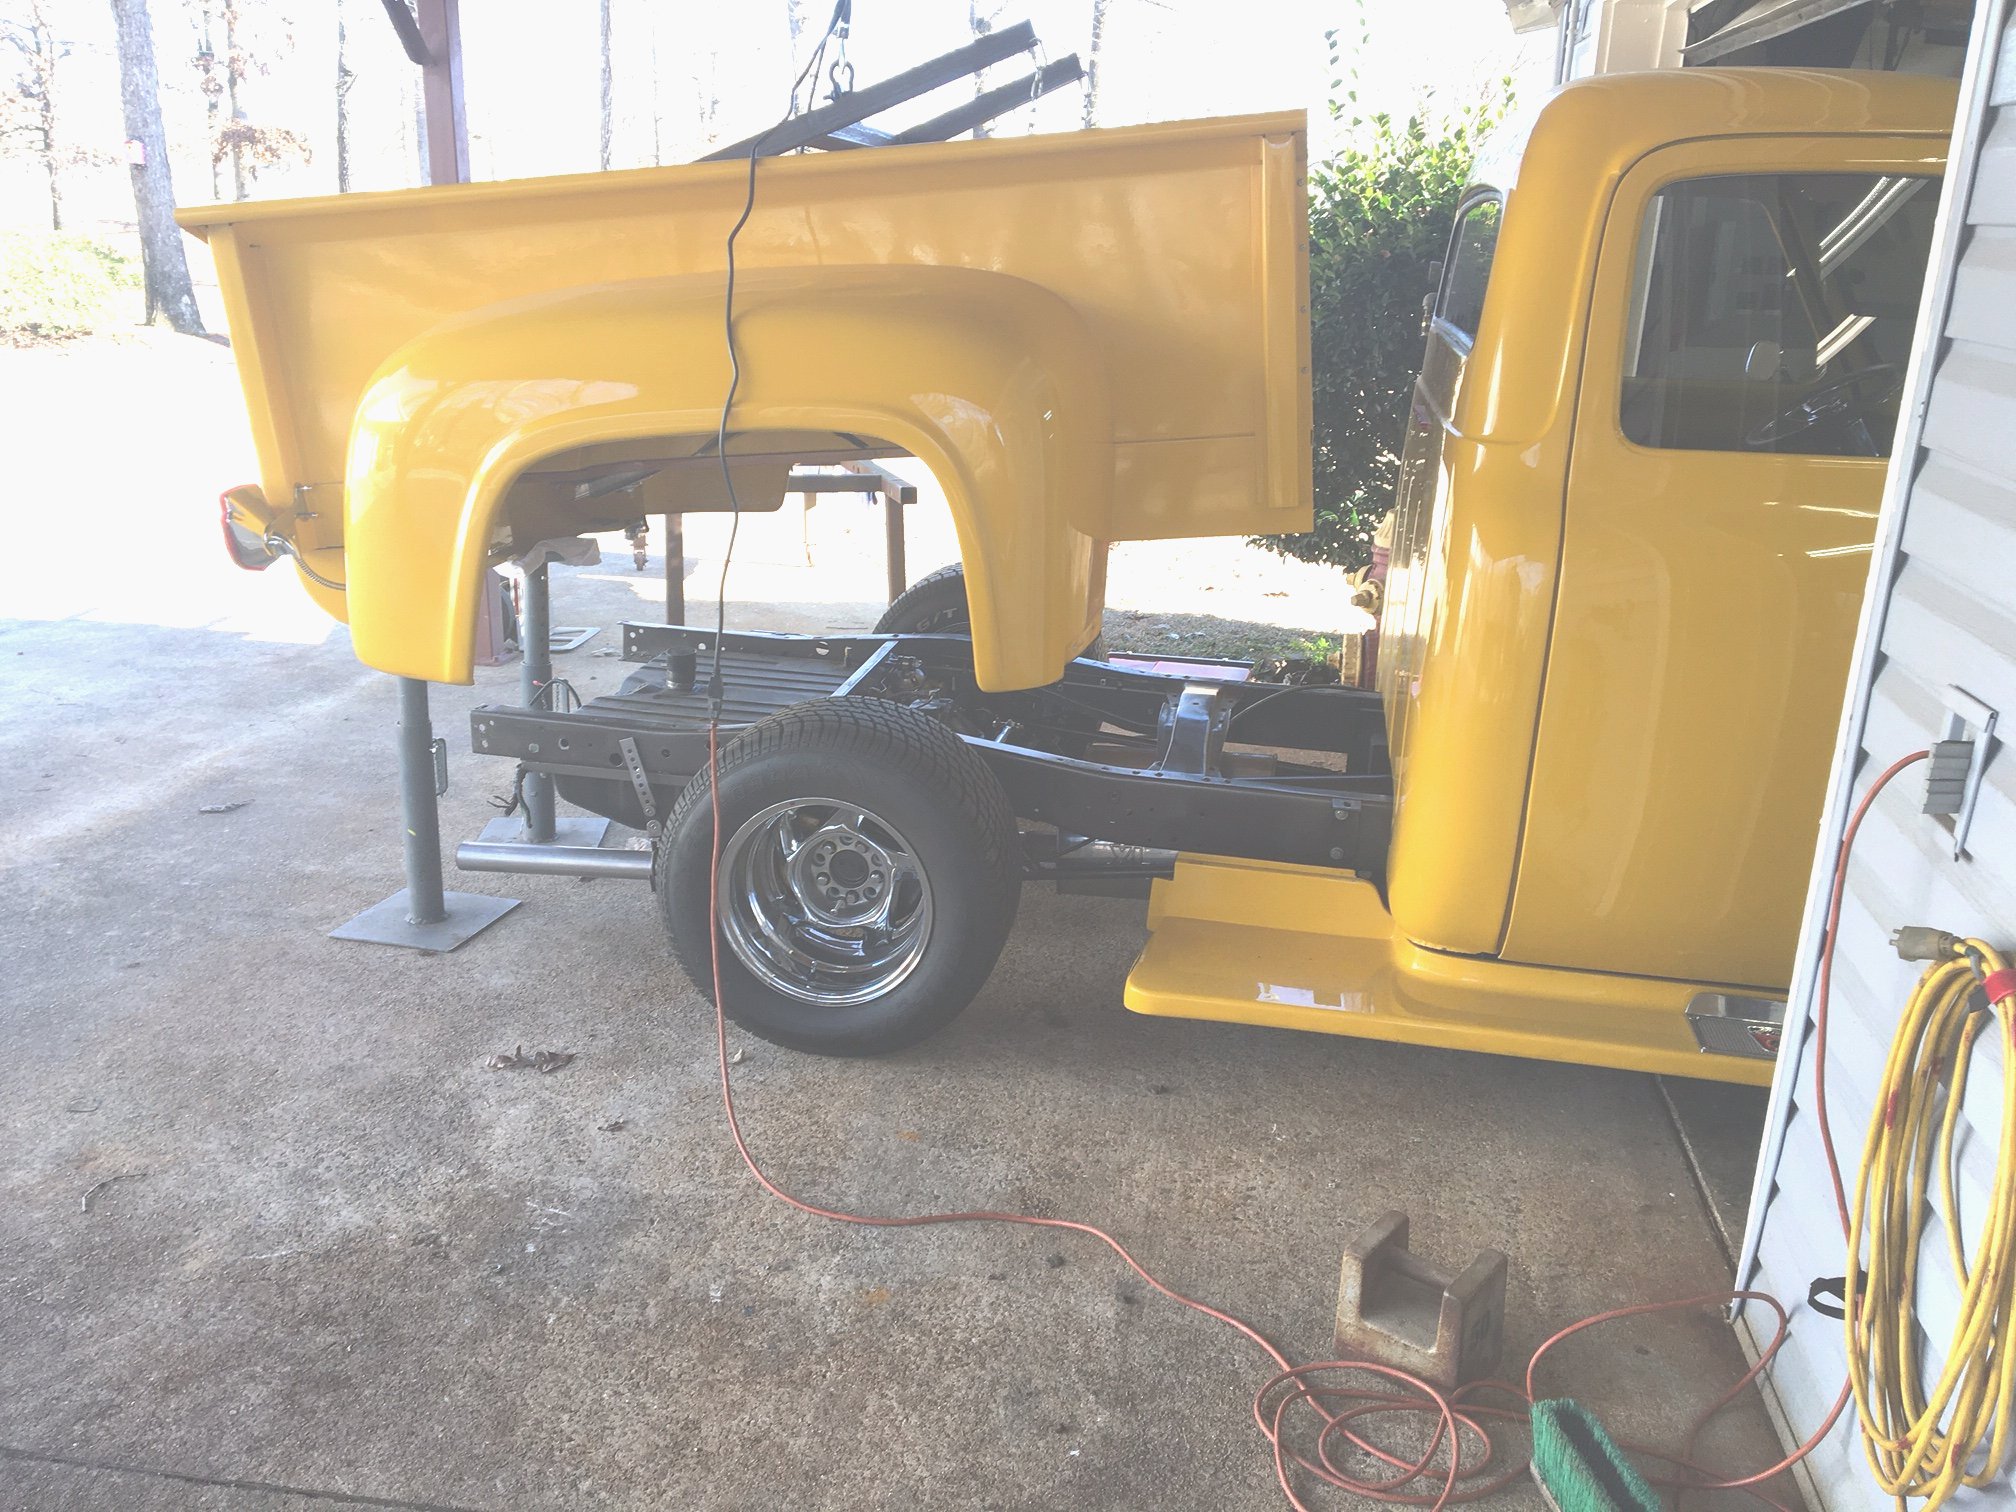
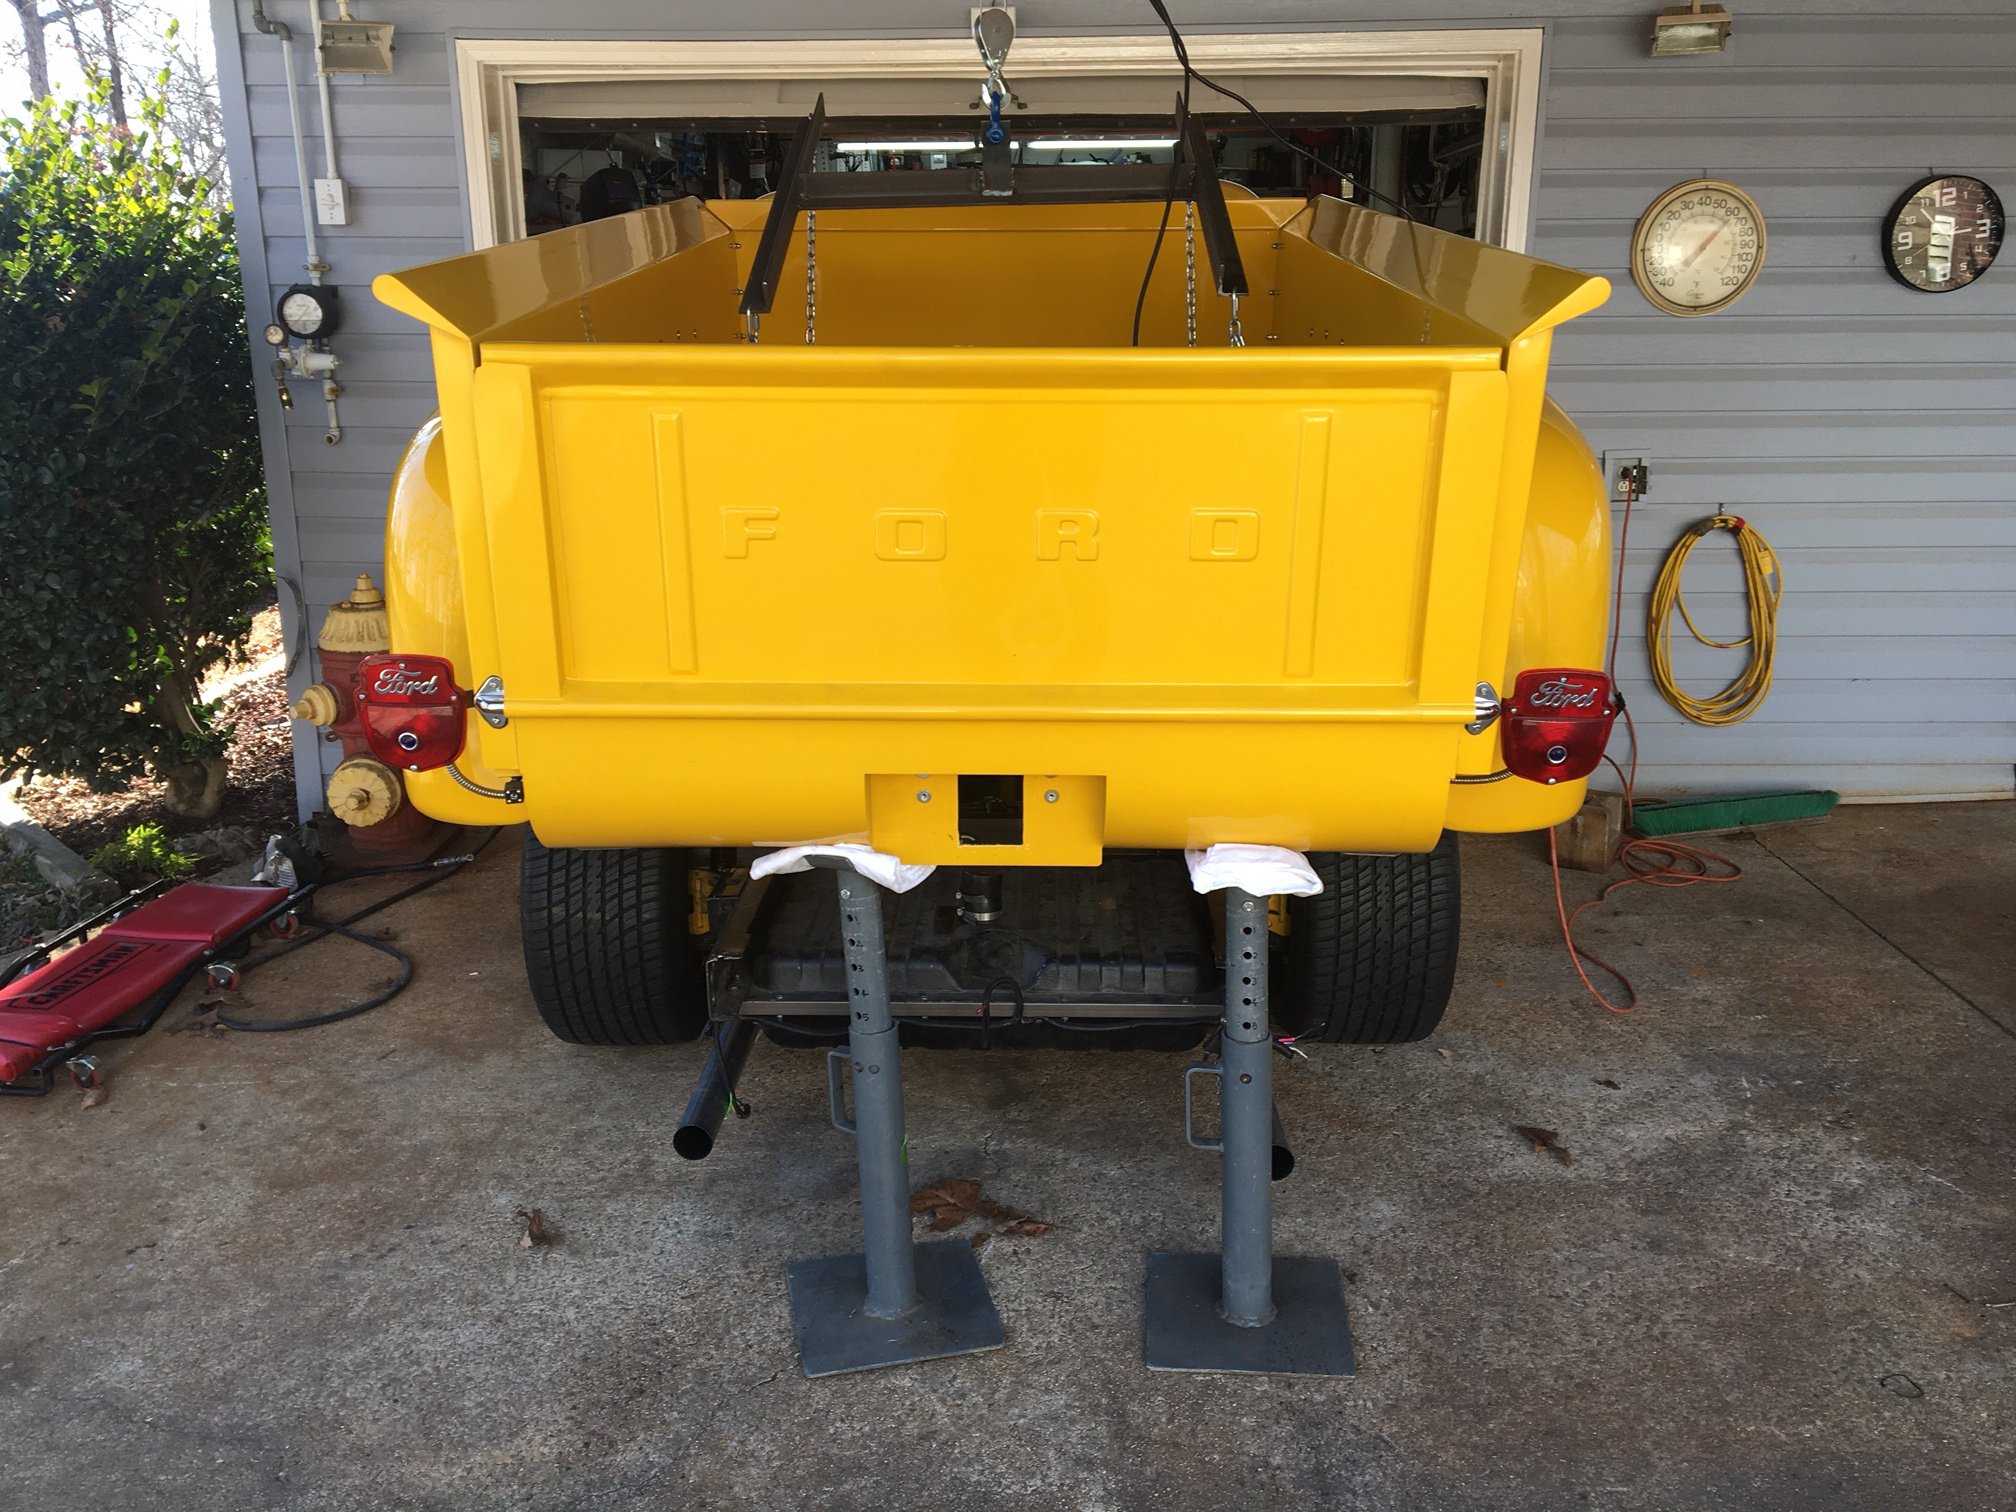
Raised the hoist
cable/chains up and backed the truck under the hoist... hooked
up the quick links and took up the slack. I raised it up an
inch or so and realized the bed was much more tail heavy than I
first thought...tailgate adds a lot to the picture. I checked
to make sure everything was clear and no binds or attachments I
missed and started the lift.. back end drooped badly as I lifted and
I had to use padded jackstands to support the rear end of the bed. Also, the frame rails extended into
the roll pan so the bed had to be pulled back to clear ... I
actually moved the truck forward about 2" to clear it... until I could pull the truck out from under it. here's pics of the lift and removal
|
|
|
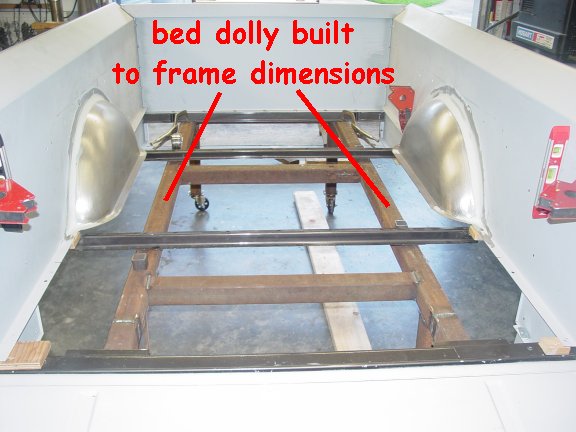
| With the truck out of the way I slid my bed dolly under the bed with ample padding and lowered the bed down on it. |
|
|
| All good now... bed was rolled across from the door out of the way and truck pulled back into shop ready for it's surgery. In a much more accessible position to remove/replace the broken bolt and fabricate a new panhard bracket. |
|
|
| As with most of my old man projects, all of this occurred over 3 or 4 days... I'd work till I couldn't and start again another day... one of the benefits of being retired... A healthy young man with a friend could probably complete this in a day...that is if he didn't have to fab up all the lifting apparatuses and the hoist rail and the hoist. |
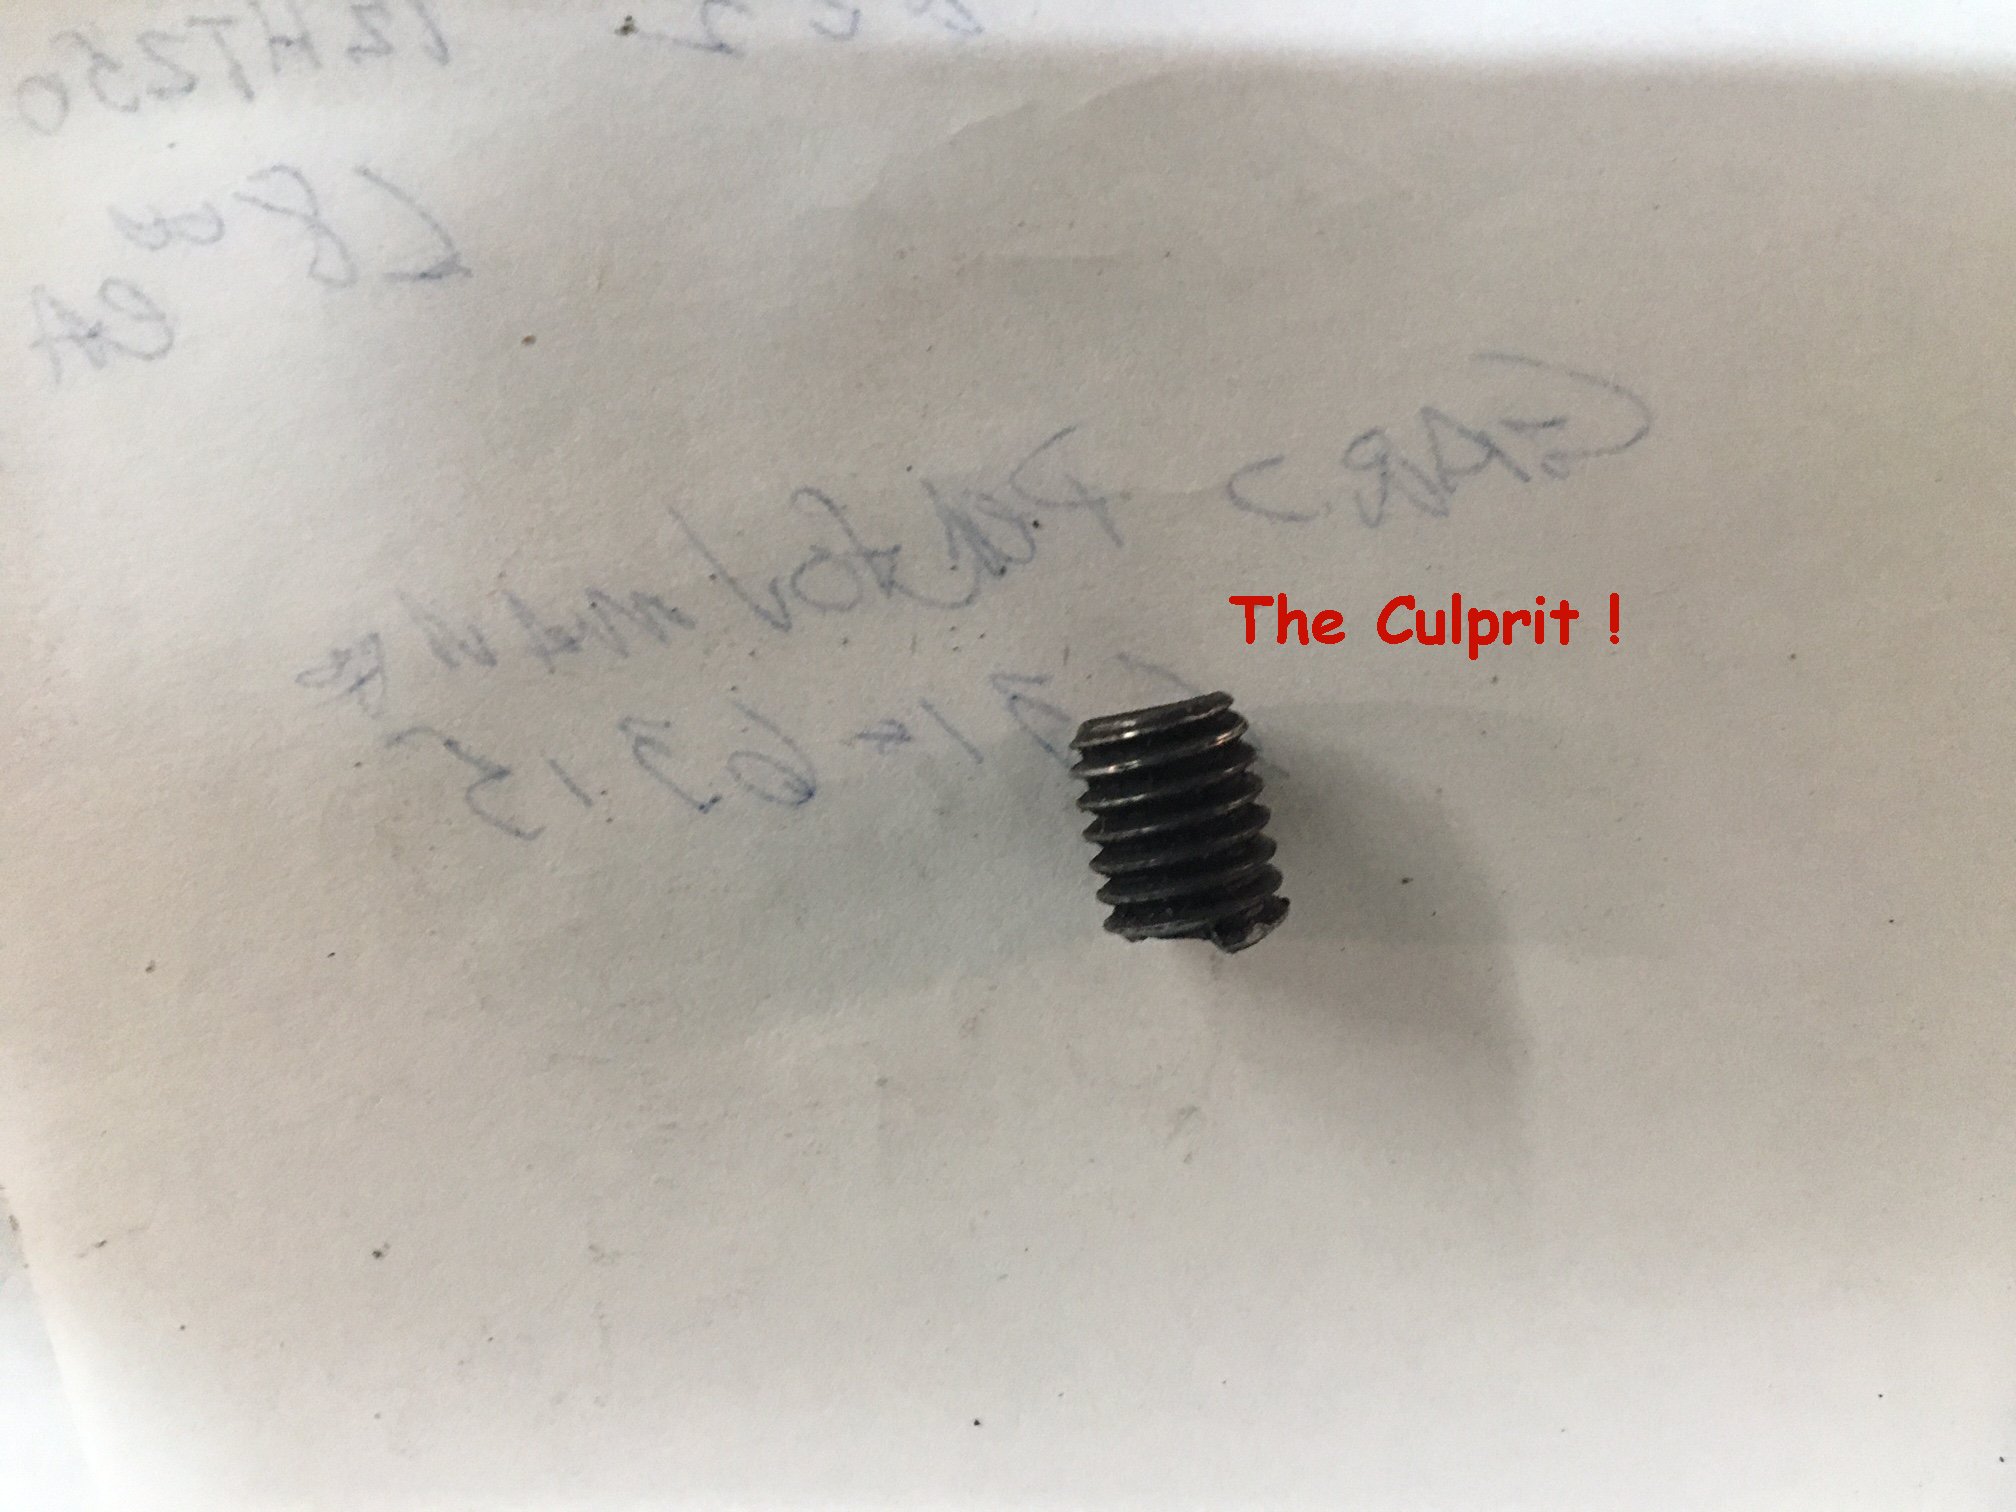
| A little bit of back story on why I had to do all this. My panhard bar is secured to the differential with 3/16 plate and the original pinion cover bolts. The truck would bottom out on hitting a swale or low place in the road...(I dodge potholes) I knew I needed heavier springs and that was part of the problem and led to the bottoming out. Evidently the accumulated hits had weakened the bolt past it's breaking point till it finally gave up. That caused the bracket to act like a hinge on the existing bolt. Also the bolts grip was shortened by adding the 3/16 plate (which has been remedied.. longer bolt, grade 8). The position of the broken bolt was the top center hole in the pinion cover and because of the interference with driveshaft flange and suspension and mufflers we couldn't get a level line to drill out the bolt... working from underneath...tool blocked !!! |
| So the only option is bed removal to get access, remove the flange and back out the pinion cover/pinion. Once it was out of the way, a couple of angled taps with a punch the the broken piece backed out by hand. |
|
|
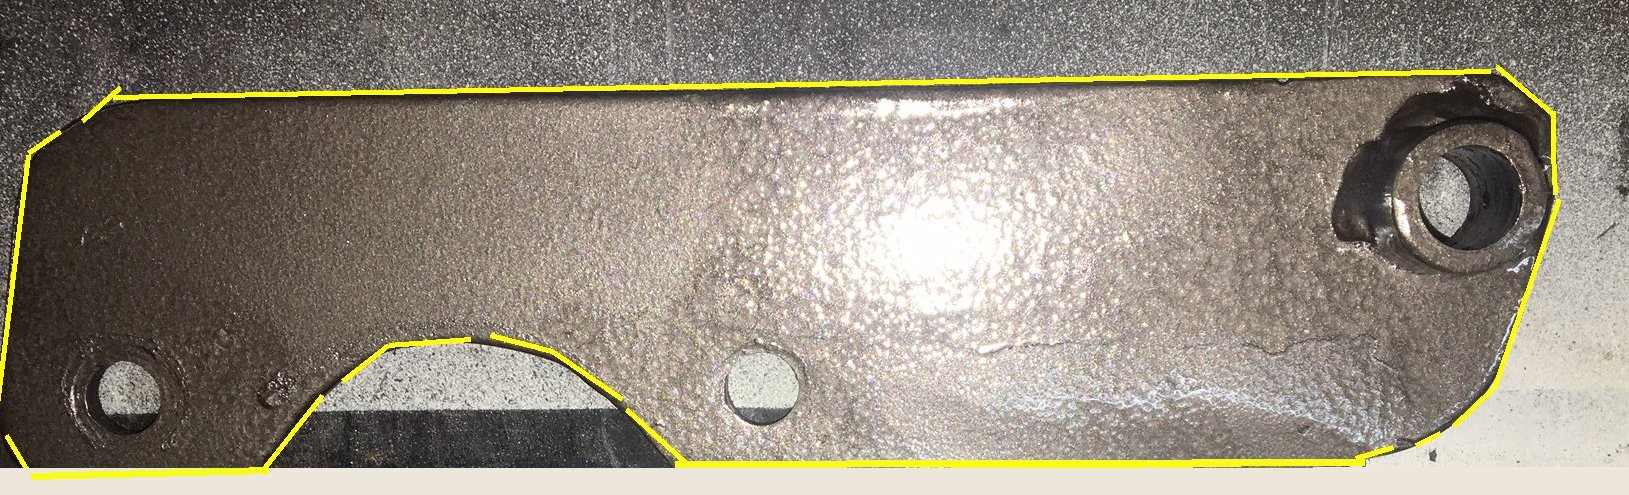
| We put it all back together with longer stronger bolts and anti-sieze and fabbed up a better bracket for the panhard bar. |
|
Original was a 2 bolt straight section
|
|
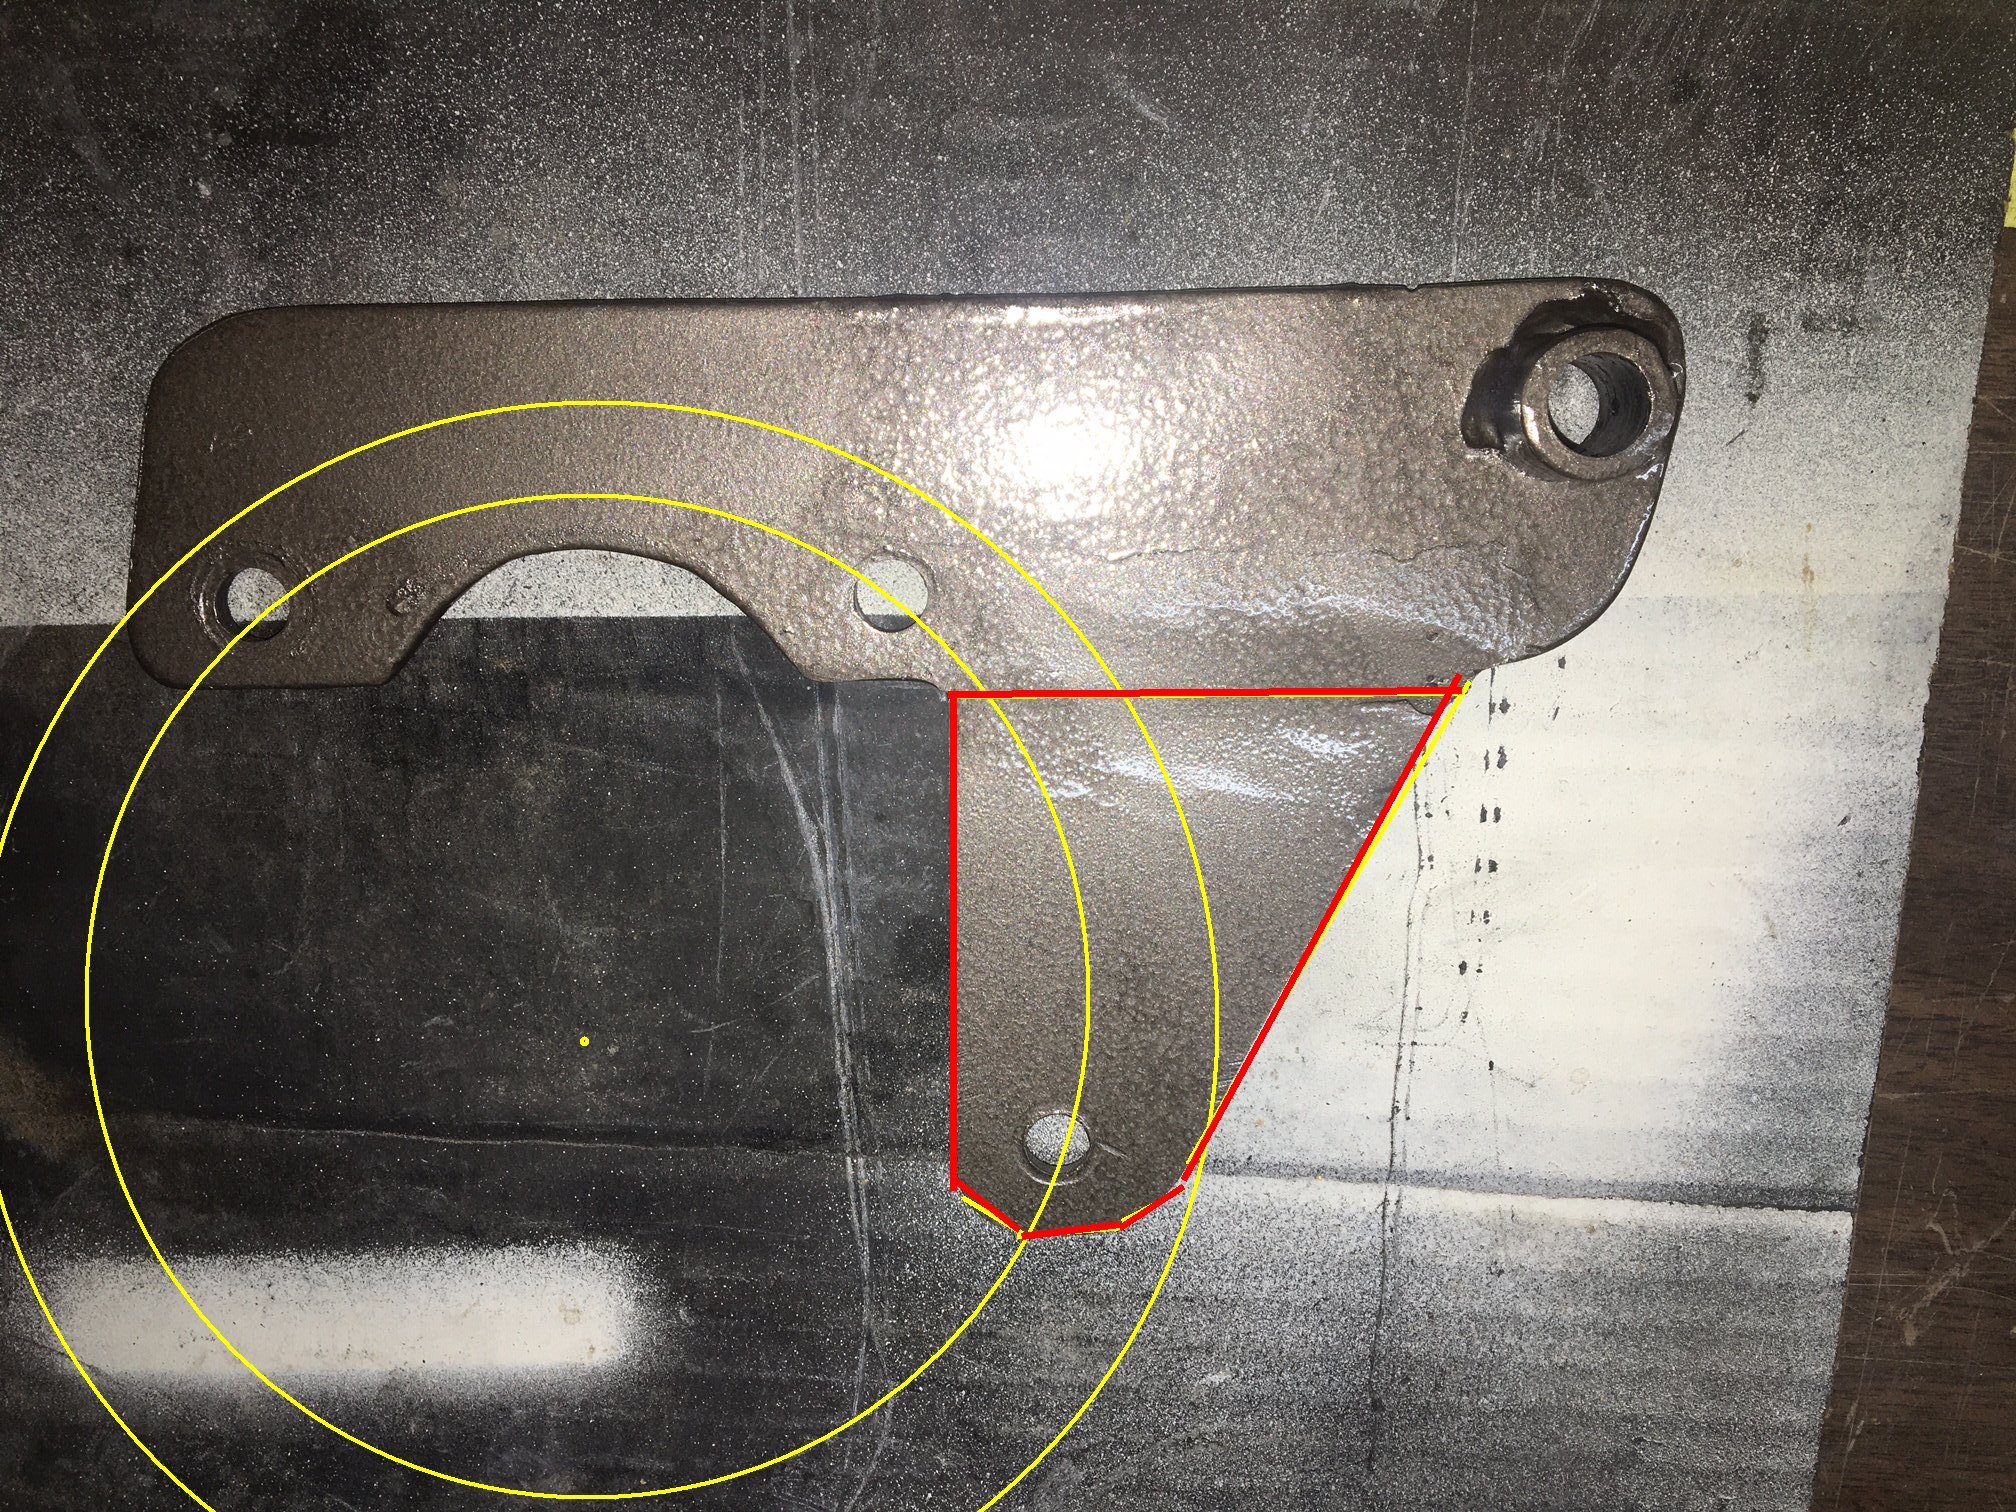
We added a 'third leg' to make it a 3
bolt design
|
|
Should make it much more better...
|
|
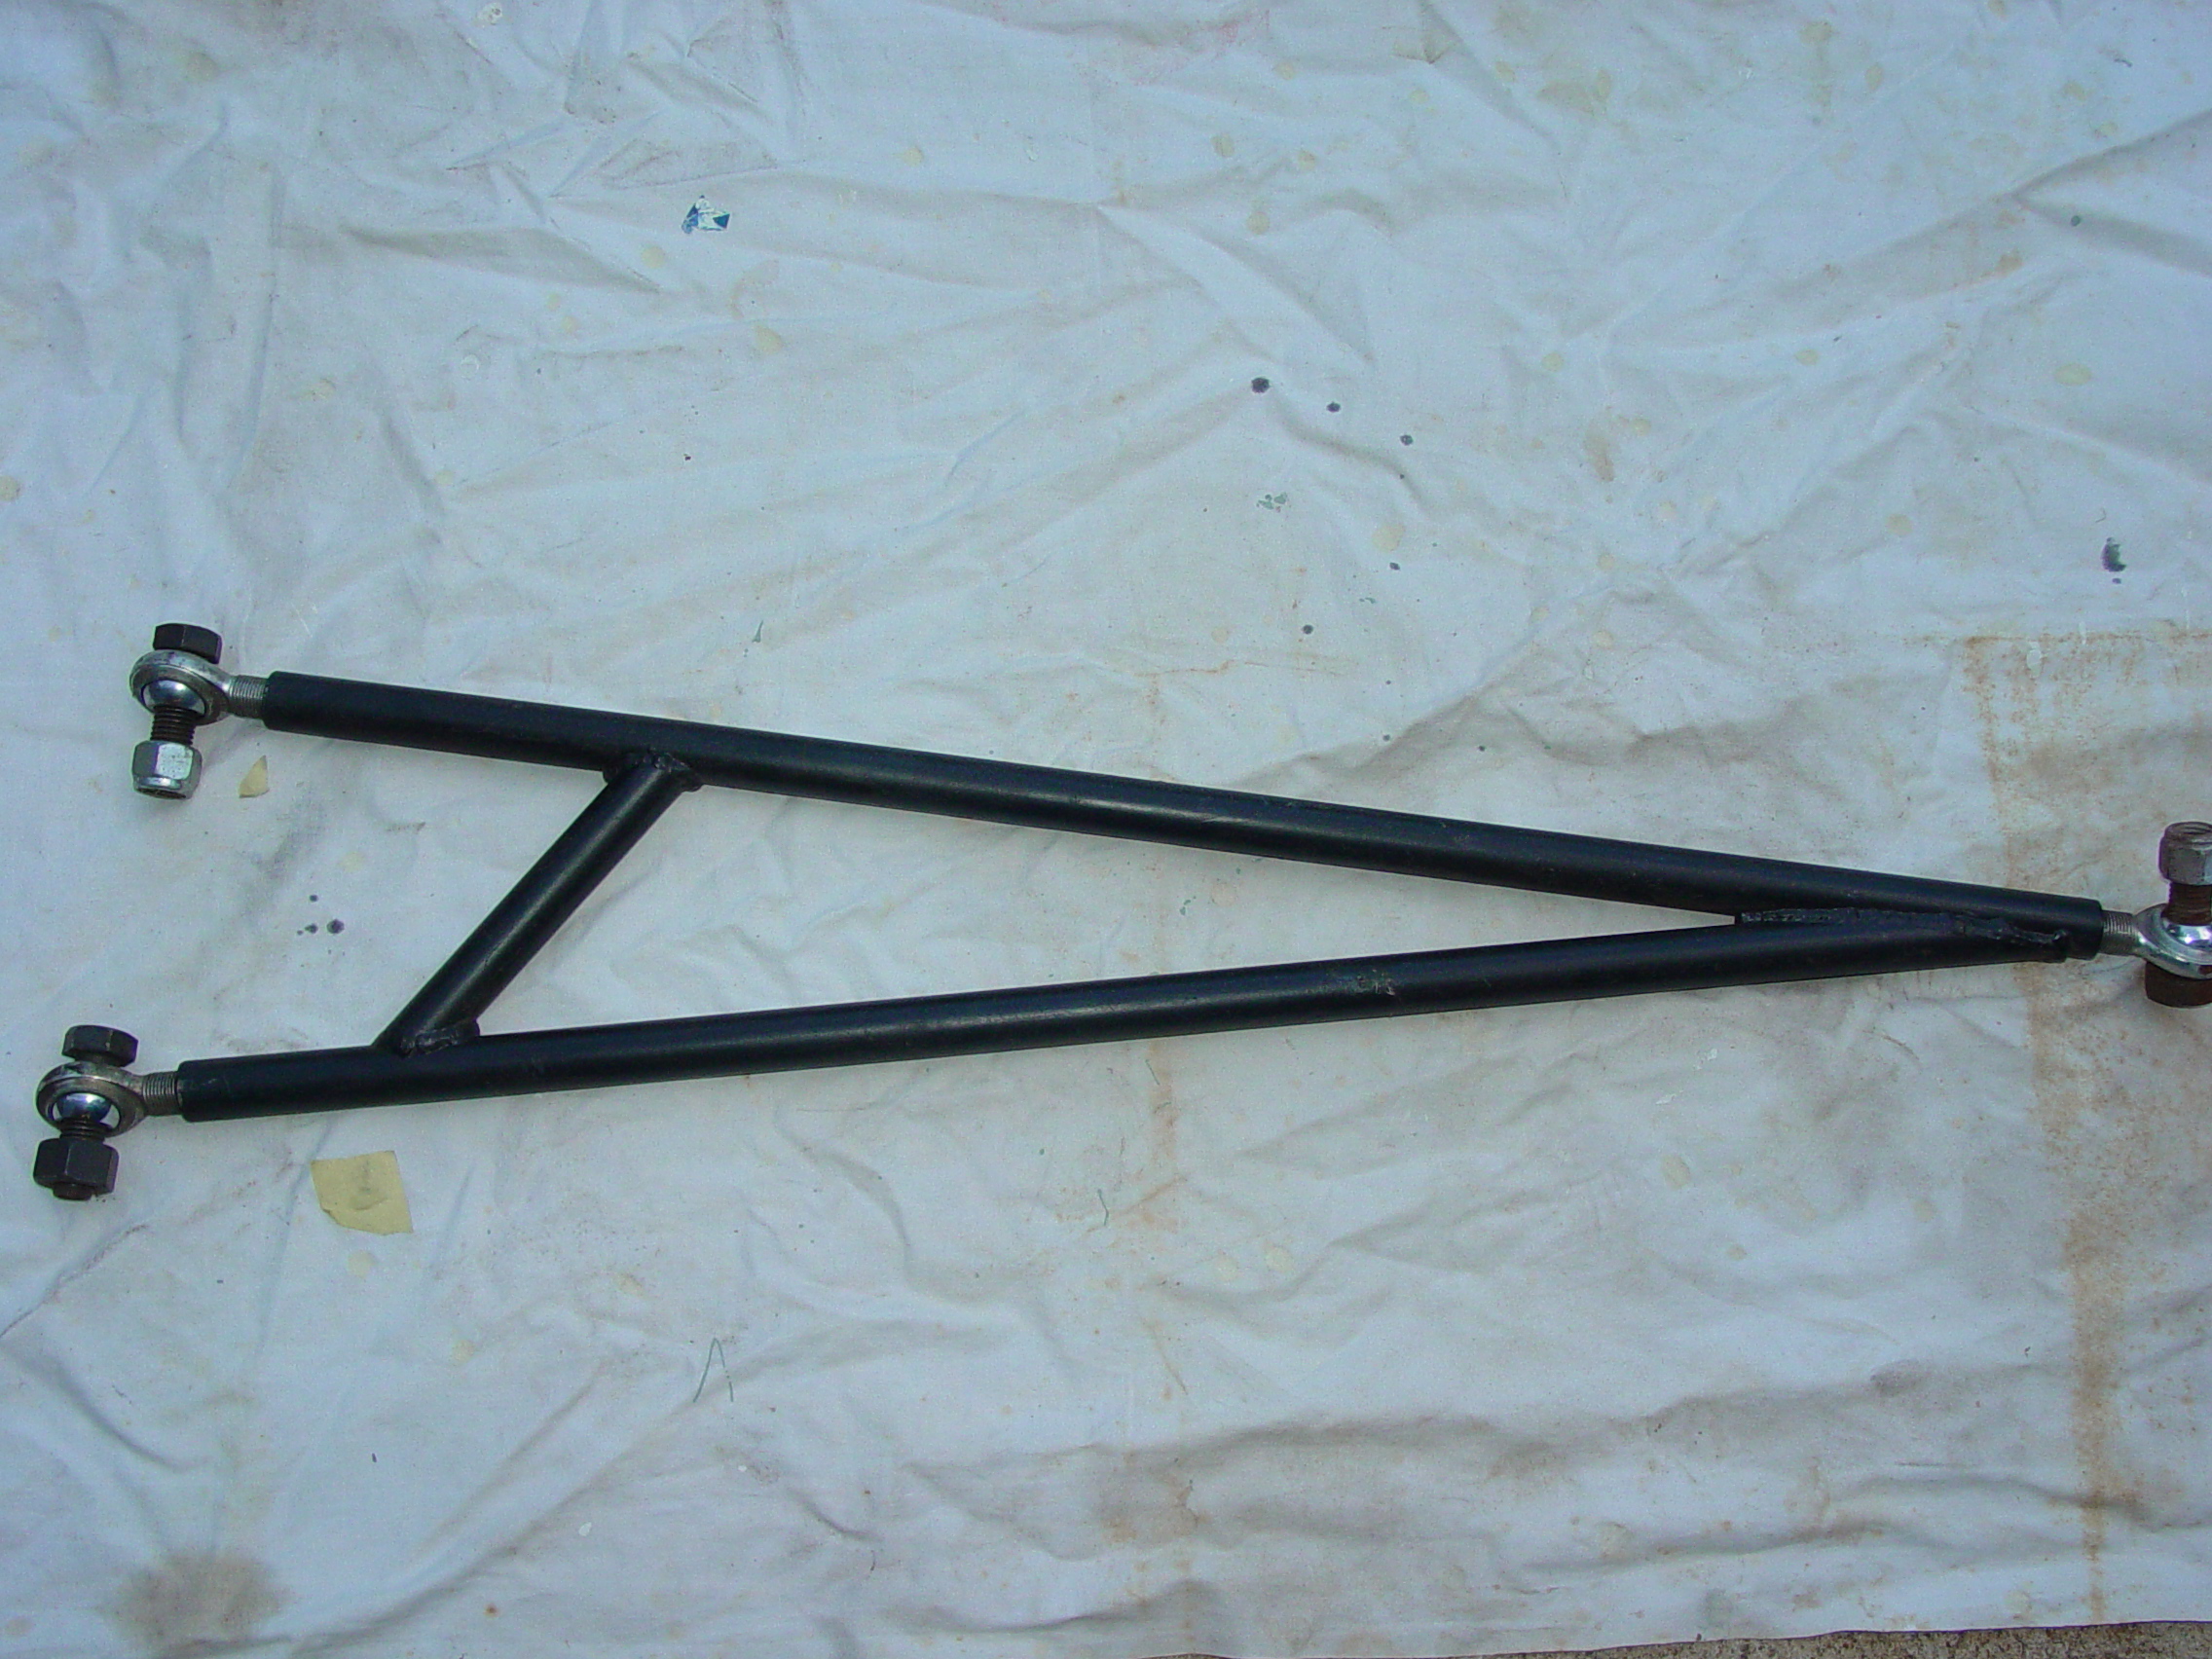
I also had
another project that worked better from above than below... When
Dave built the ladder bars, he installed/squared them and since he only had
the rolling frame, he knew adjustments needed to be made later.
lock nuts weren't installed then. So after the panhard bracket
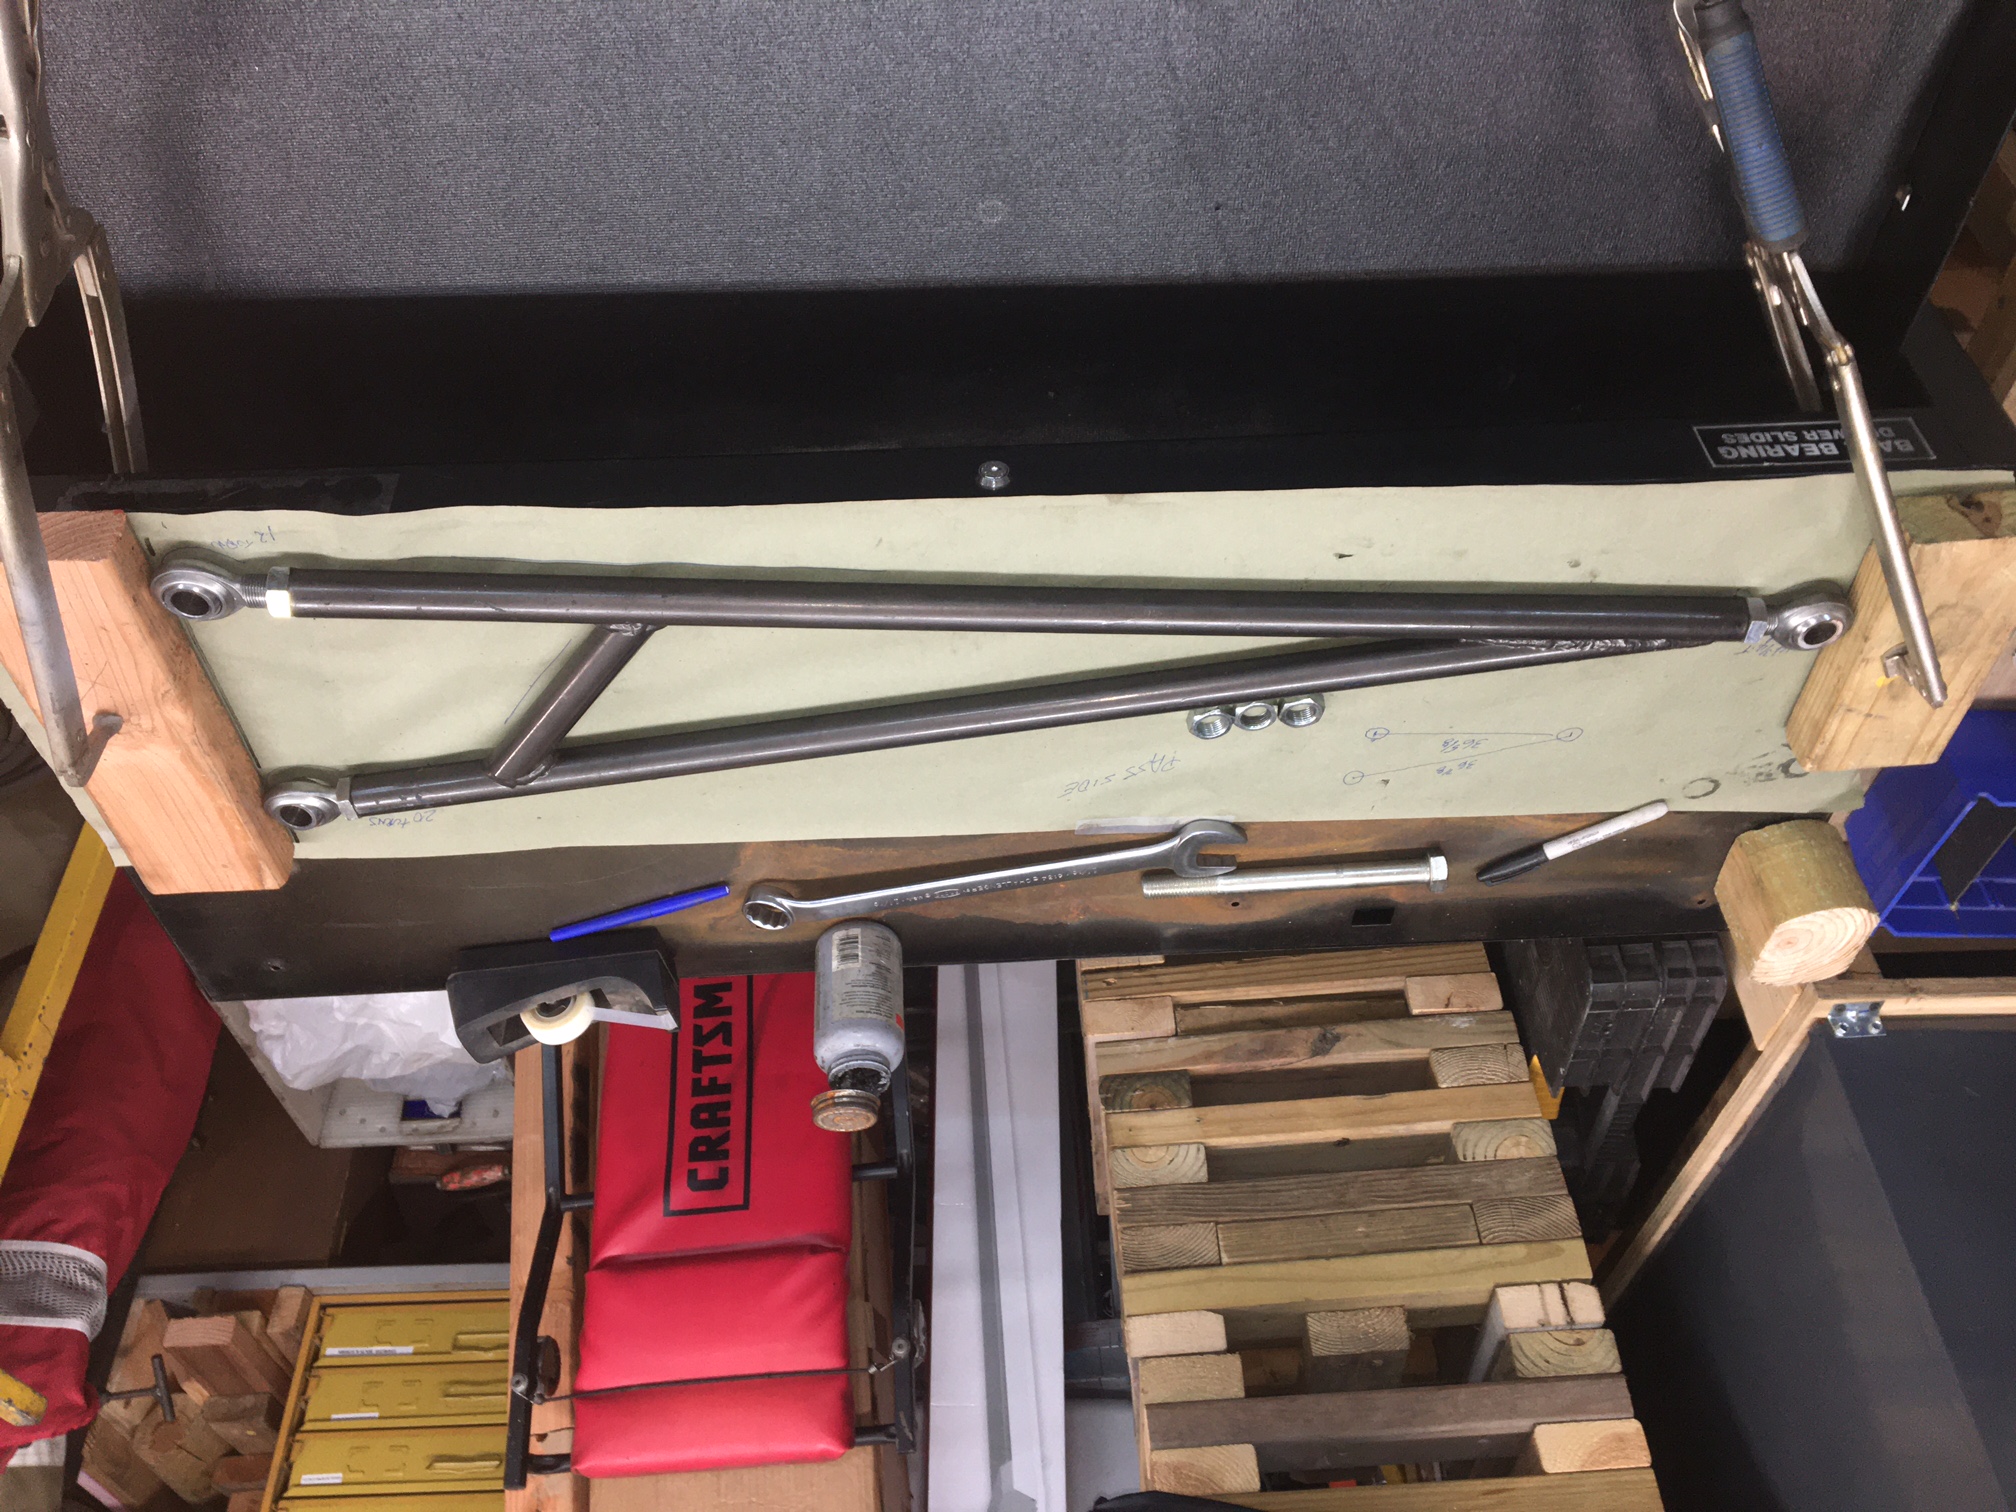
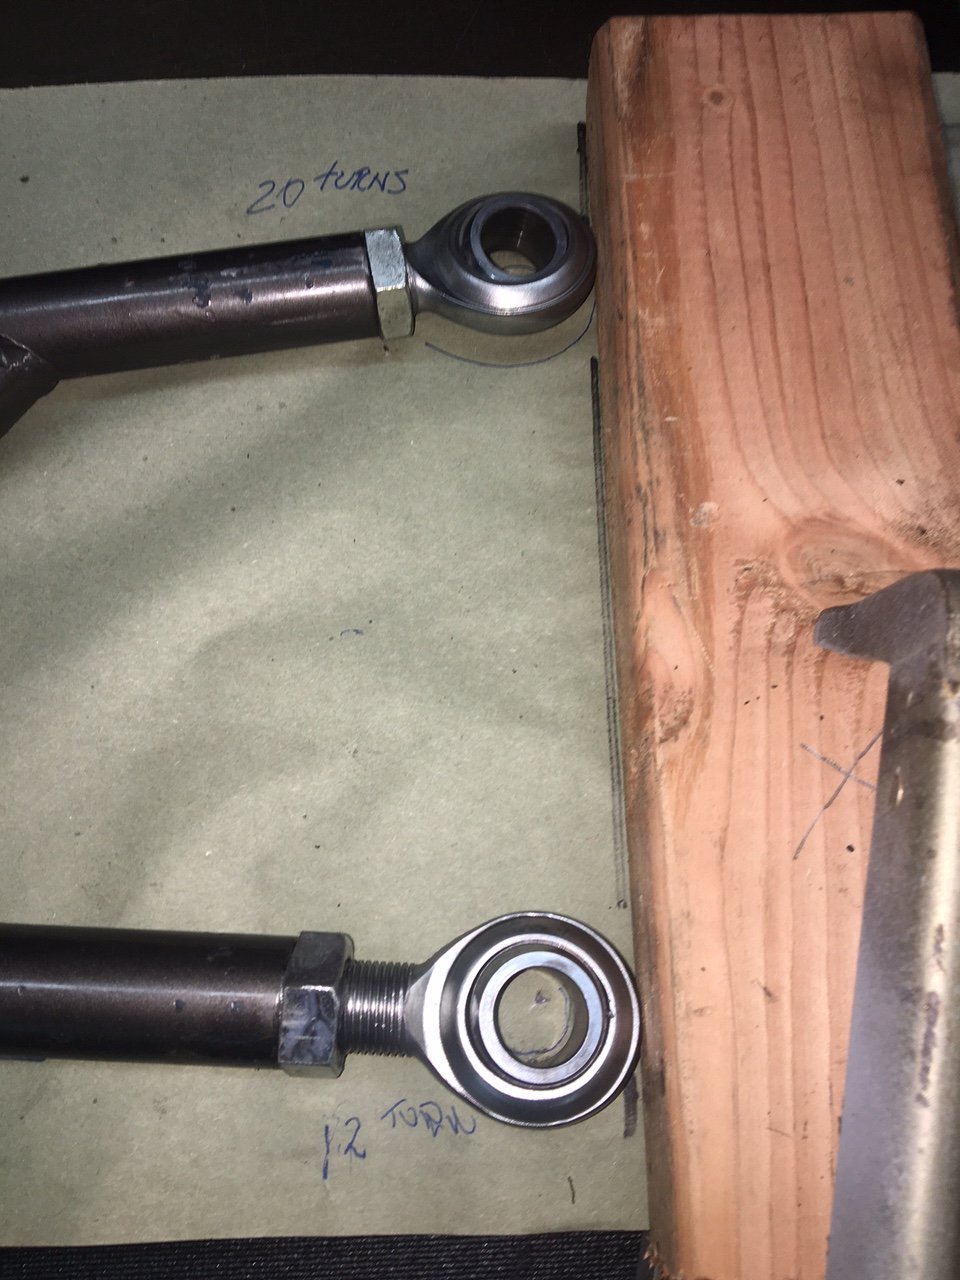
took a dump it was logical to address this at the same time I remove each one separately and 'jigged' them up to keep the same lengths...using highly scientific and precise engineering methods.. (blocked them in place with 2x4s to maintain length) then counted turns backing out the heim joints ...recorded the turns to make sure it was the same when it went back in. Very precise and scientifical . |
|
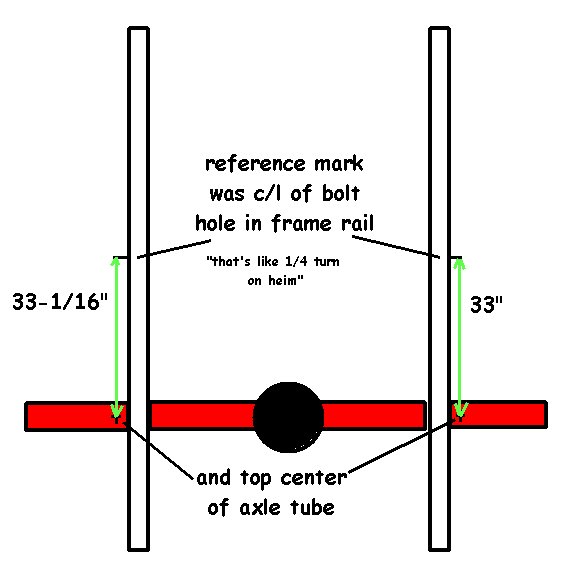
| I cleaned all the heims and sprayed them with a coat of clear, applied anti-sieze to them, screwed them back in place, checked the turn count and then snugged the lock nuts down. I reinstalled each one and tightened everything back to spec.. I had also made reference marks on the top of the axle tube and on the frame rail... the axle was within 1/16" of square with the frame |
|
|
| Then with everything back in place and secure...it was just do it all backward...lift the bed, remove the bed dolly, back the truck under the bed...let it down and position it and bolt it all back securely. I'm still in that part... and I'm tightening other stuff as I go. Originally the springs were 150# so I ordered 200#. I initially adjusted them so that I had 1/2 of the shock travel above the shock body and a road test will be needed to see if any further adjustment will be needed.. |
|
boilerplate denial of liability
statement… i.e. the fine print
This device is something I came up with to
prevent me from spending too many dollars on a commercial patented device, it
is not patented, engineered or even perfect… it is what it is, a home made
contraption. I’m sure there are alternatives to this design some even
better/cheaper/easier, I just didn’t think of them or warrant them necessary... there
are several similar units on the internet waiting behind Google for you to
see/copy/build…(just like I did) This work was done by me and for me or by
friends who were nice enough to help me out. I only ask that if you reproduce it give me
credit for it and if you make money from it… give me my percentage.
Since I have no way of knowing your level
of competence, welding or cutting skills, mechanical ability or estimated intelligence,
there are no guaranties or warranties either verbal, written or implied with this article.
Along with this article I am giving you absolutely free of charge…that’s right
! FREE !!...the liability, total and complete liability for the use or misuse of
this contraption will be yours and yours alone.
It belongs to you with that in mind… I
am in no way responsible for any damage, injury or embarrassment you may suffer from the
use of this homemade device. If it doesn’t look like something you’d
be comfortable using… don’t build/use it. If you’re not intelligent
enough to make that decision about your comfort level… ask a family member or
friend.. but here’s a hint… if you have to ask someone… don’t build it
!
Pictures were made at different stages of
construction and all assemblies in pictures may not be complete in each shot. I.e.. a
picture showing ‘some parts’ only means that it was not finished, but I’ve
tried to make the idea complete to the best of my ability. If you have questions or see
mistakes or problems, let me know by e-mail and I’ll make the corrections if
possible..
Use these ideas at your own risk. Modify
them at your discretion and to suit your purpose. Your mileage may vary, batteries not
included, much assembly required... wait one hour after building to enter the water,
additional charges may apply. not all applicants will qualify for advertised A.P.R., for
ages 10 to adult…side effects are comparable to placebos. Do not take drugs when
building or operating machinery. JUST SAY NO. Copyright . 2022 John Niolon, All International Rights Reserved. This document may not be copied or published without prior written consent of the author- jniolon@att.net
|