
BEDWOOD PROBLEMS AND SOLUTIONS
putting bed wood in a '53 f-100
Well here we are
While the body work on the cab is winding down I needed to turn the cab over and get the bottom buttoned up. We blew it all apart again... We removed the front tilt, the cab and the bed from the frame. There is also some touch up needed on the frame paint to fix my blunders and uh-ohhs. I built a cab dolly for the cab and a bed dolly to keep things mobile since I have a small working space. They are detailed in other articles on my page.
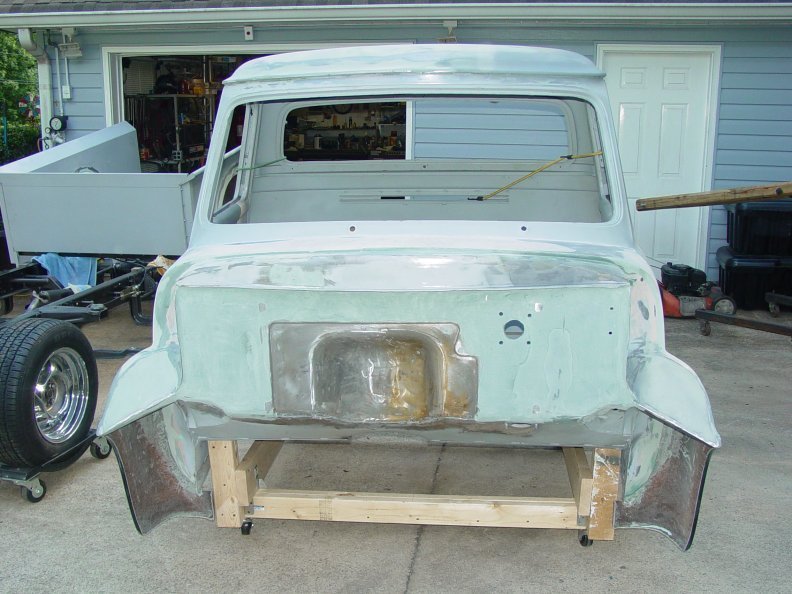 |
The cab was rolled over on it's back and work progresses on it's bottom. While that continues I started fitting up the bed wood. The bed sits on a dolly built to the same dimensions as the original frame.

After I set the bed on the dolly I got it plumbed and square to 1/8" and clamped it down.

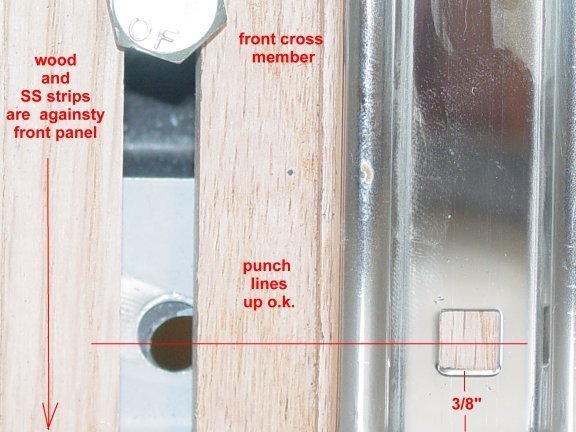
Next came the bed wood and the strips. All the wood was laid down on the cross members and spacing was figured out for the strips. I finally came up with 7/16" between all the boards except the middle two and it was 3/8". I used bolts to maintain the spacing

The strips were added and everything seemed to line up o.k. I marked the two edge boards for the tub cutouts and started checking the bolt hole locations for the strip bolts and the edge bolts that would have to be drilled. Every thing looked good till I got to the rear cross member. They didn't fit at all. The very last hole at the tailgate was actually right against the cross member and wouldn't allow the bolt to go through and certainly wouldn't allow a washer and nut to be attached. The first problem I found was that the strips are punched differently at each end. One end has the punch 1/2" from the edge and the other has it 3/8" from the edge. I used the 3/8" end at the front of the bed to move the strip as far forward as possible. The holes at the front lined up correctly with the front cross member and the bed panel.
And here's the problem at the tailgate end

I went back and double checked everything... plumb, square, etc. And posted a question on FTE (ford truck enthusiasts website, ford-trucks.com) in the 48-60 forum and got lots of suggestions and none helped. My next step was to contact Mid-50 F-100 where I bought the bed/wood/strips. Diane was great to deal with and discussed the problem with the staff there. With all the discussion and forum chatter we only found two possible work-arounds... lengthen the notches in the strips and shorten the 3/8" end by the same amount, which is a bunch of work and it would only get me about 3/32" if I still had the notch under the carriage bolt head.. I didn't like that plan. The next idea was to make cutouts in the rear cross member to give me room to add washers and nuts.
 |
 |
The discussion continued o FTE about how to notch the rear cross member with several suggestions. Initially I decided to use a hole saw and just cut a half circle out of the edge. Something like this

I tried that and didn't like the results... although no one will see it, I didn't like how it looked and it took a long time to cut one hole. Next I tried to square up the circular cut holes and again it didn't look clean and professional looking so I abandoned that idea... I finally decided to cut away the entire top front corner of the cross member but was concerned that that would compromise the strength of the cross member considering the whole bottom was already open.

Plan "B" came along. I decided to fab up a new cross member from stiffer material. I had a couple of pieces of 2x4x1/8" rectangular tubing and pieced two sections to get one length 53" long. .(I missed getting a pic of the new piece without the cut).
I did all the necessary measurements, added the mounting angles to the face of the c.m. then set up for the cutaway. I marked the cut and using my plasma cutter and a nice angle iron straightedge, sliced off the corner rather neatly..
 |
 |
Tried for fit in the stake pockets and it was good
 |
 |
After conferring again with my gurus on FTE there was a concern about road spray and trapped water and rust showing up on the truck... I decided to drill drain holes and paint the inside with Sherwin-Williams Macropoxy coating. This is an industrial epoxy coating that is extremely wear resistant and tough as nails. All holes were drilled and two coats later and we have this...

It's ready to be put back in with ample room for fingers to install washers and nuts to snug everything together nicely. Thanks for FTE and Mid-50 for the help they offered.. now... to finish the body work on the cab bottom and finishing bedwood.. Paint is just over the rise.