MOUNTING
A WINCH ON THE TONGUE OF A CAR HAULER
IN A TOOLBOX
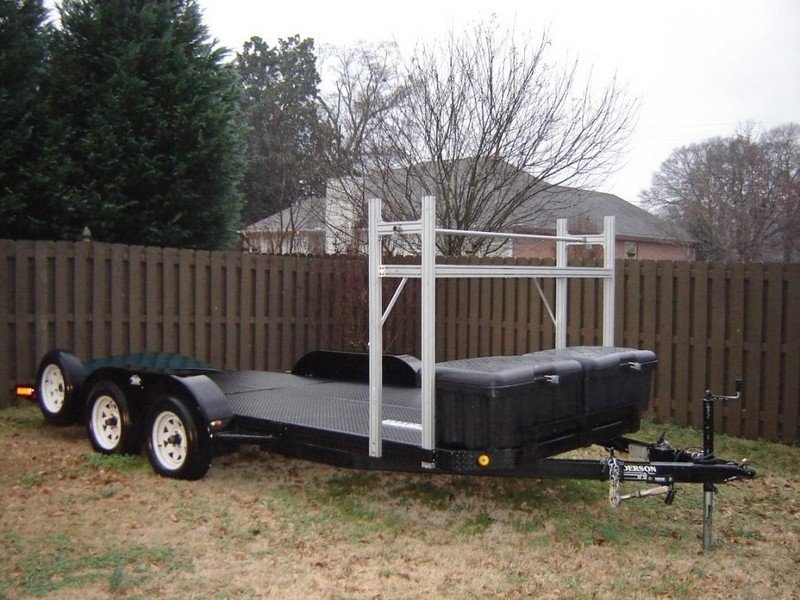
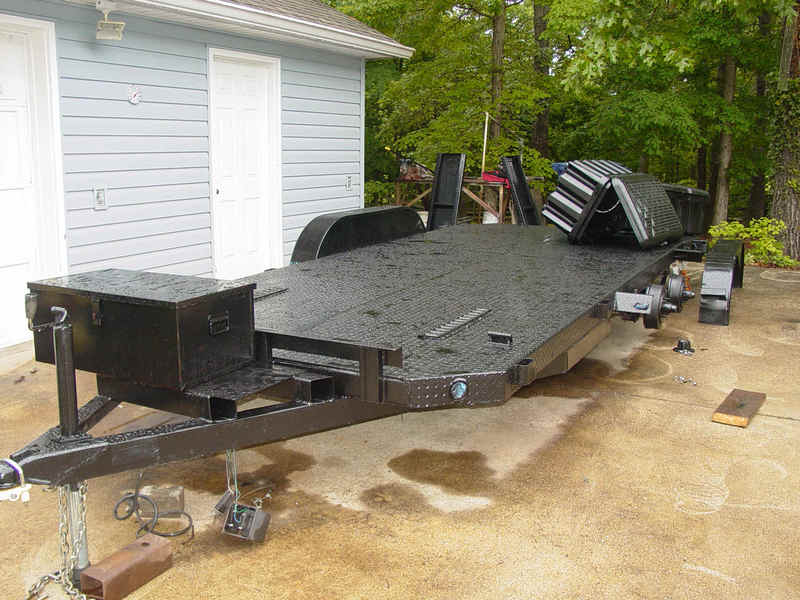
Last year I bought a car hauler to tow my hopefully one day to be finished '53 F-100 on long hauls to car shows and cruises. It's an Anderson 18' with a 2' dovetail and rear sliding ramps and 4 wheel brakes.. It was used to haul a Miata to SCCA races.
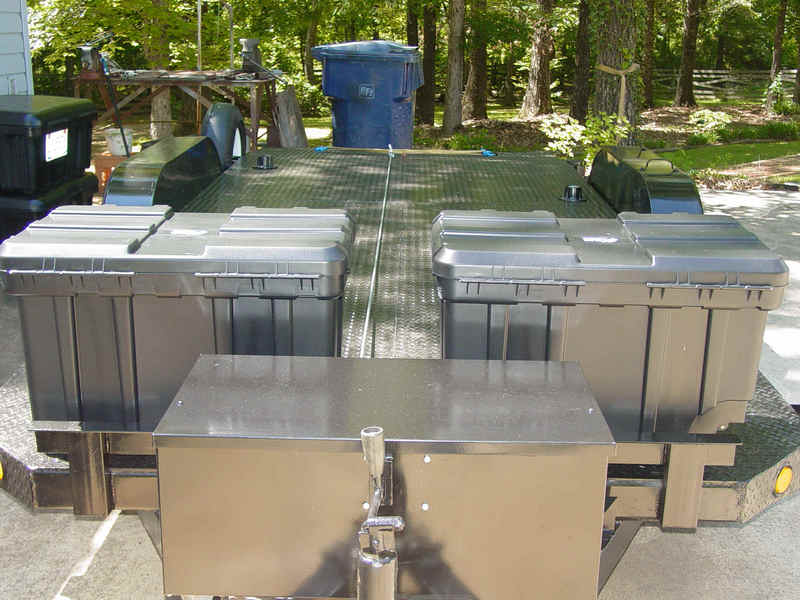
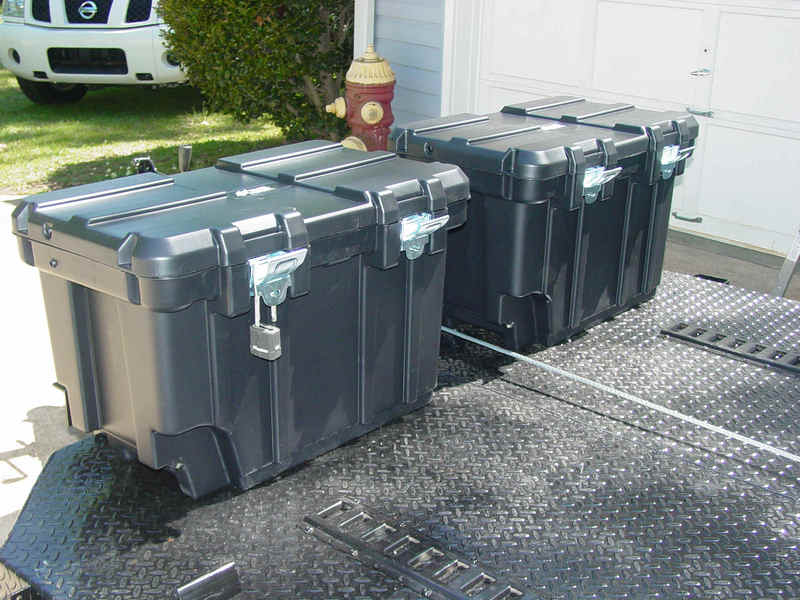
Haven't done much with it yet... removed the tire rack, kept the tool boxes, new tires all around, some chrome wheels ... good wheel and tongue locks and a good set of wheel baskets to strap the truck down one day. I knew I wanted a winch on it... not so much for the '53... it will be a driver, but for anything else I need to drag up on the hauler. I've already had folks ask to borrow it or it and me to haul projects home, so the day is coming.
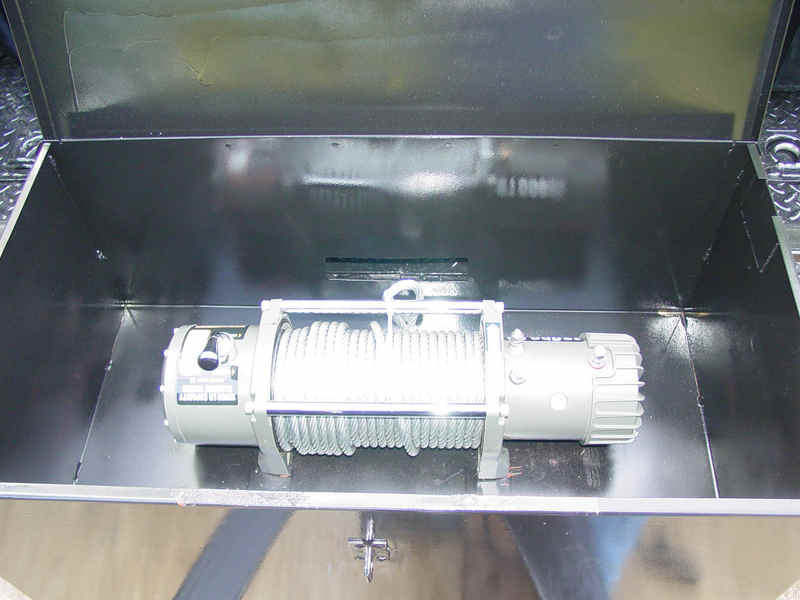
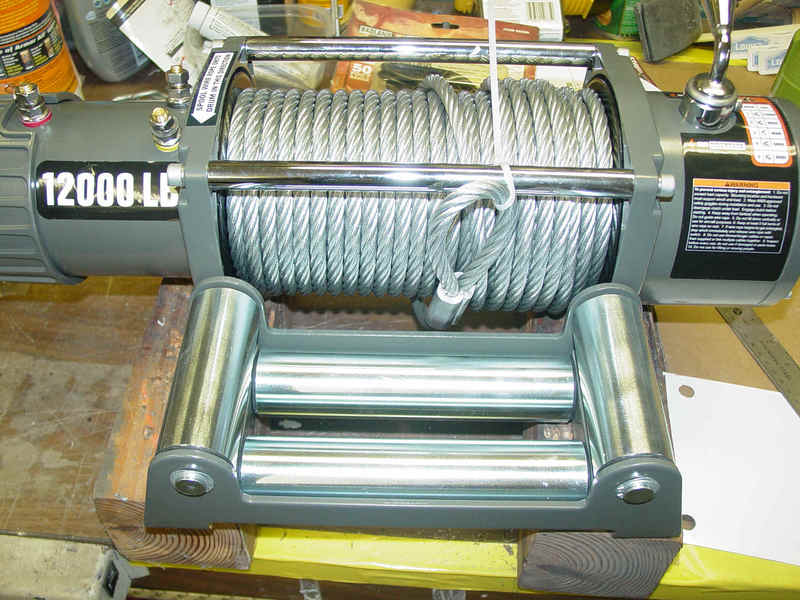
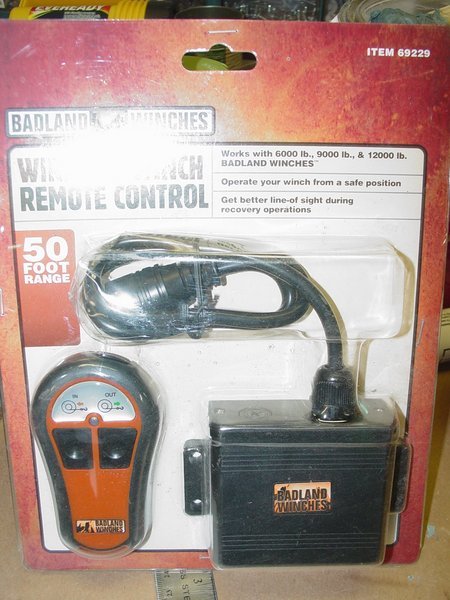
I've been watching for a good deal on a winch but hadn't found anything I could or would afford. I figured a 5k or 6k winch would be sufficient since my truck only weighed between 3k and 4k. Well, Harbor Freight had a tent/parking lot sale one weekend and they had a 12k for nearly the same price as a 6k... so it followed me home along with a wireless remote I'm gonna try. This thing is big... almost 90 pounds and nearly 2 feet wide. I found lifting it in and out of the box to be no fun after about 2 times (rotator cuff surgery three months ago didn't help)
 |
 |
I read all the good and bad stuff on the net about HF winches, but I have a 3k on another trailer that has performed well and this isn't going to be used daily and I figured it would do all I asked of it. Besides with the extended warranty, they replace it if the bolts come loose and I drag it on the hiway.
I also knew I wanted it secure and out of the weather. I looked at removable hitch type mounts but with this things weight and a gimpy shoulder, I don't relish lugging it around and 'hitchin' it up every time I need it. I'm an old guy. So I started researching "Winches in a Box" ... tool box that is. Lots of pics on the net of installations without much detail on the how-to. So I figured I'd write it down as I did it. There are lots of ways to mount a winch to a trailer and I'm sure as you read this, you'll find a 'different' way. Go for it.
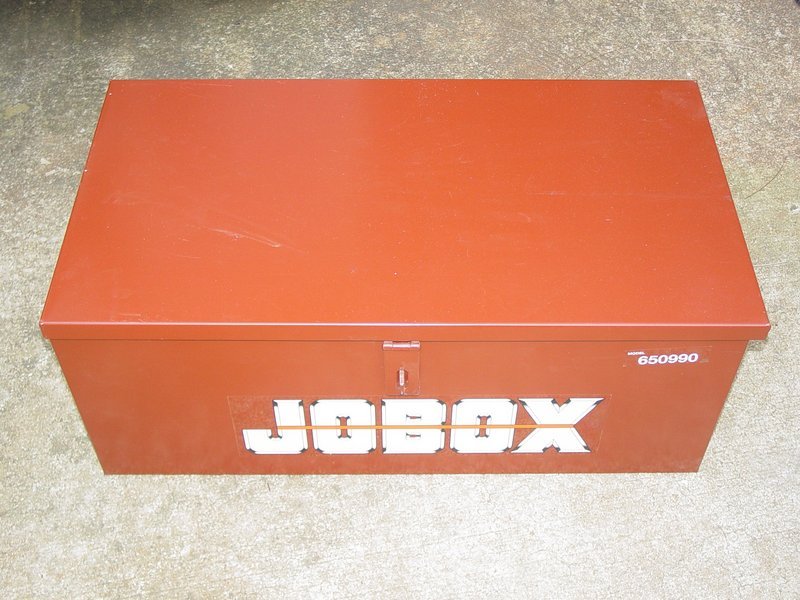
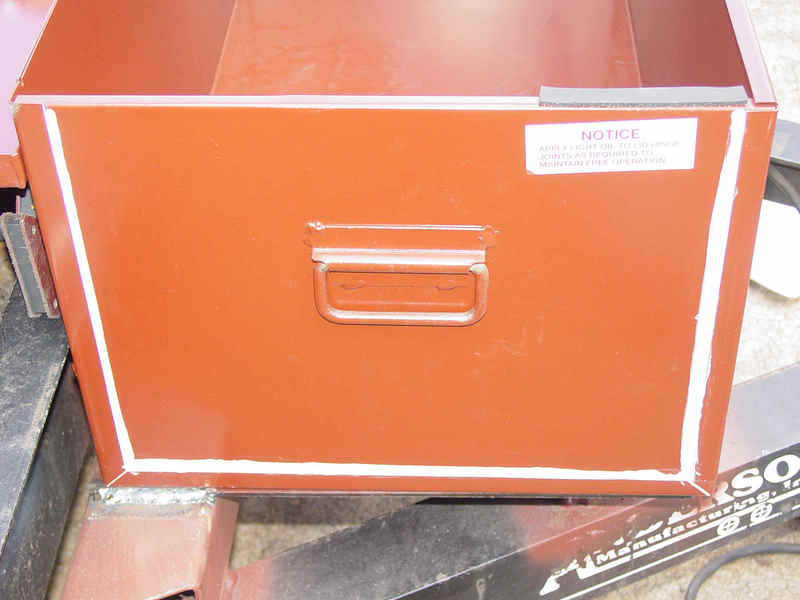
I searched the net for 'tongue toolboxes' and there are lots... from around a hundred bucks to the price of a car. I'm frugal.. I want to save my money for stuff for my truck and my grandson so I started thinking outside the box, so to speak. Searched around the shop/shed/outbuildings and found something I'd forgotten I had. A small welders job box up on a top shelf in the shed. This should have room for winch and battery and some straps and wheel baskets and it secure, lockable and weatherproof... zero expenditure. It's not all fancy with smooth edges all rolled pretty. No polished diamond plate aluminum. It's just a rectangular brown utility jobox.
|
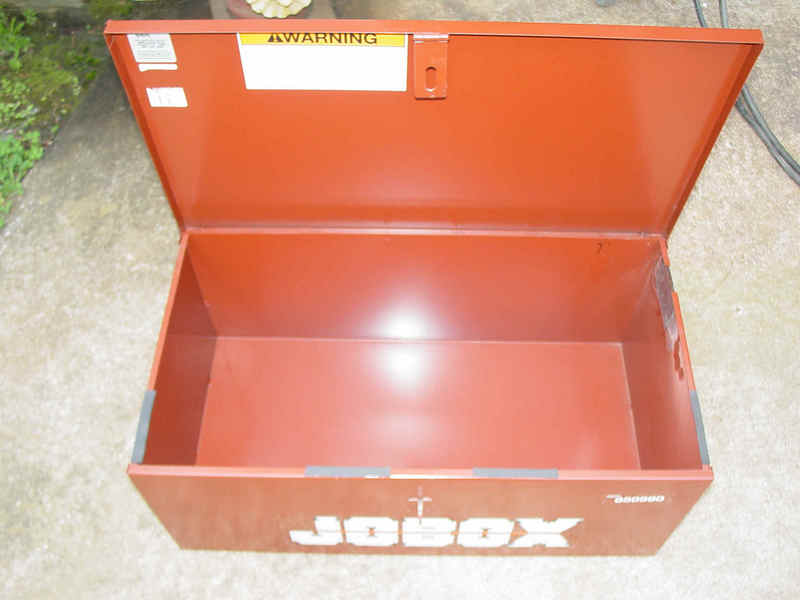 |
It's 30" wide x 16" deep by 12" high... 3.3 cu ft. It's only 16 gauge metal, but should do just fine... It's not like it's gonna be on a job site. It did have one cutout in the right back corner for torch hoses (so you can lock up your oxy/act torch and not disconnect it) I covered that with a sheet metal patch to keep out the weather. The joints and seams are press bent and spot welded and not water proof, but a bead of silicon on all the seams cured that. I'll use weatherstripping around the lip so the lid will seal and keep out the weather.
The plan is to weld in a suitable support in the tongue of the trailer... drill it for the winch mounting bolt dimensions then mount winch and box to the framework in the trailer tongue.
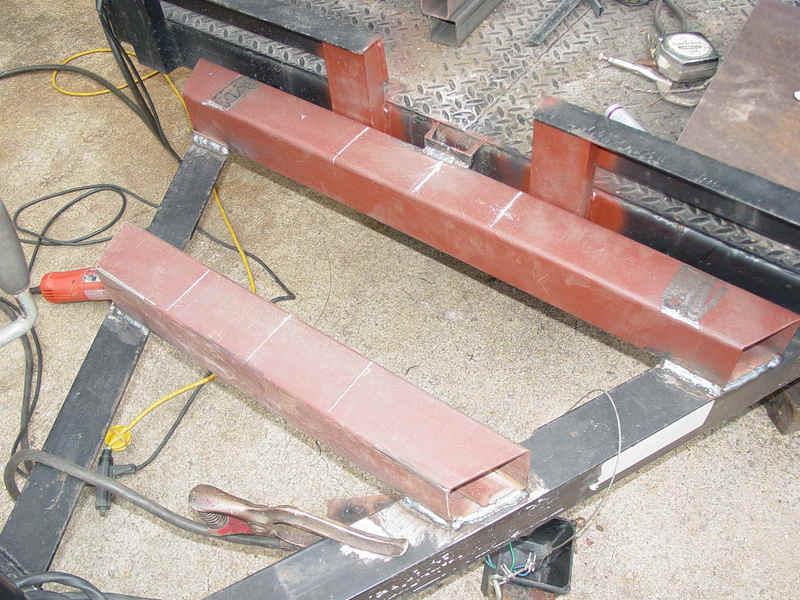
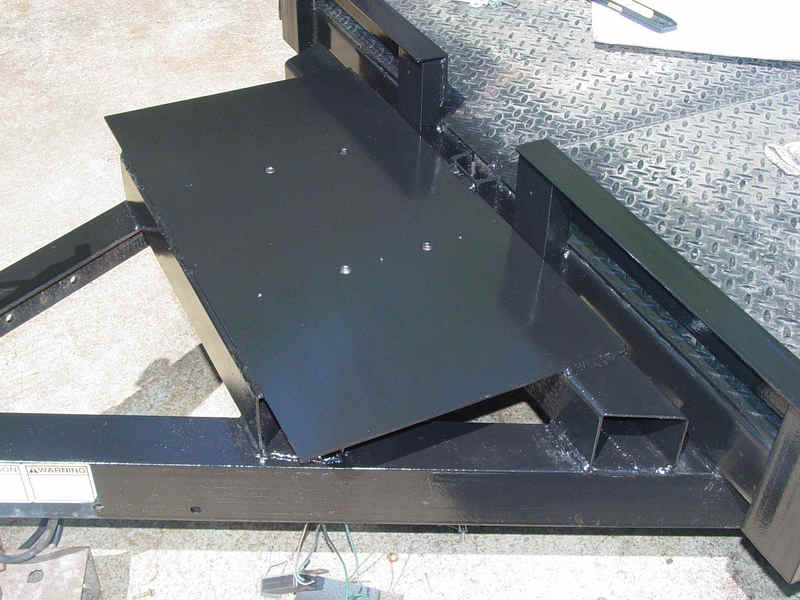
The tongue is about 4" lower than the deck of the trailer since it's built with 4" channel. I started by cutting up some 3.5" tubing I had to raise the winch deck up to deck height so I'm not pulling the cable over the edge of the deck. I first cut two pieces of tubing to match the width of the tongue and the depth of the box and welded it to the tongue angle iron. Pictures below.
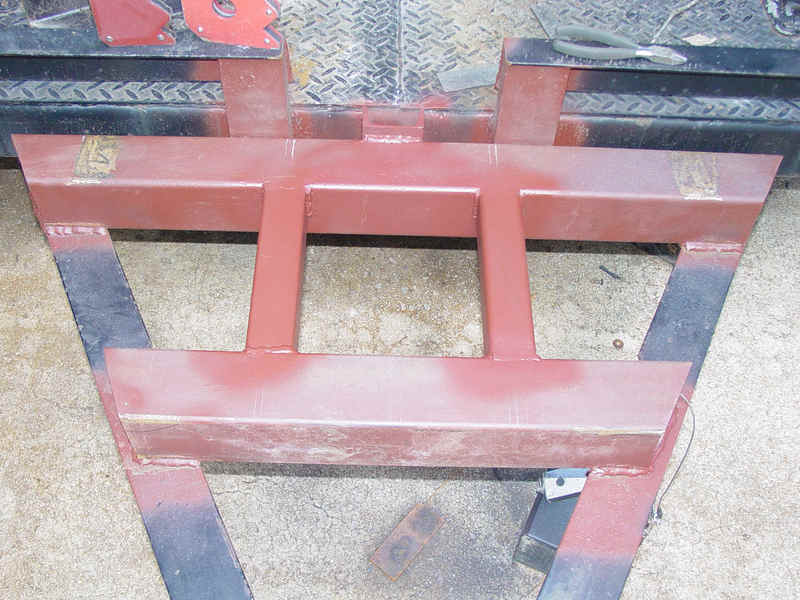
Next I added cross members fabbed from 2x2 thick wall tubing that are welded between the two larger tubes and that is where the winch actually bolts down. Before mounting the box and winch I'm adding a sheet of 3/16" thick plate and tie it all together so the winch will be pulling against a substantial base.
The cross bar ( or I guess it's a stop rail) across the front of the trailer was a continuous section of 2x2 angle with a center brace. It was exactly in the way.. I cut out a section of the angle and added two new braces leaving a section clear about 10" wide. (a FAIL here... see mounting boxes later) The bar will still be fully functional and besides the two resin toolboxes will probably be put back in place in front of it (for jacks and blocks and straps and stuff...if there is room).
The next pictures show the cross members added and finally the steel deck to which the box/winch will be mounted.
 |
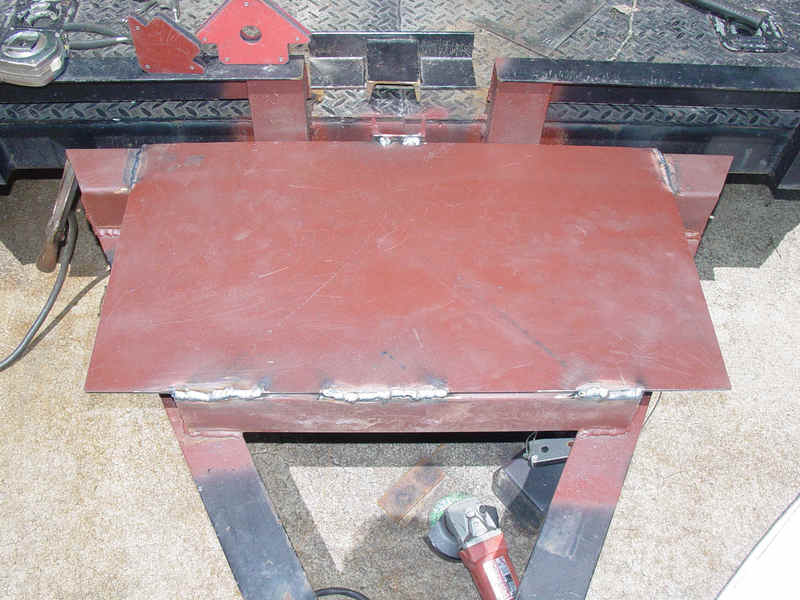 |
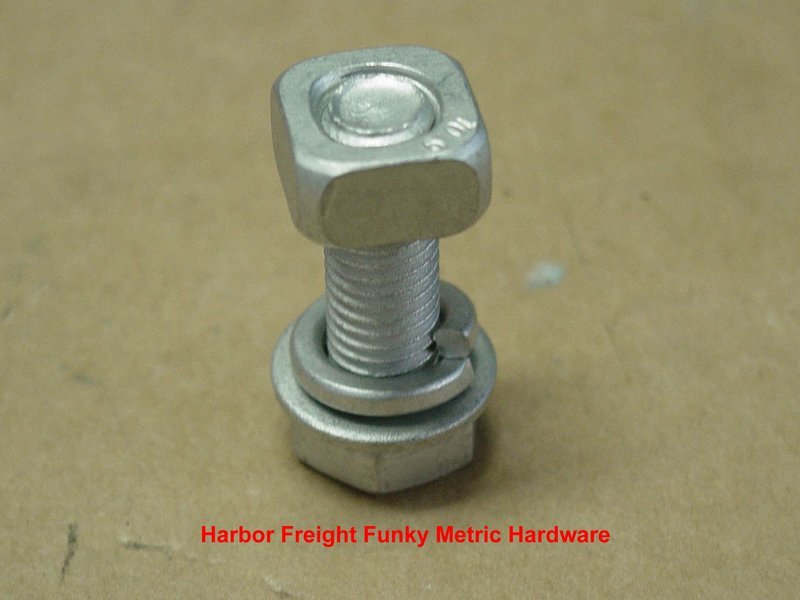
So after another day... cross braces in, plate cut, primed and painted on the bottom. Box fitted to the plate and the winch was put inside for measurements and bolt layout. Holes drilled and I'm looking for some suitable hardware. I don't care for HF's hardware. I'm using 7/16" bolts but the nuts have to fit in an insert in the winch framework (crazy design) which will not accomodate a standard hex nut... dang Chinese...so I'm still working on that. I think I can use nylock nuts and just grind down the top bonnet a little and they will fit... see the pics below.
|
 |
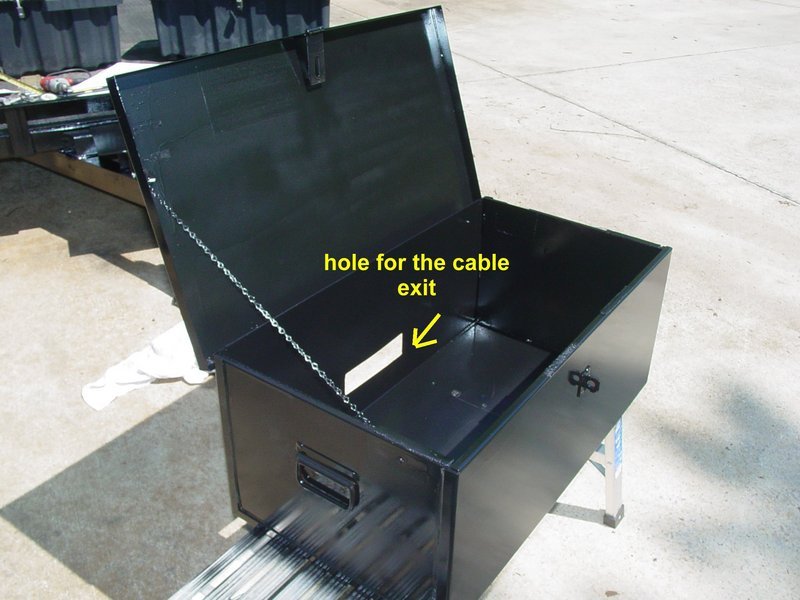
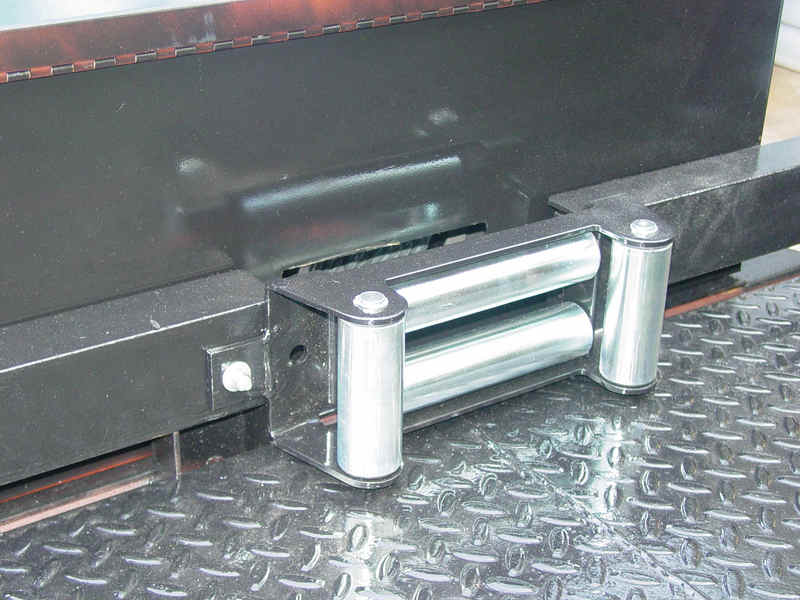
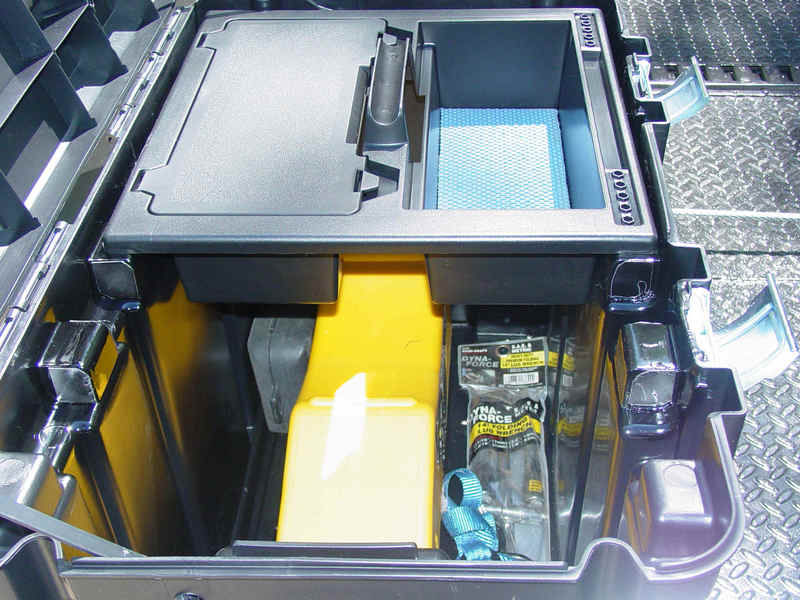
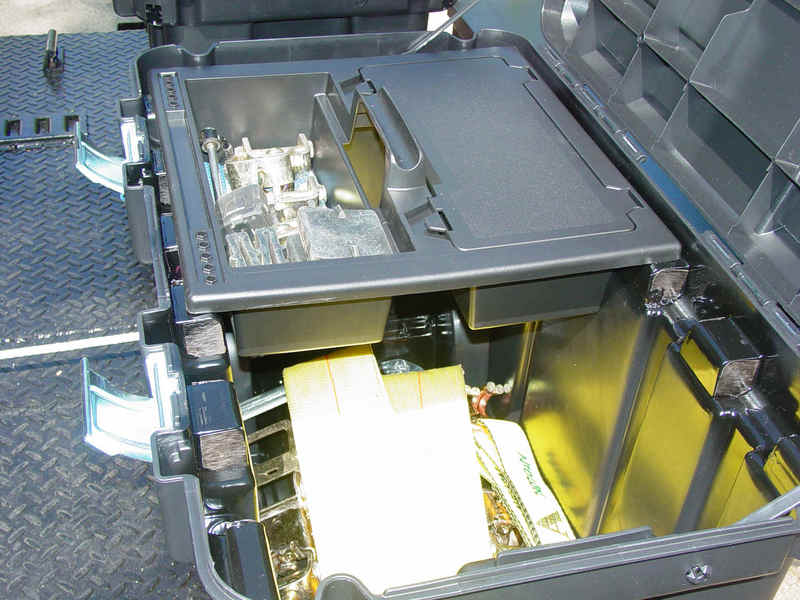
I made a cardboard pattern for a size 34 battery (since that is what I use on my other winch) and lay it in the box with the winch and there is plenty of room... still have to figure out the placement for the control box and wiring... it might mount on the side wall of the box. I cut the hole in the box for the cable exit point. I screwed up and didn't measure the fairlead width and when I went to mount it to the stop bar... there was no place to put the holes... so I added a tab on each side and bolted it to the stop bar.
I took everything back apart and painted everything that I could reach with the spray can. It looked a lot better than the rest of the trailer... soooo I bought a gallon of paint tonite. I'm going to roll the deck and spray the fenders and side rails. It needs pressure washing to remove some mildew and crap. That's tomorrows project (along with the siding and ceiling on the porch.
 |
 |
 |
I've added a rubber flap or cover for weather protection where the cable exits the box... some rubber drawer liner material cut to size that just acts like a little shed over the cable hole.
So...as I said.. the pretty new paint on the winch mount looked nice ( I like shiny) and the old worn paint on the trailer was dulll, faded and abused... One gallon of Rustoleum Ind. Enamel gloss black and it's all pretty all over now. I was going to spend the time and money to get it sprayed... but a 4" and 9" roller cover did a nice job. I did spray the smooth places... fenders and frame but all the diamond plate got rolled and a hot day in the sun painting made it lay down smooth with no roller tracks... Took all of 30 minutes.
The next part was the wiring. The control box (relays) come pre-assembled with leads clearly marked for connection. The connectors are color coded so it's hard to screw it up. Notes... the plastic strain reliefs/grommets are only finger tight... I pulled them down properly and don't forget to hook the small black wire coming from the controller to ground.. it's easy to miss and it won't work without it... ask me how I know. The Battery sits in a corner of the box and the controller is mounted to the front box wall. The remote connection is right on top. I plan to install the wireless remote when all the other stuff is done. I over estimated how much stuff I could get in this box.. the winch/battery/controller/wiring pretty much fill it up. My original storage boxes were huge..(see first picture at top) long and wide and deep. I bought two cargo boxes from Lowes that will take the place of the big ole honkin boxes I originally had. They have trays in the top for little stuff that always finds it's way under everything else. They were originally rolling boxes with wheels and a handle... if you need some cheap plastic wheels I can hook you up. Mounting the fairlead took up part of the room for the big boxes anyway and they hung off the edge of the trailer. Didn't like how it looked and I didn't have near enough stuff to fill up those two big boxes.
 |
 |
 |
 |
|
|
So, that's about it... and it suits me so far... might be changes as I use it but I thnk I've covered everything I wanted to do.
Boilerplate denial of
liability statement… i.e. the fine print
This project is
something I came up with to prevent me from spending too many dollars on a high dollar
commercial solution, it is not patented, engineered or even perfect… it is
what it is, a home made project. I’m sure there are alternatives to this
design, some even better/cheaper/easier, I just didn’t think of them or warrant them
necessary... there are several similar ideas on the internet waiting behind Google for you
to see/copy/build…(just like I did) This work was done by me and for me or by
friends who were nice enough to help me out. I only ask that if you reproduce it give me
credit for it and if you make money from it… give me my percentage.
Since I have no way of
knowing your level of competence, welding or cutting skills, mechanical ability or
estimated intelligence, there are no guaranties or warranties either verbal, written or
implied with this article. Along with this article I am giving you absolutely free of
charge…that’s right ! FREE
!!...the liability, total and complete liability for the use or misuse of this idea
will be yours and yours alone.
It belongs to you with
that in mind… I am in no way responsible for any damage, injury or embarrassment you
may suffer from the use or misuse of this homemade thing. If it doesn’t
look like something you’d be comfortable using… don’t build/use it. If you’re not intelligent enough to
make that decision about your comfort level… ask a family member or friend.. but
here’s a hint… if you have to ask someone… don’t build it !
Pictures were made at
different stages of construction and all assemblies in pictures may not be complete in
each shot. I.e.. a picture showing ‘some parts’ only means that it was not
finished, but I’ve tried to make the idea complete to the best of my ability. If you
have questions or see mistakes or problems, let me know by e-mail and I’ll make the
corrections if possible..
Use these ideas at
your own risk. Modify them at your discretion and to suit your purpose. Your mileage may
vary, batteries not included, much assembly required... wait one hour after building to
enter the water, additional charges may apply. not all applicants will qualify for
advertised A.P.R., for ages 10 to adult…side effects are comparable to placebos. Do
not take drugs when building or operating machinery. JUST SAY NO.
Copyright . 2013 John Niolon, All International Rights Reserved. This document may not be copied or published without prior written consent of the author- jniolon@att.net