| INSTALLING A MID-60’S MUSTANG FUEL TANK IN A '53 F-100 by John Niolon |
|
| INSTALLING A MID-60’S MUSTANG FUEL TANK IN A '53 F-100 by John Niolon |
|
updated again May 28,2004 ( venting)
thanks to Quinn Bergmann for
the detail and the pictures
updated July 2004 (22 gallon revision)
the detail below is for the install of a 16 gallon tank (my first install). Most of it will apply to the installation of the larger 20 and 22 gallon tanks... I've since removed the 16 gallon and replaced it with a 22 gallon unit.. The details and pics of that install are at the bottom of the article in RED text.
updated April 2002
updates are in blue text
Some more information has come in and I thought I'd update this article. I had previously stated that I had the larger of the two tanks made for the mid-60's Mustangs. That is what I was told by the seller. What prompted this update was an e-mail from another truck lover that told me based on dimensions that I had the smaller... so I did some more research... details below...revisions in blue font. Many of us don’t like the idea of 20 gallons of gasoline in the cab with us, or sitting directly under the drivers seat with nothing but a running board to protect it from collision. So, what do you do ??? Move it. There aren’t many options on where to put it and a few more than that on what to use for the tank. One of the easiest and safest options is between the frame rails behind the rear axle. It’s fairly well protected from impact, out of the cab area and it offers adequate room for a 20-25 gallon tank ( a welcome addition when you’re running a big block). There are a number of tanks available in the after market that will fit the bill in steel, stainless steel and plastic tanks in several different configurations and price ranges. Check out your favorite magazine for the adds. There is also a popular swap using an Mid 80’s Isuzu trooper tank that works well although it requires C-notching the left frame rail to route the filler neck out and under the left rear fender. There are two major drawbacks to using a rear frame installation … #1 is you lose your spare tire space. For those with fender mount spares…never mind. For the rest of us, it means laying the spare in the bed, using a vertical bed mount , or taking a chance and going without the spare (not a good choice). Mine will lay nicely (on a cushioned rubber mat) in the back of the bed, thank you.. #2 is the filler neck location. Some require cutting a hole through the bed wood and mounting the filler hose/cap in the bed, some route around to the fender well, and I’ve even seen one that came out the rear sill with a cute little flip down door. It’s something that must be addressed…as is the hole in the cab where you took the old one out. Personal choice will be the deciding factor here and patch panels are available. |
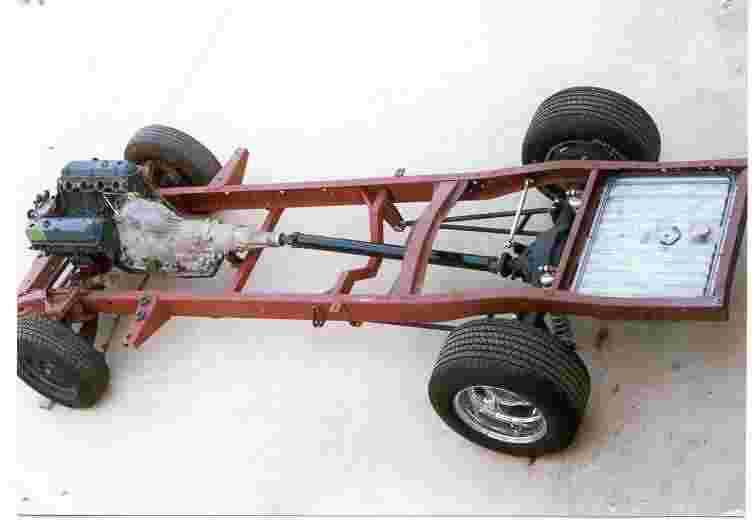
| I chose a Mid 60’s Mustang tank. They come in both 16 and 20 gallon versions. I used the larger. (correction... I have the smaller...right now. One of my truck buddies pointed this out after looking at the dimensions. I think this will be corrected in the future...but anyway...) The installation is really easy and the tank fits between the frame rails like it was made for them. | 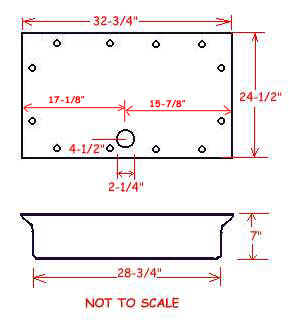 |
| First you should remove the rear cross member. The best I can remember, this piece is riveted into the frame, so either grind off the rivet heads or wash them off with a torch and drive out the rest. Sometimes you have to ‘persuade’ the cross member with a hammer to get it out. ( One item I did forget to mention in the first edition of this article. It will be necessary to cut out a portion of the lower frame rail lip to make the tank fit. I used a plasma cutter and cut out 1/2" from the inside edge of each rail. It won't weaken the rail in the least and is necessary to have adequate room for the tank. At least, that was true on the 16 gallon unit. According to the dimensions given on gastanks.com's web site.. the 20 and 22 gallon tanks are actually narrower (30-1/4" vrs 32-5/8") than the 16 gallon tank so the notching may not be necessary if you use the larger tanks. They make up the difference in the height of the tanks. ) | |
I fabricated a frame for the tank from 1" square tubing that matched the dimensions of the tank lip, which is 32-3/4" wide and 24-1/2" deep. I laid the tank in the frame and marked the mounting holes. I used ?" hardware - three each across the wide side and two each on the short sides. The two on the short sides were marked on the frame rails and drilled through. These four bolts hold the frame and tank to the frame rails. When the tank was secure in the frame, I installed the cross member at the end of the frame rails and bolted it in. I am not using a rear bumper, just a roll pan. Your cross member mount might be different depending on your bumper brackets, but put it back in. |
|
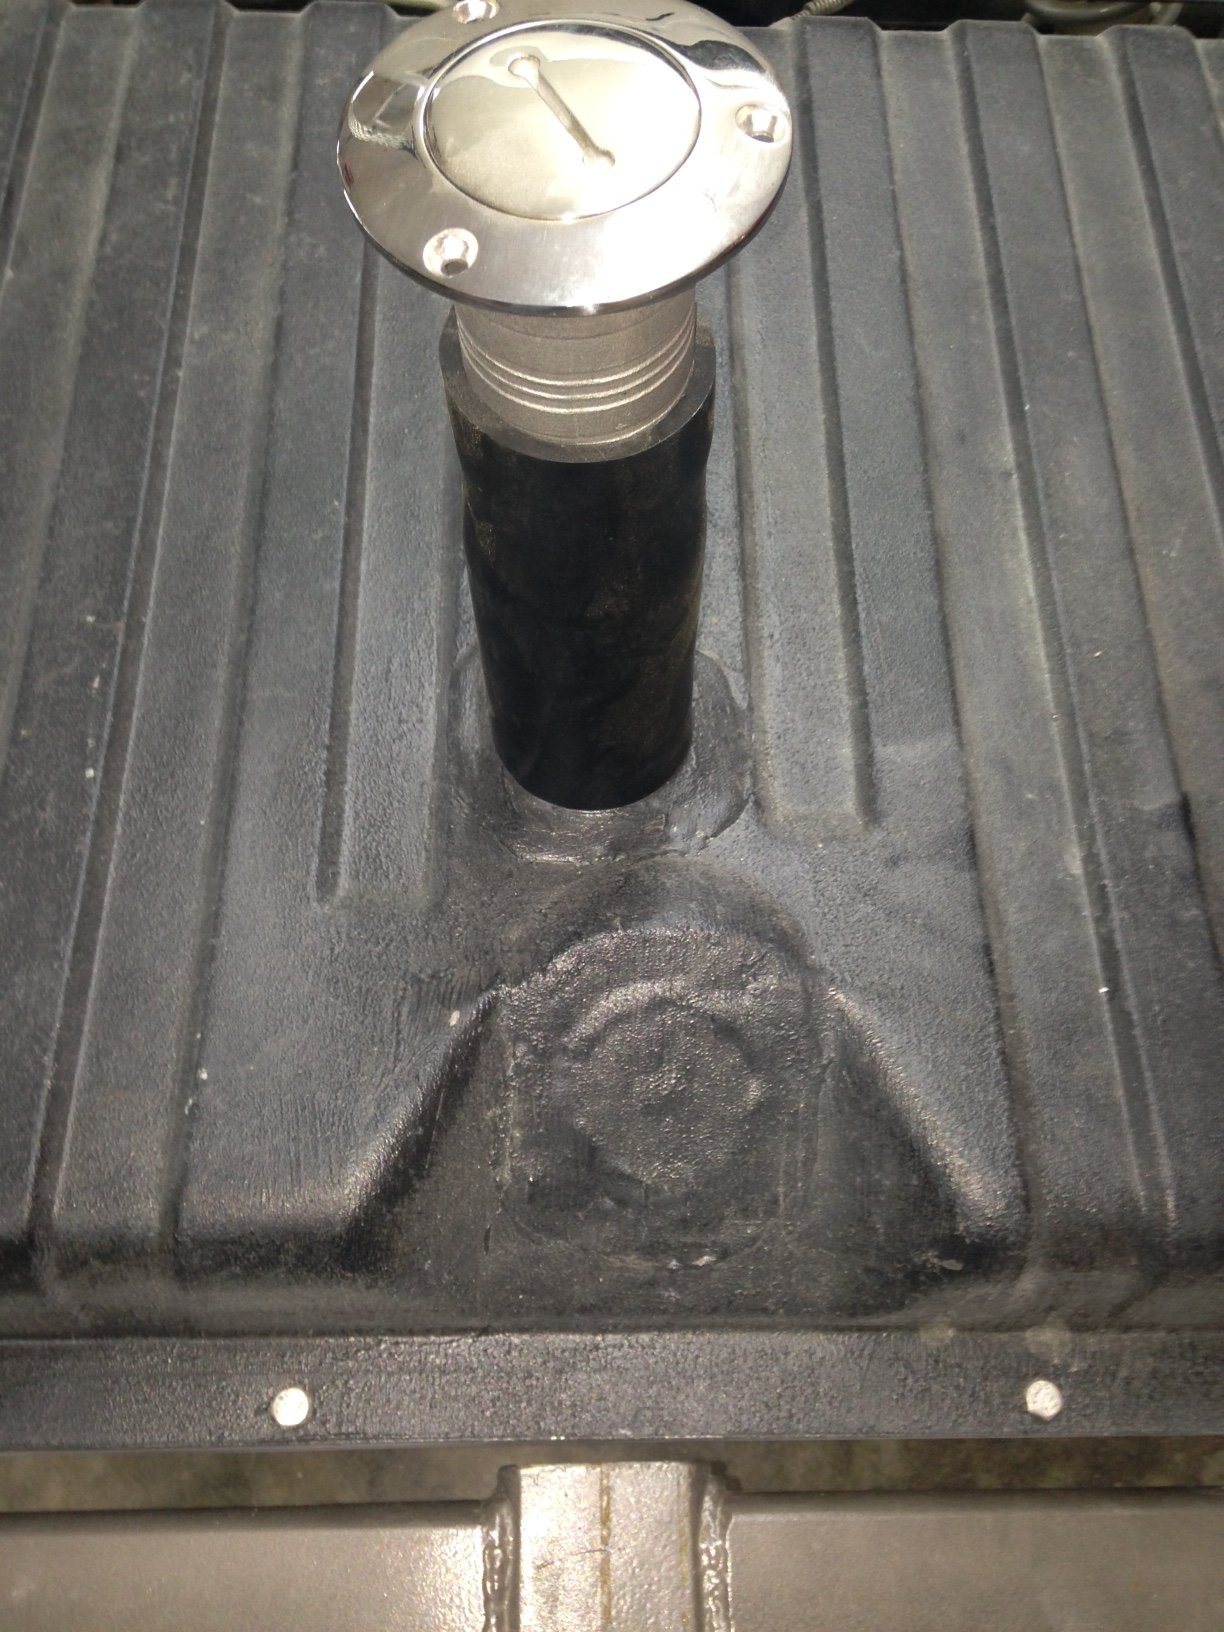
| The filler neck is on the top rear of the tank and a short rubber hose will connect it to a "Cool Cap" style filler neck mounted in the truck bed wood. An excellent filler neck hose can be found at the hardware store. They stock flexible drain connectors that adapt from and to different sizes of piping. I found a 2-1/2" to 1-1/2" adapter. They even come with the clamps already attached. | 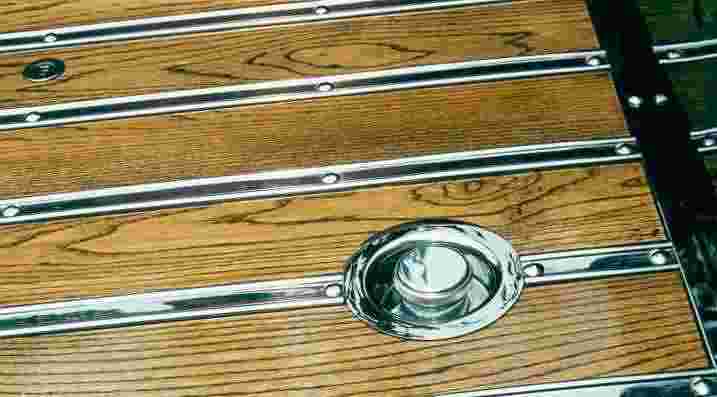 |
| You can pay around $ 50 - $ 60 for the "Cool Cap" brand with the cute little palm tree on the cap or you can go by a marine dealer and look in the catalogs for a stainless steel fuel inlet fitting or "deck fuel fillers" …. Same as the cool cap (but without the palm tree) and they run about $ 25.00 . They include the cute little key to open the cap and a chain attached so you won’t lose the cap. Some of the after market folks also carry a stainless steel (or chrome) drip tray that you can mount under the filler neck assembly… looks good and catches that last drip and keeps it off the bed wood. The drip tray is pictured above. The Cool Cap and the generic are pictured below. Cool Cap retails for around $60 ...the generic around $25.. your choice...both are nice and polished stainless steel and forged for marine type applications, the only difference is the cost | |
 |
 |
| My research has brought me to a web site called www.gastanks.com . They are located in Rising Sun. Md ( 1-800-235-8788 ) and have tanks of every shape and size. I found three that would probably work between the frame rails of a Ford truck. They are listed and pictured below. PRICES MAY BE HIGHER !!! |
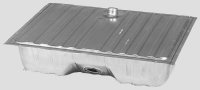
| '64-68 Mustang/Cougar Tank 32-5/8" x 24-1/2" x 8" capacity 16 gallons original part # C5ZZ9002D their part # F-28E priced now at $119.00 |
 |
| '69 Mustang/Cougar Tank 30-1/4 x 22" x 9" capacity 20 gallons original part # C9ZZ9002A their part # f-28-C priced now at $ 139.00 |
 |
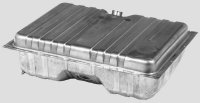
| '70 Mustang/Cougar Tank 30-1/4" x 22" x 9-3/4" capacity 22 gallons original part # D0ZZ9002A their part # F-28D priced now at $ 149.00 |
 |
| I have not tried to install the larger tanks. But
looking at my pictures below, I don't think that the extra height will interfere with the
bed mounting rails, although I've been wrong before. Measure carefully before you order
this tank.
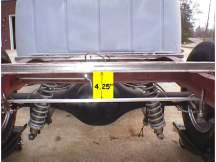
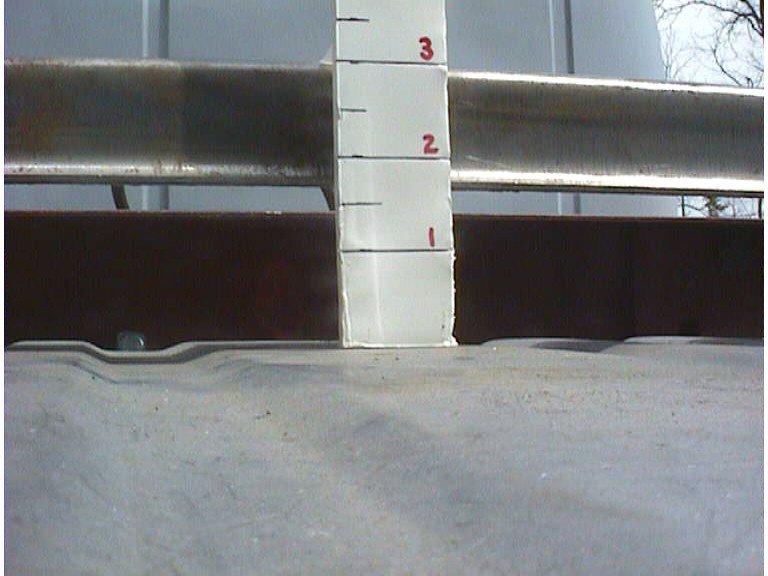
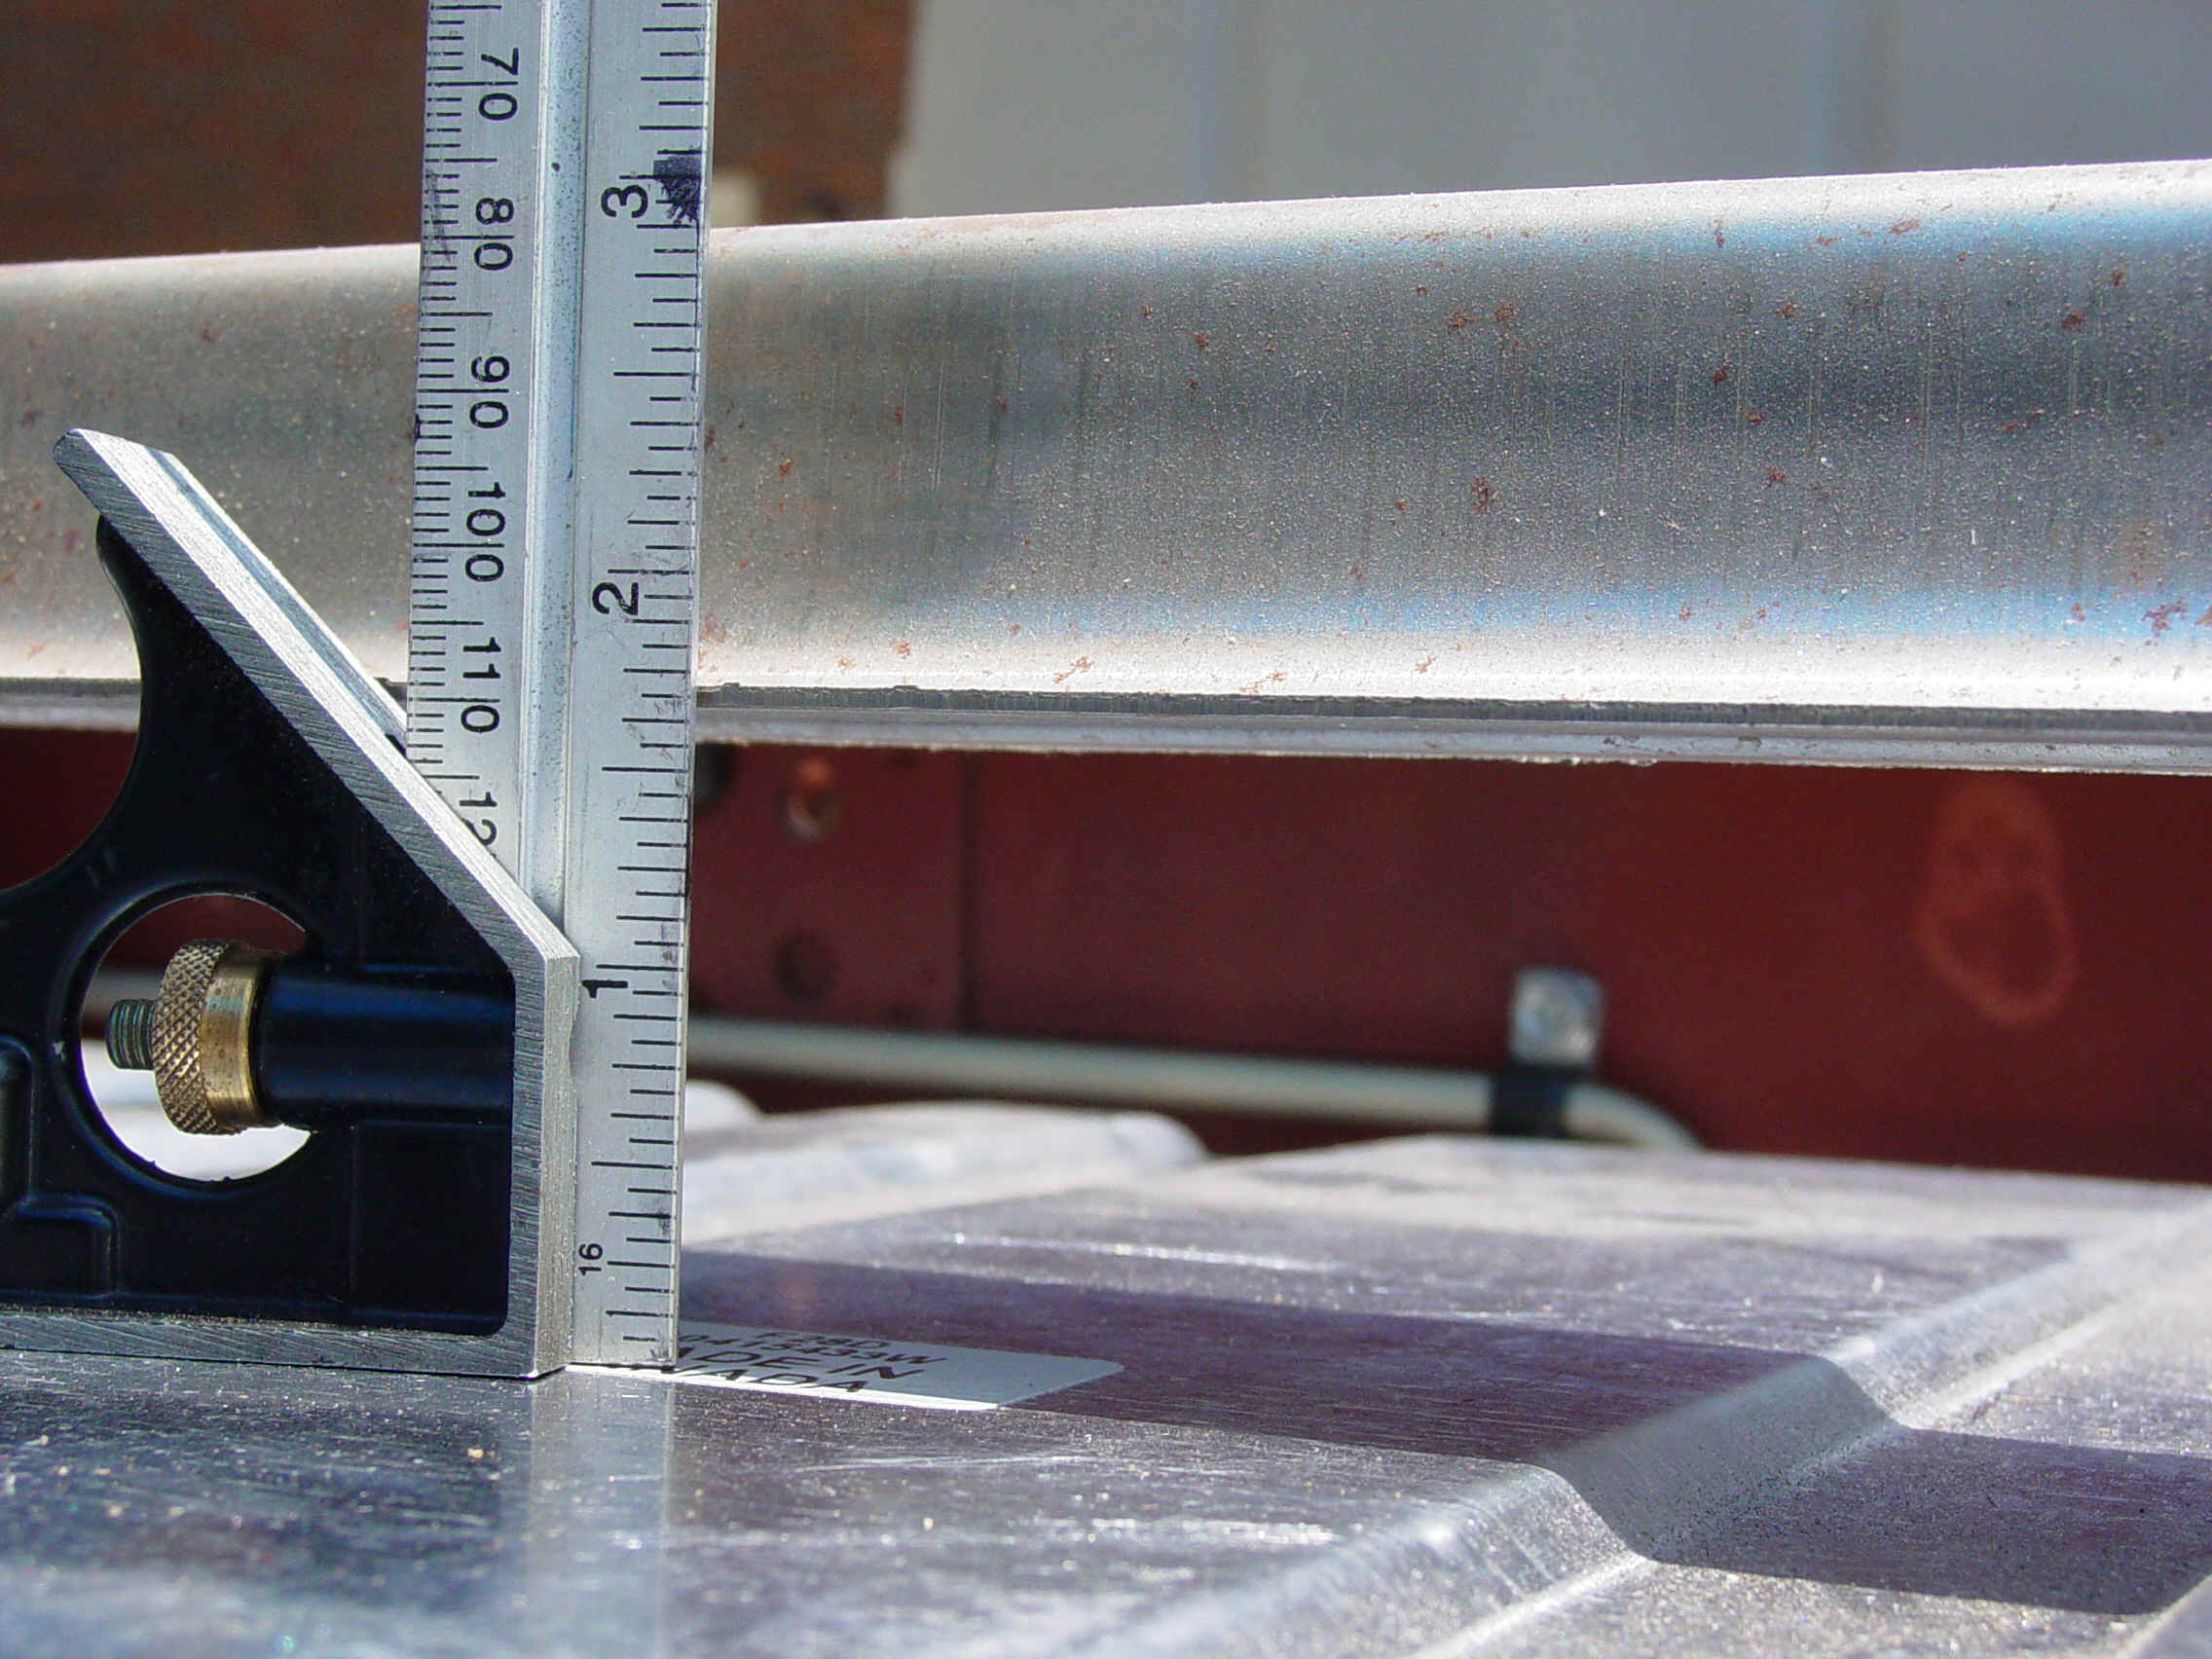
I took some measurements with and without the 16 gallon tank I have now.. and here's what I found.. I attached a straight edge to the bottom of the frame rail and the bed support to it's position on top of the rail.. then measured between them. There is approximately 4-1/4" between the two. I then slid the 16 gallon tank and frame in to the rails and measured again and it showed approximately 1-3/4" clearance. |
 |
 |
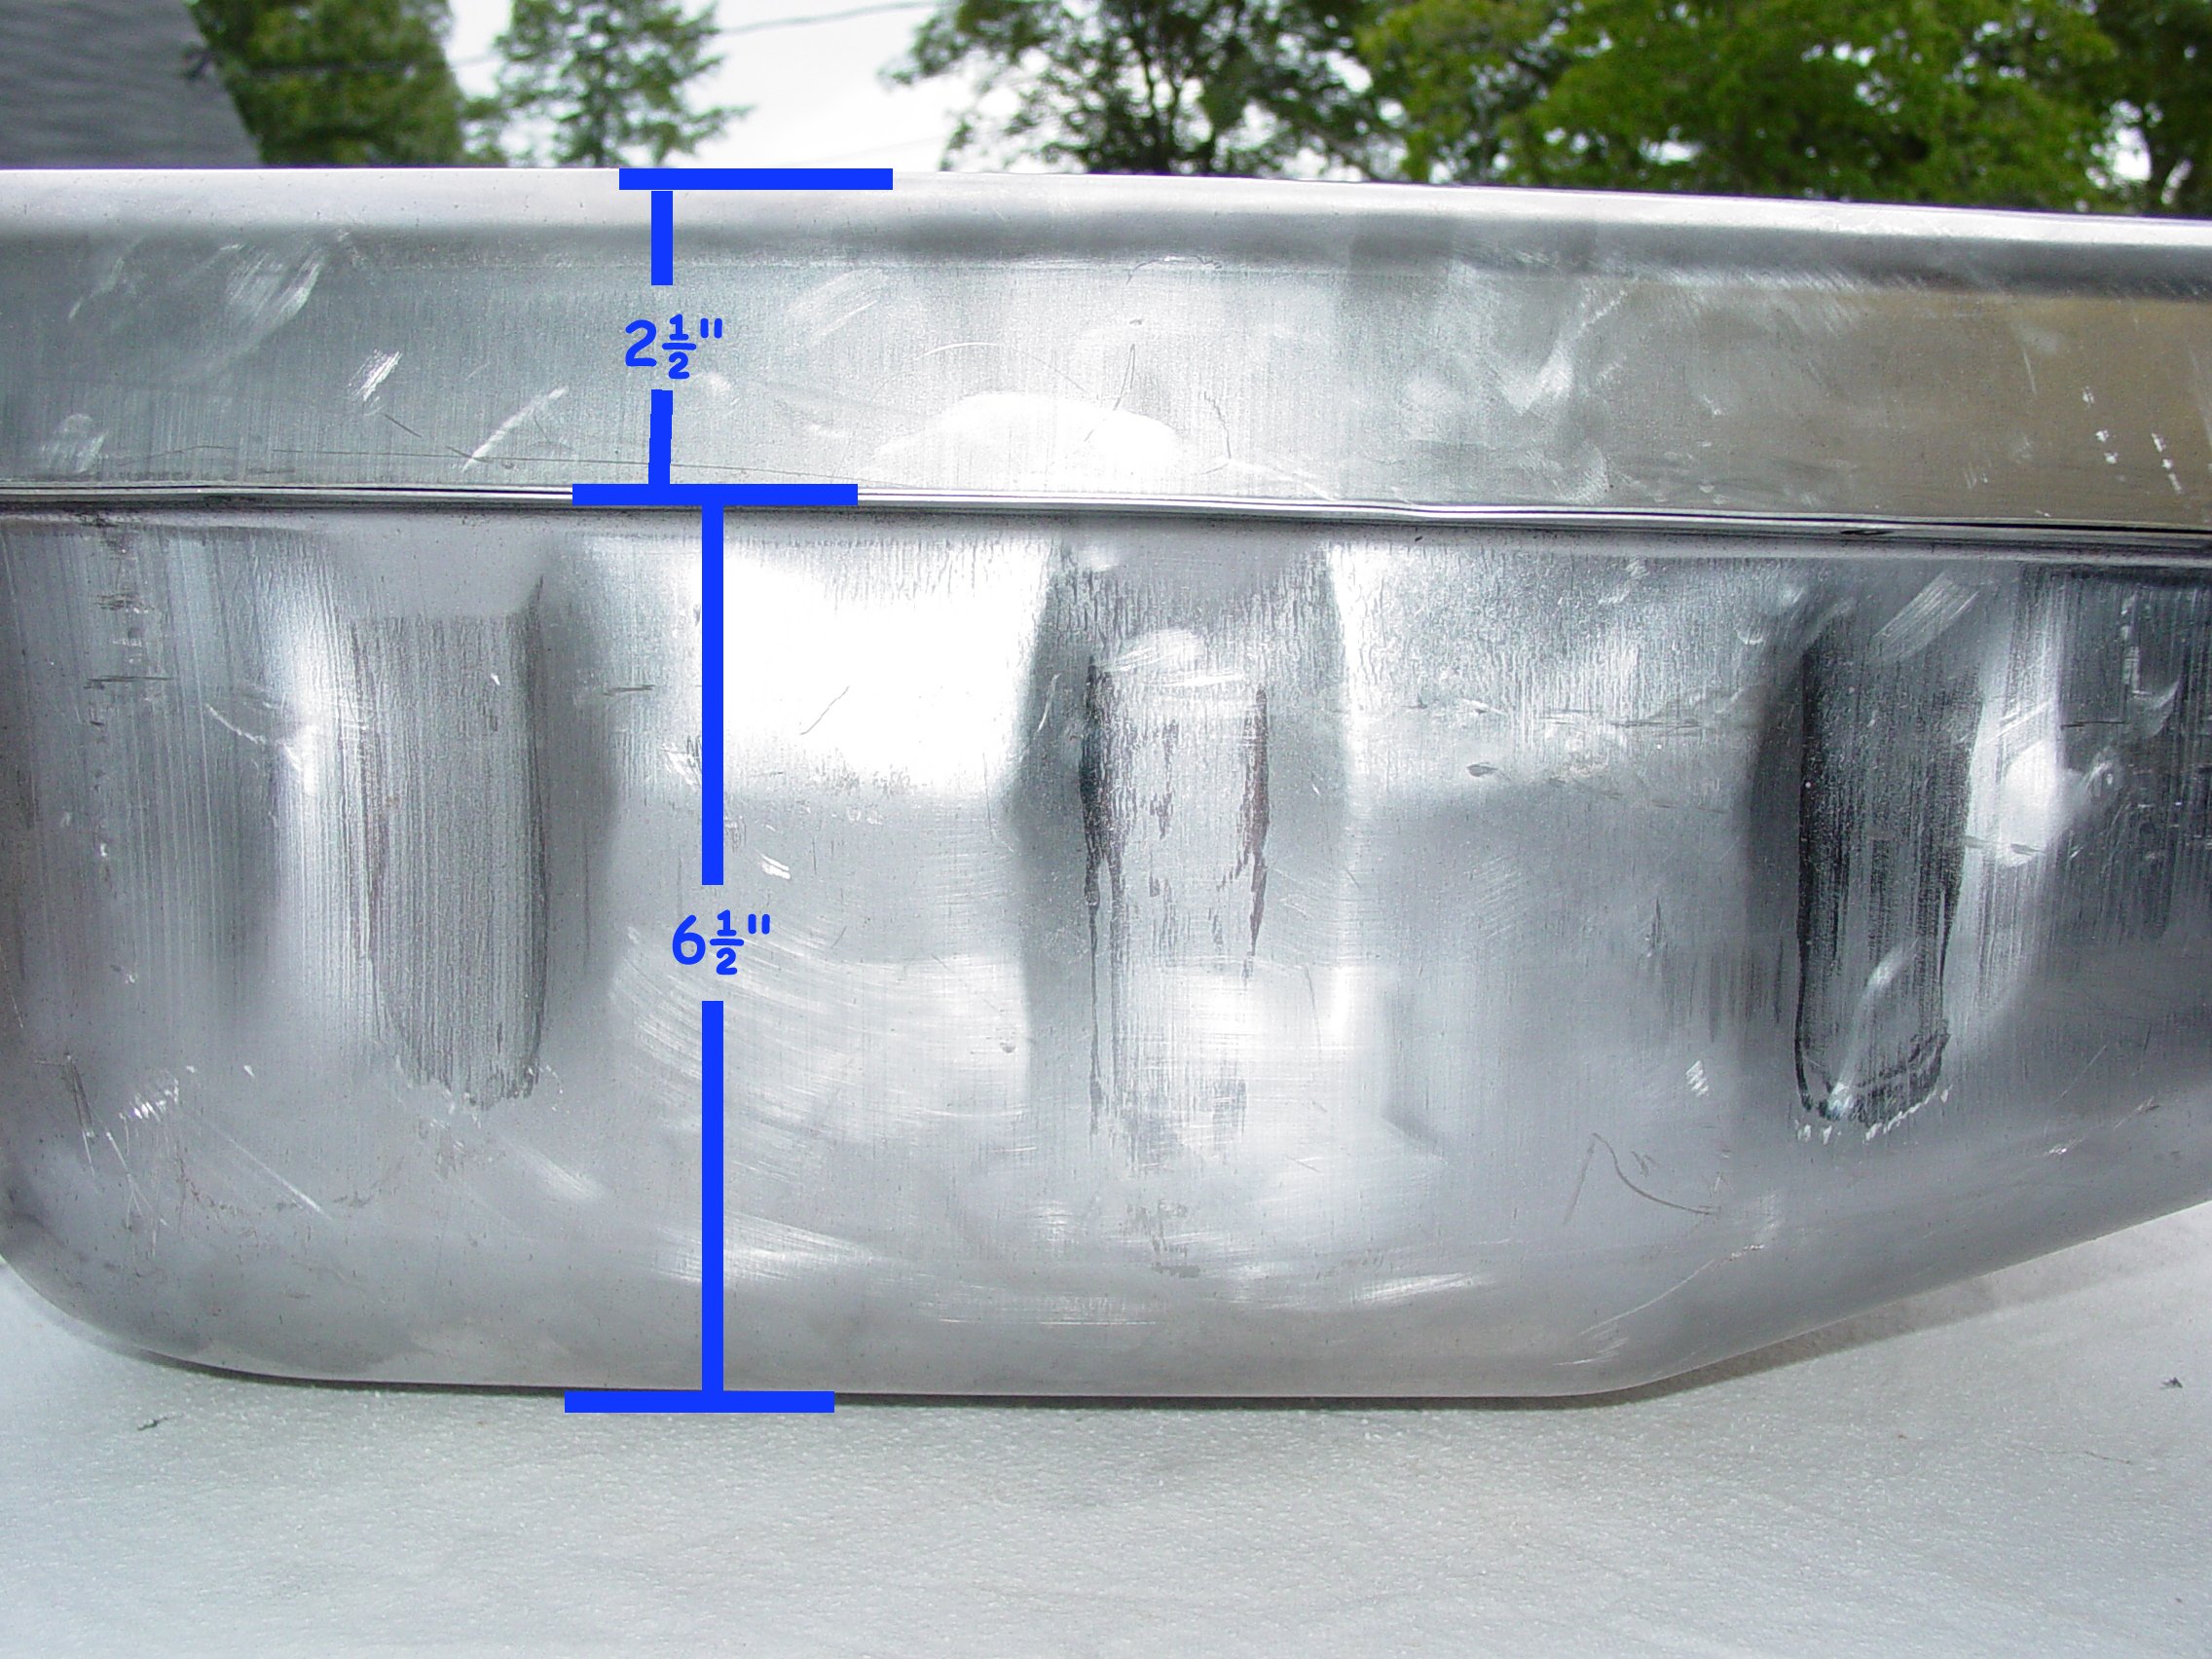
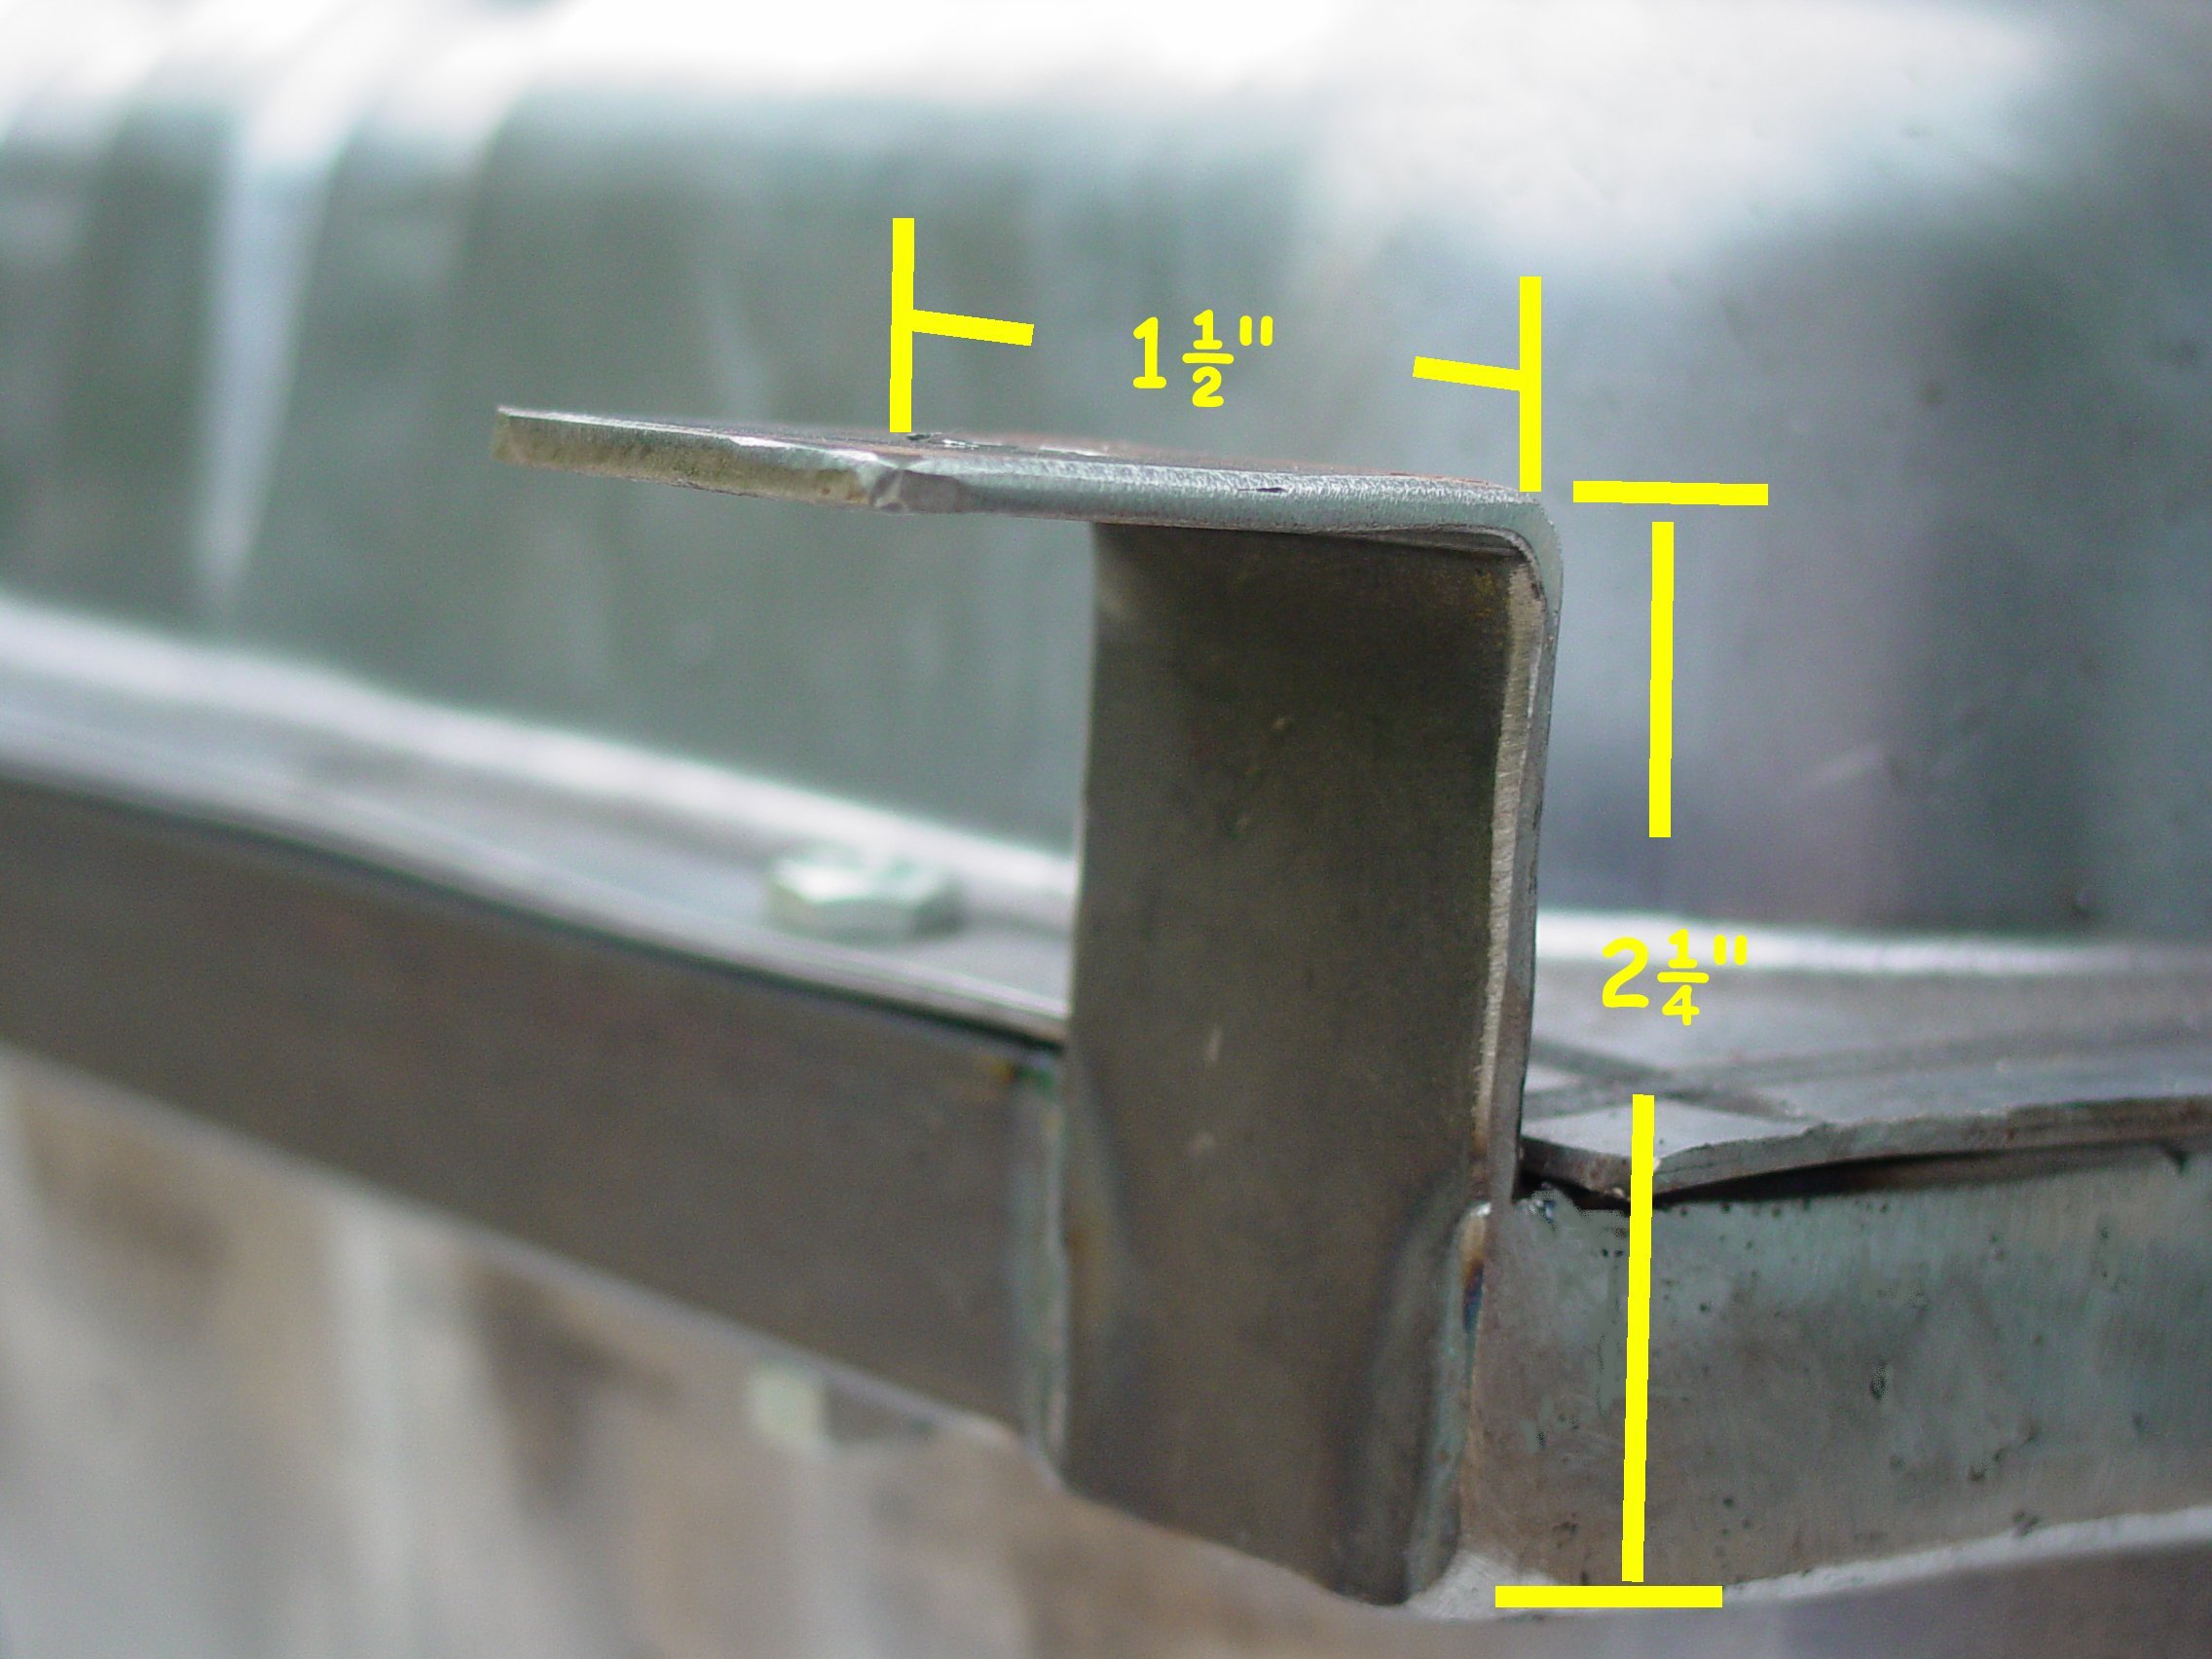
| I called gastanks.com again and asked if they could give me the height of the top of the tank above the flange. They said they couldn't (wouldn't), and went on to say that they only made tanks for specific applications and that using a tank in another vehicle would void the warranty (?? what's up with that... lawyer stuff probably" I printed pictures of the tanks and tried to scale the heights and came up with this... on the 20 gallon tank, the top of the tank is approx 2-1/4" above the flange. If you use 1" tubing frame material that makes a total of 3-1/4", which would fit under the bed wood with an inch to spare. Although, connecting the filler neck would be a squeeze. One the 22 gallon tank there is approx 3-1/4" above the flange. In this case, with a 1" tubing frame, it would put the tank top right up against the bedwood. I think you'd have to mount the tank below the rail to make it fit, and support it from the underside with the frame. It would still fit and not hang too low (6-1/4"). My 3rd member and coil-overs are lower than that. |
On the mustang tank the sending unit hole is on the lower front of the tank so it doesn’t show in the pictures. All of the gauge manufacturers made sending units to fit the mustang tanks or you could buy the stock mustang unit and tell the gauge people what type sending unit you have. The fuel line plumbing depends on your engine size and fuel feed choices (carb vrs f.i.) There has been some discussion on some of the message boards about mounting the tank for easy removal, should the sending unit give a problem. If the bed is in place and a rear roll pan is used.. it would be very difficult to remove the tank. But my thinking is... with the sending unit in the front lower part of the tank, there is really no need to remove the tank unless it's seriously damaged. And then, we're dealing with a whole different set of problems... Mine will probably stay where it is.. although I'm seriously considering moving up to the 22 gallon size. That’s about it… if you start early in the morning, plan something else for the afternoon, ‘cause it isn’t gonna take that long. |
 |
 |
 |
 |
22 Gallon Tank Install
After talking to some folks and seeing what they did,, I decided that with the 460 in the truck that a 22 gallon tank would serve me better... I could get a whopping 200 miles before fill-ups... maybe... if I stay out of it.
The install is almost identical to the 16 gallon with a couple of exceptions. First, the tank is taller from the flange up to the top... which will necessitate moving the tank and frame down below the frame rails where the 16 gallon actually sits "IN" the web of the rails. The 22 gallon will FIT in the web but is so close to the bed wood that a filler neck is all but impossible to install. I also had concerns about ever having to remove the tank... and if it's in the web and the bed or bed and rollpan or bumper is installed, you'd nearly have to disassemble the rear end of the truck to remove the tank. With it mounted under the rails it makes the removal as easy ... well as easy as removing a fuel tank can be.
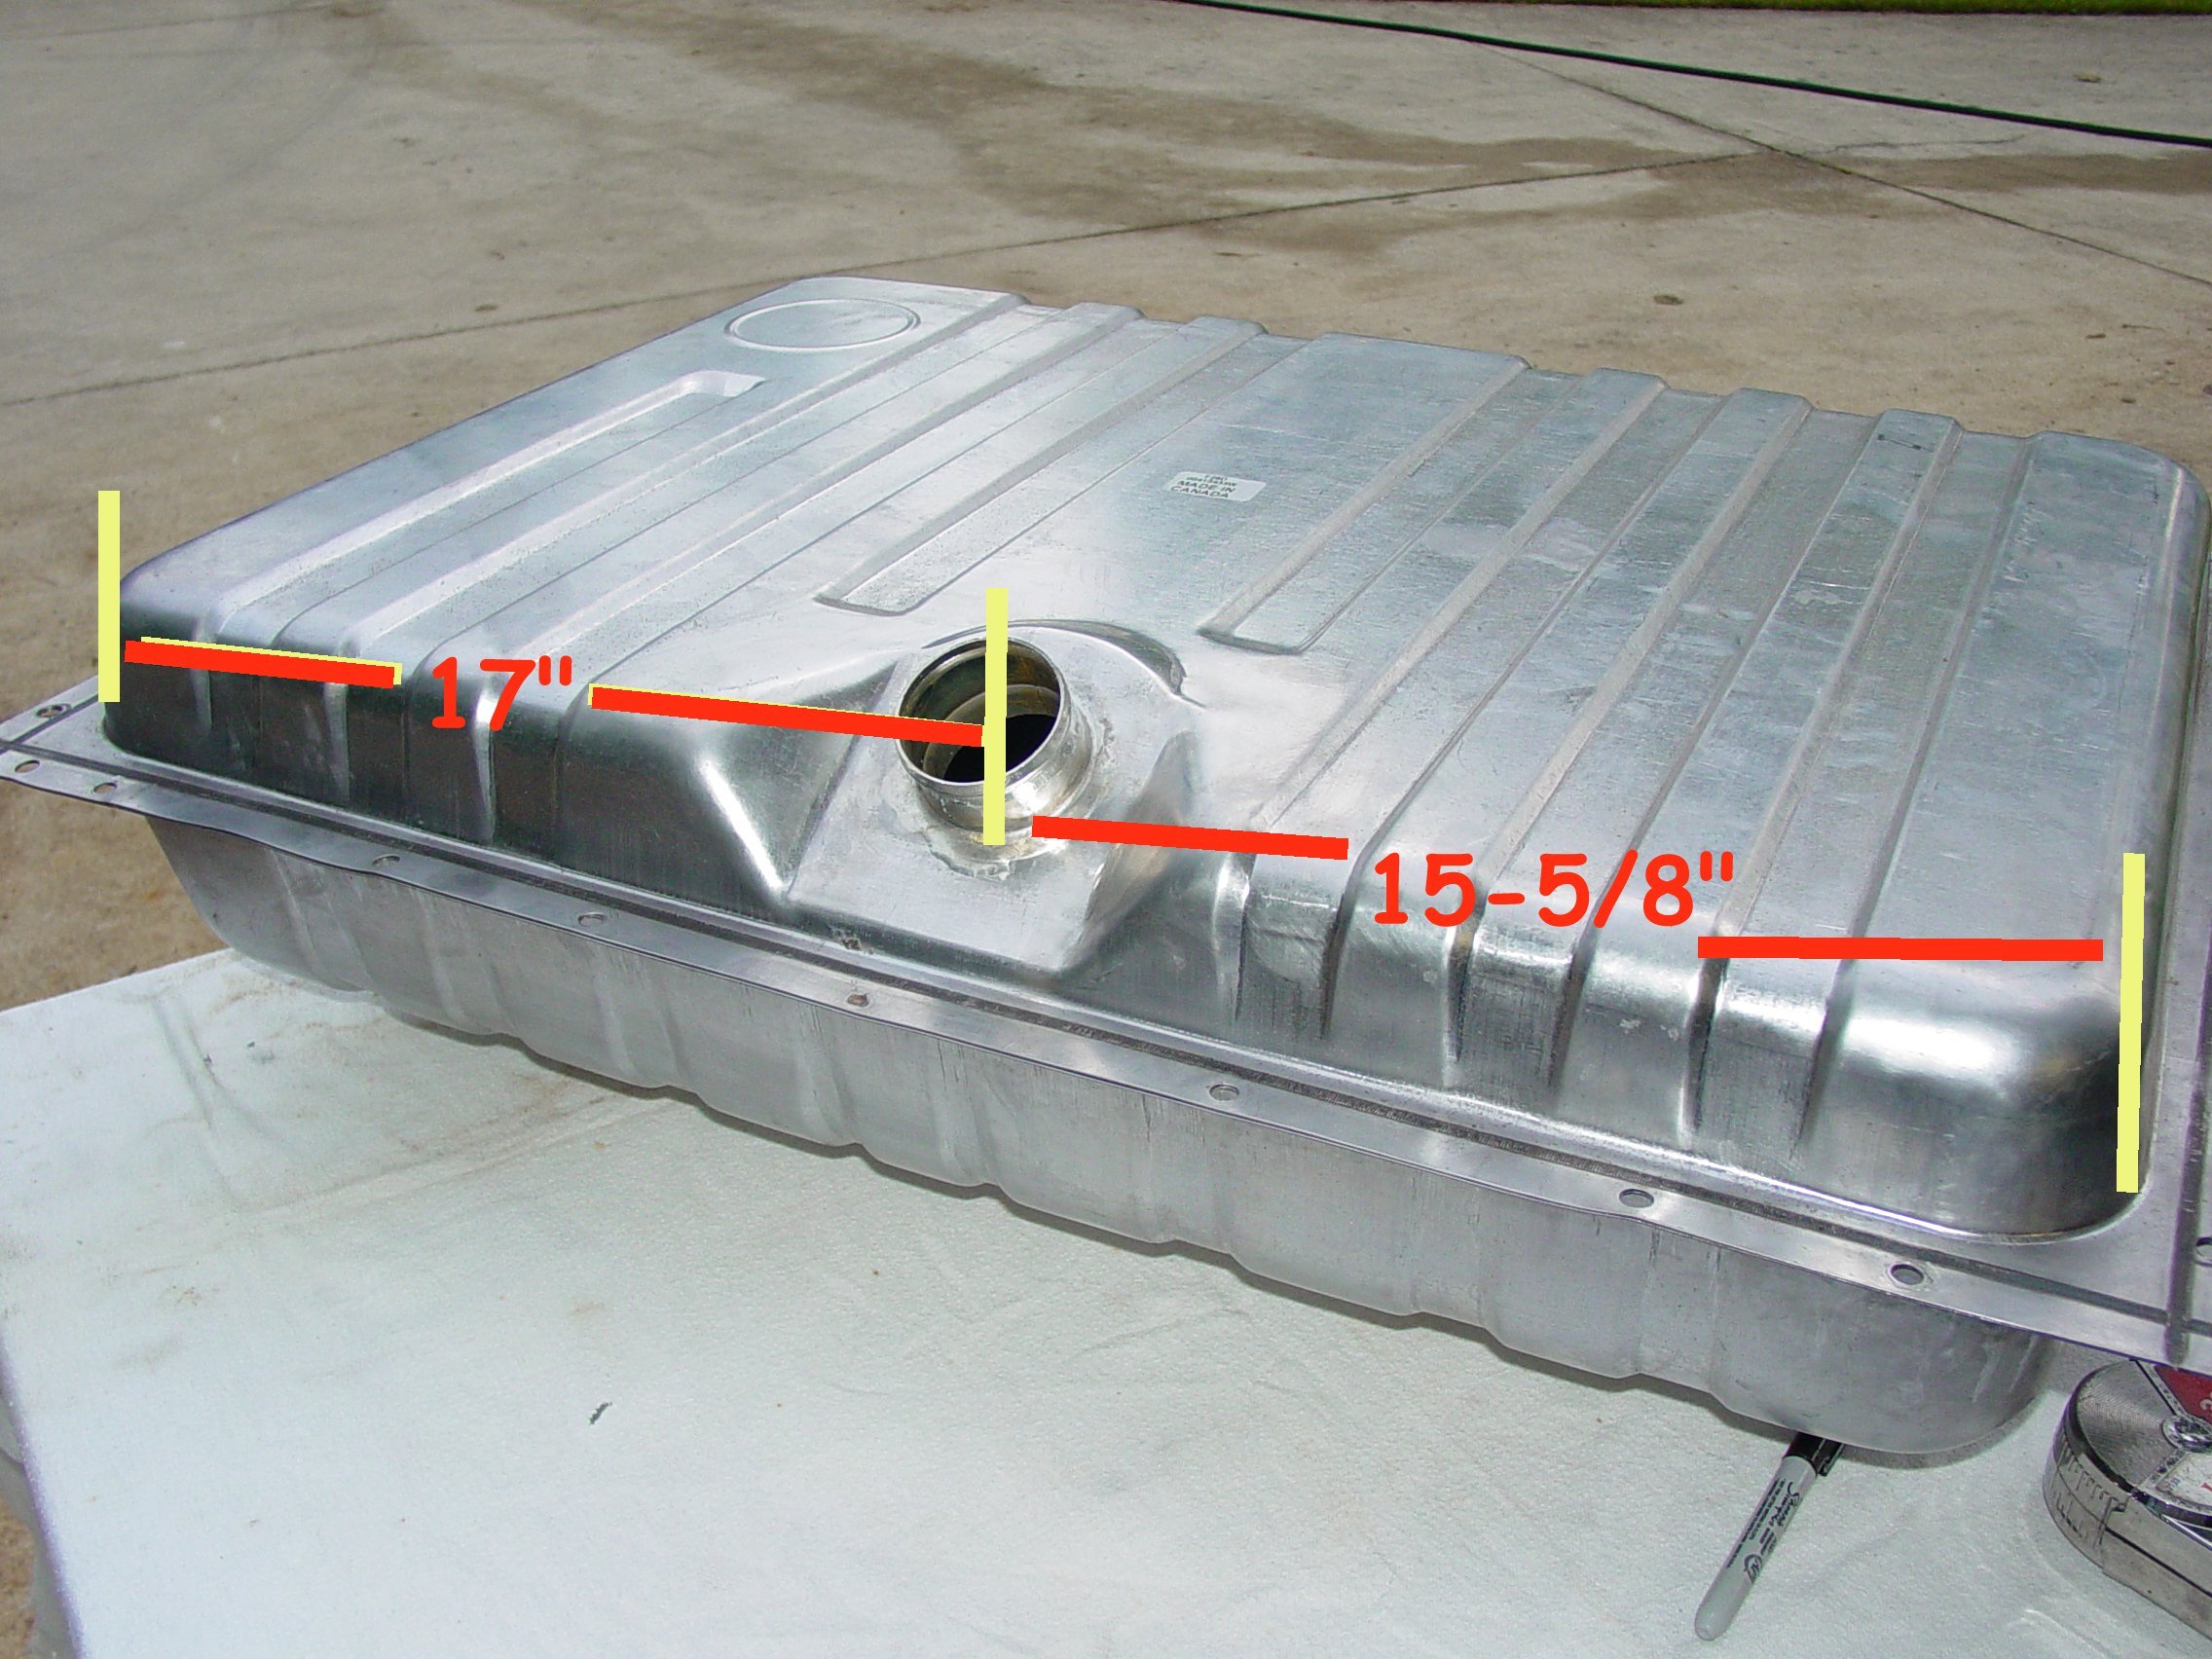
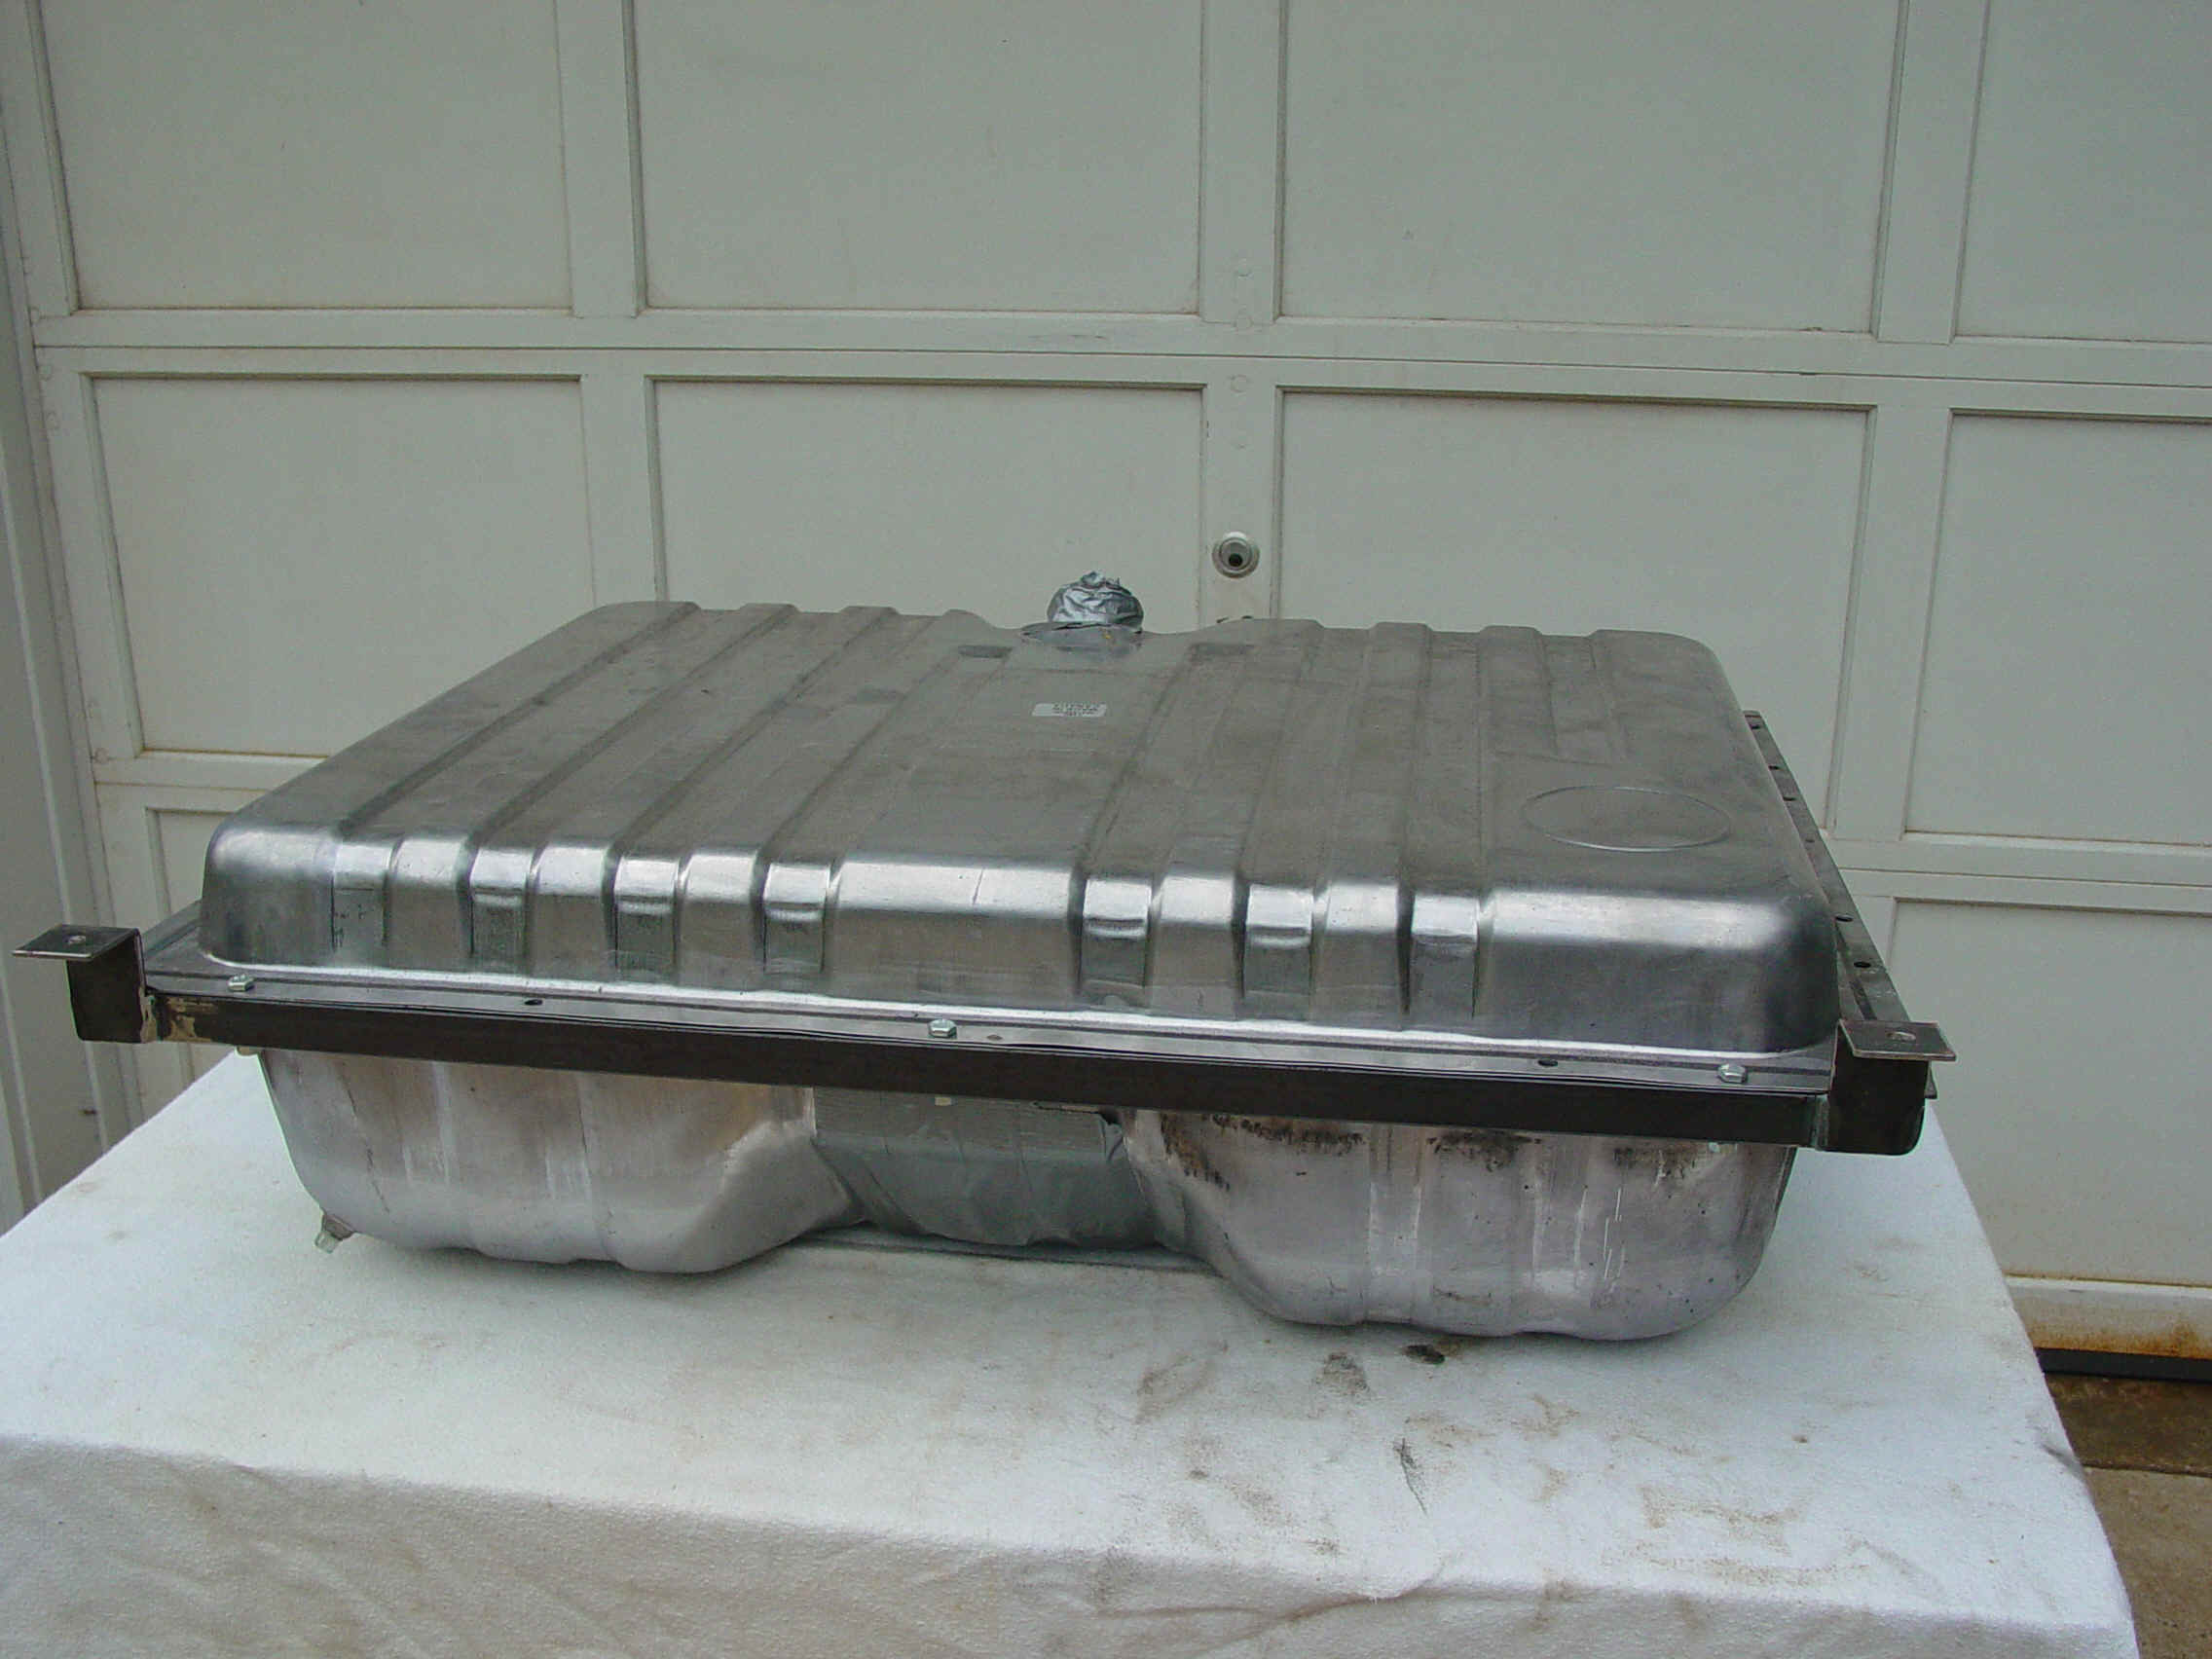
The tank I used is pictured above... the '70 model Mustang/Cougar tank. www.gastanks.com sells it for around 150.00 plus shipping... but it can be found cheaper. Call/surf around to some of the Mustang aftermarket places and see what you can find.. mine was 125.00/plus shipping from North Carolina.
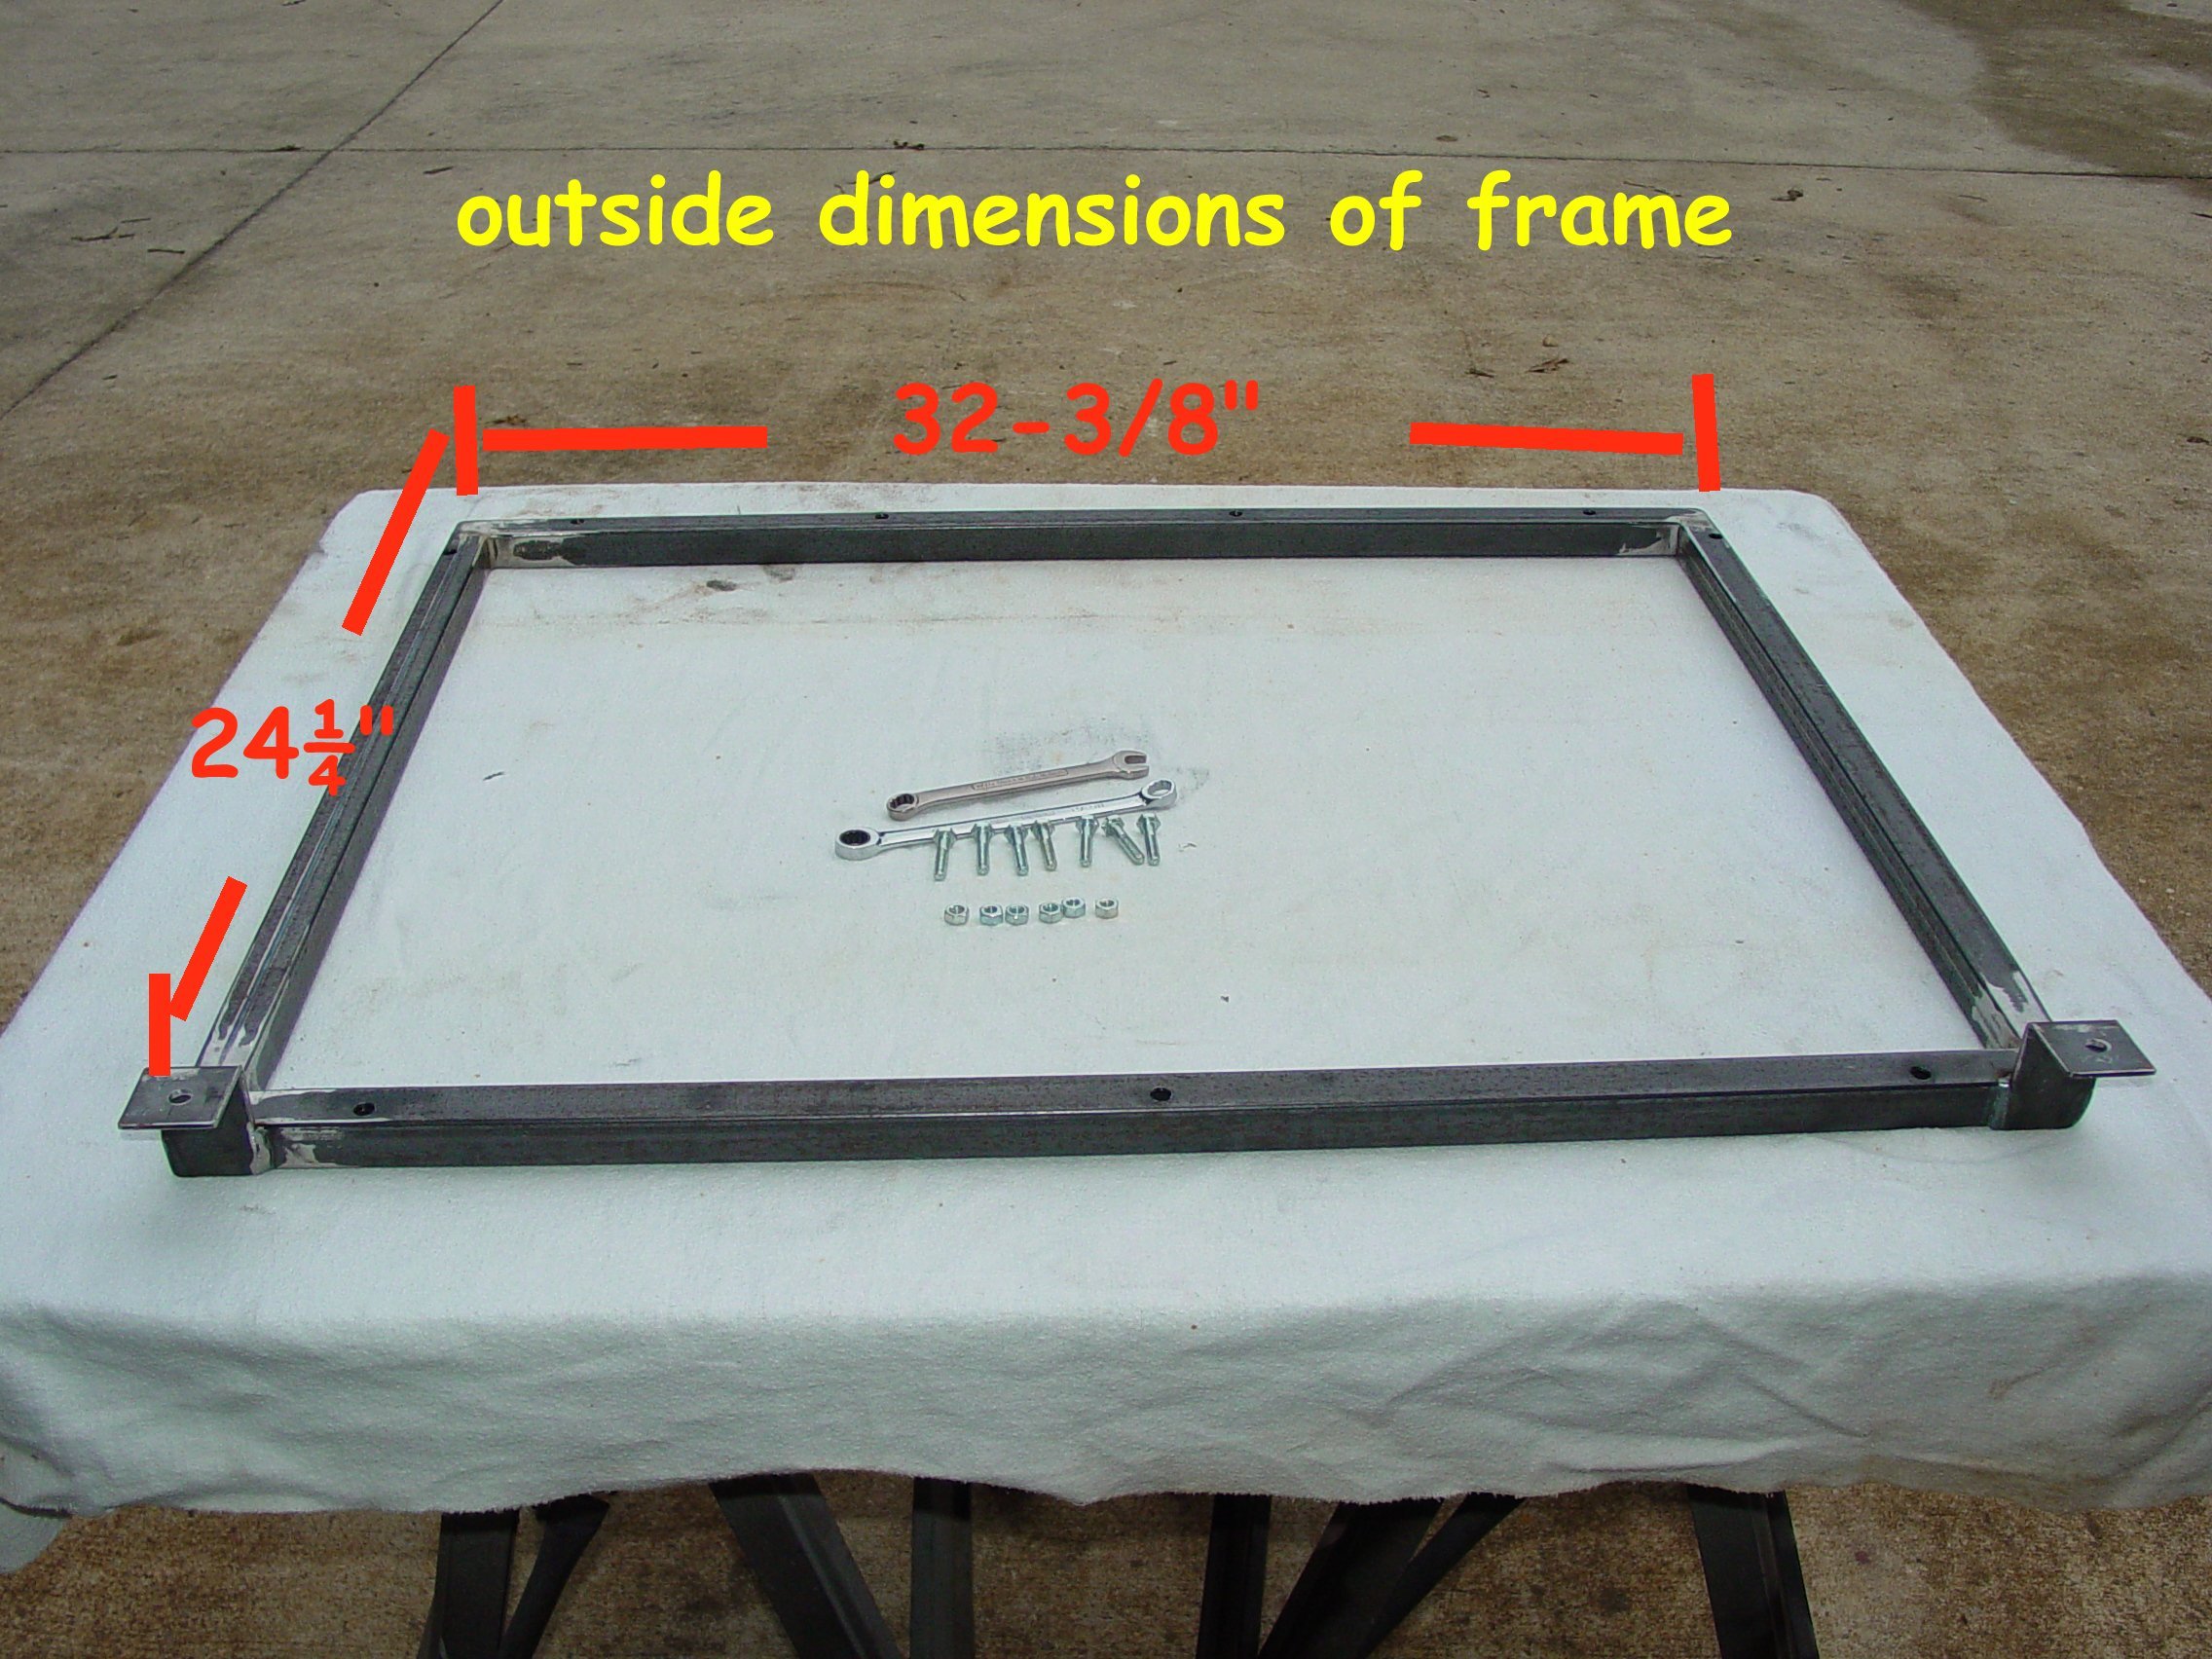
The frame that is detailed above will also work for this tank... the outside dimensions are the same.. the only difference is how the new tank is mounted below the frame rail. Because the rails rise up to clear the rear suspension, you need to add brackets to the front of the frame to accommodate this rise and keep the tank level.
Also the filler neck is not centered in the tank so the filler tube if mounted in the bed wood will not be in the center piece. This can be changed by moving the neck... cutting it out and moving it over... take care doing this. If it's a fresh new tank that hasn't had gas in it... you can cut and weld with no fear... if it's a used tank... NO MATTER HOW LONG IT'S BEEN EMPTY, you need to take special care with sparks, fire and such. These tanks hold fumes for years. There are several accepted methods for cutting tanks... fill them with water to displace the gas (fumes), fill them with inert gas, like argon or nitrogen or CO2 to displace the fumes and the oxygen... I think the best way is to let someone who's experienced in these methods do it for you. Personally ?? I don't mind the filler tube being offset a little.
Here's the pics with dimensions..
sketches below are accurate in dimension but not in scale... and not particularly pretty but you can get the picture.....

here's a pic of the drop bracket that I drew so crudely above...you might want to set yours up and make your own measurements... these were the dimensions on MY frame. with my placement.. if you move the tank forward or backward... this dimension will change. It's simply here for a sample of what you might do. I actually copied Larry Eckart's frame design with the drop brackets... I liked his design. You can find the detail on his install on http://www.ford-trucks.com/user_gallery/displayalbum.php?&userid=82938&albumid=4818
here additional pics of the frame with the drop brackets in the foreground and after that a close up of the brackets... sometimes a picture is much better than a sketch for me.
below is the tank mounted in the frame and ready to install....
and below shows the sending unit hole (taped up)... it's in the center of the lower front of the tank

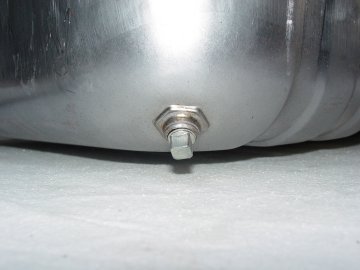
and a pic of the nifty drain plug included
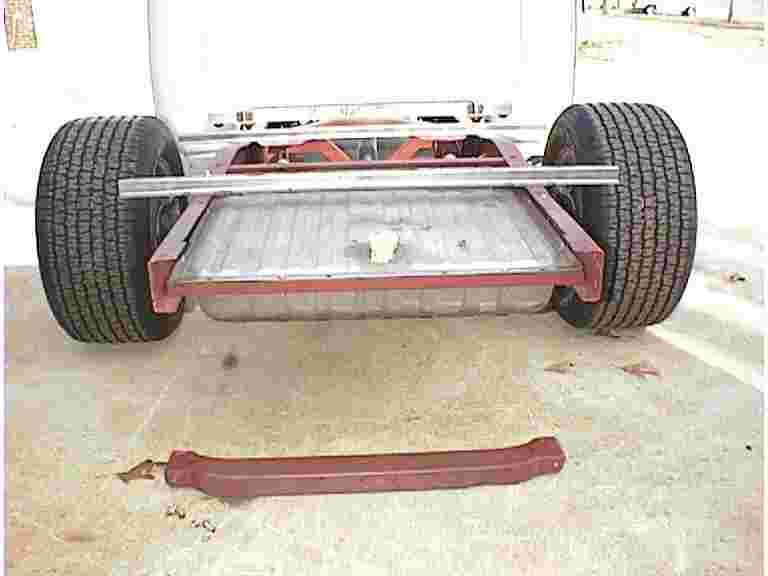
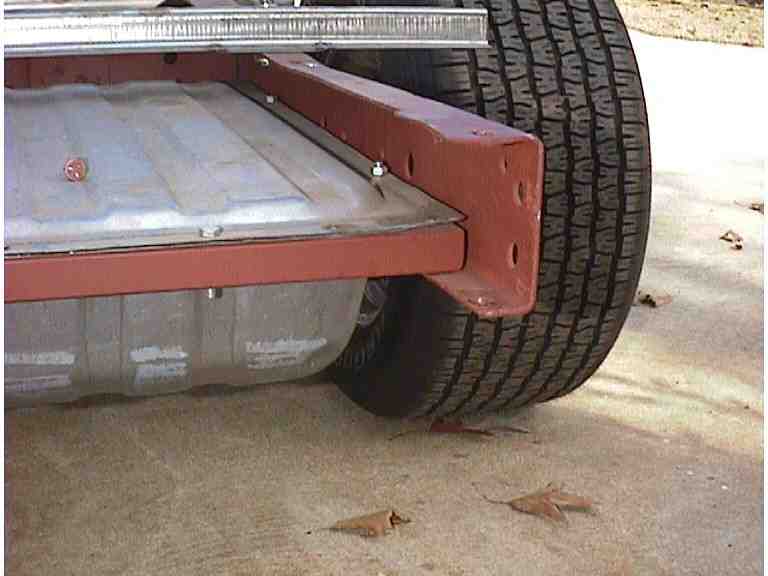
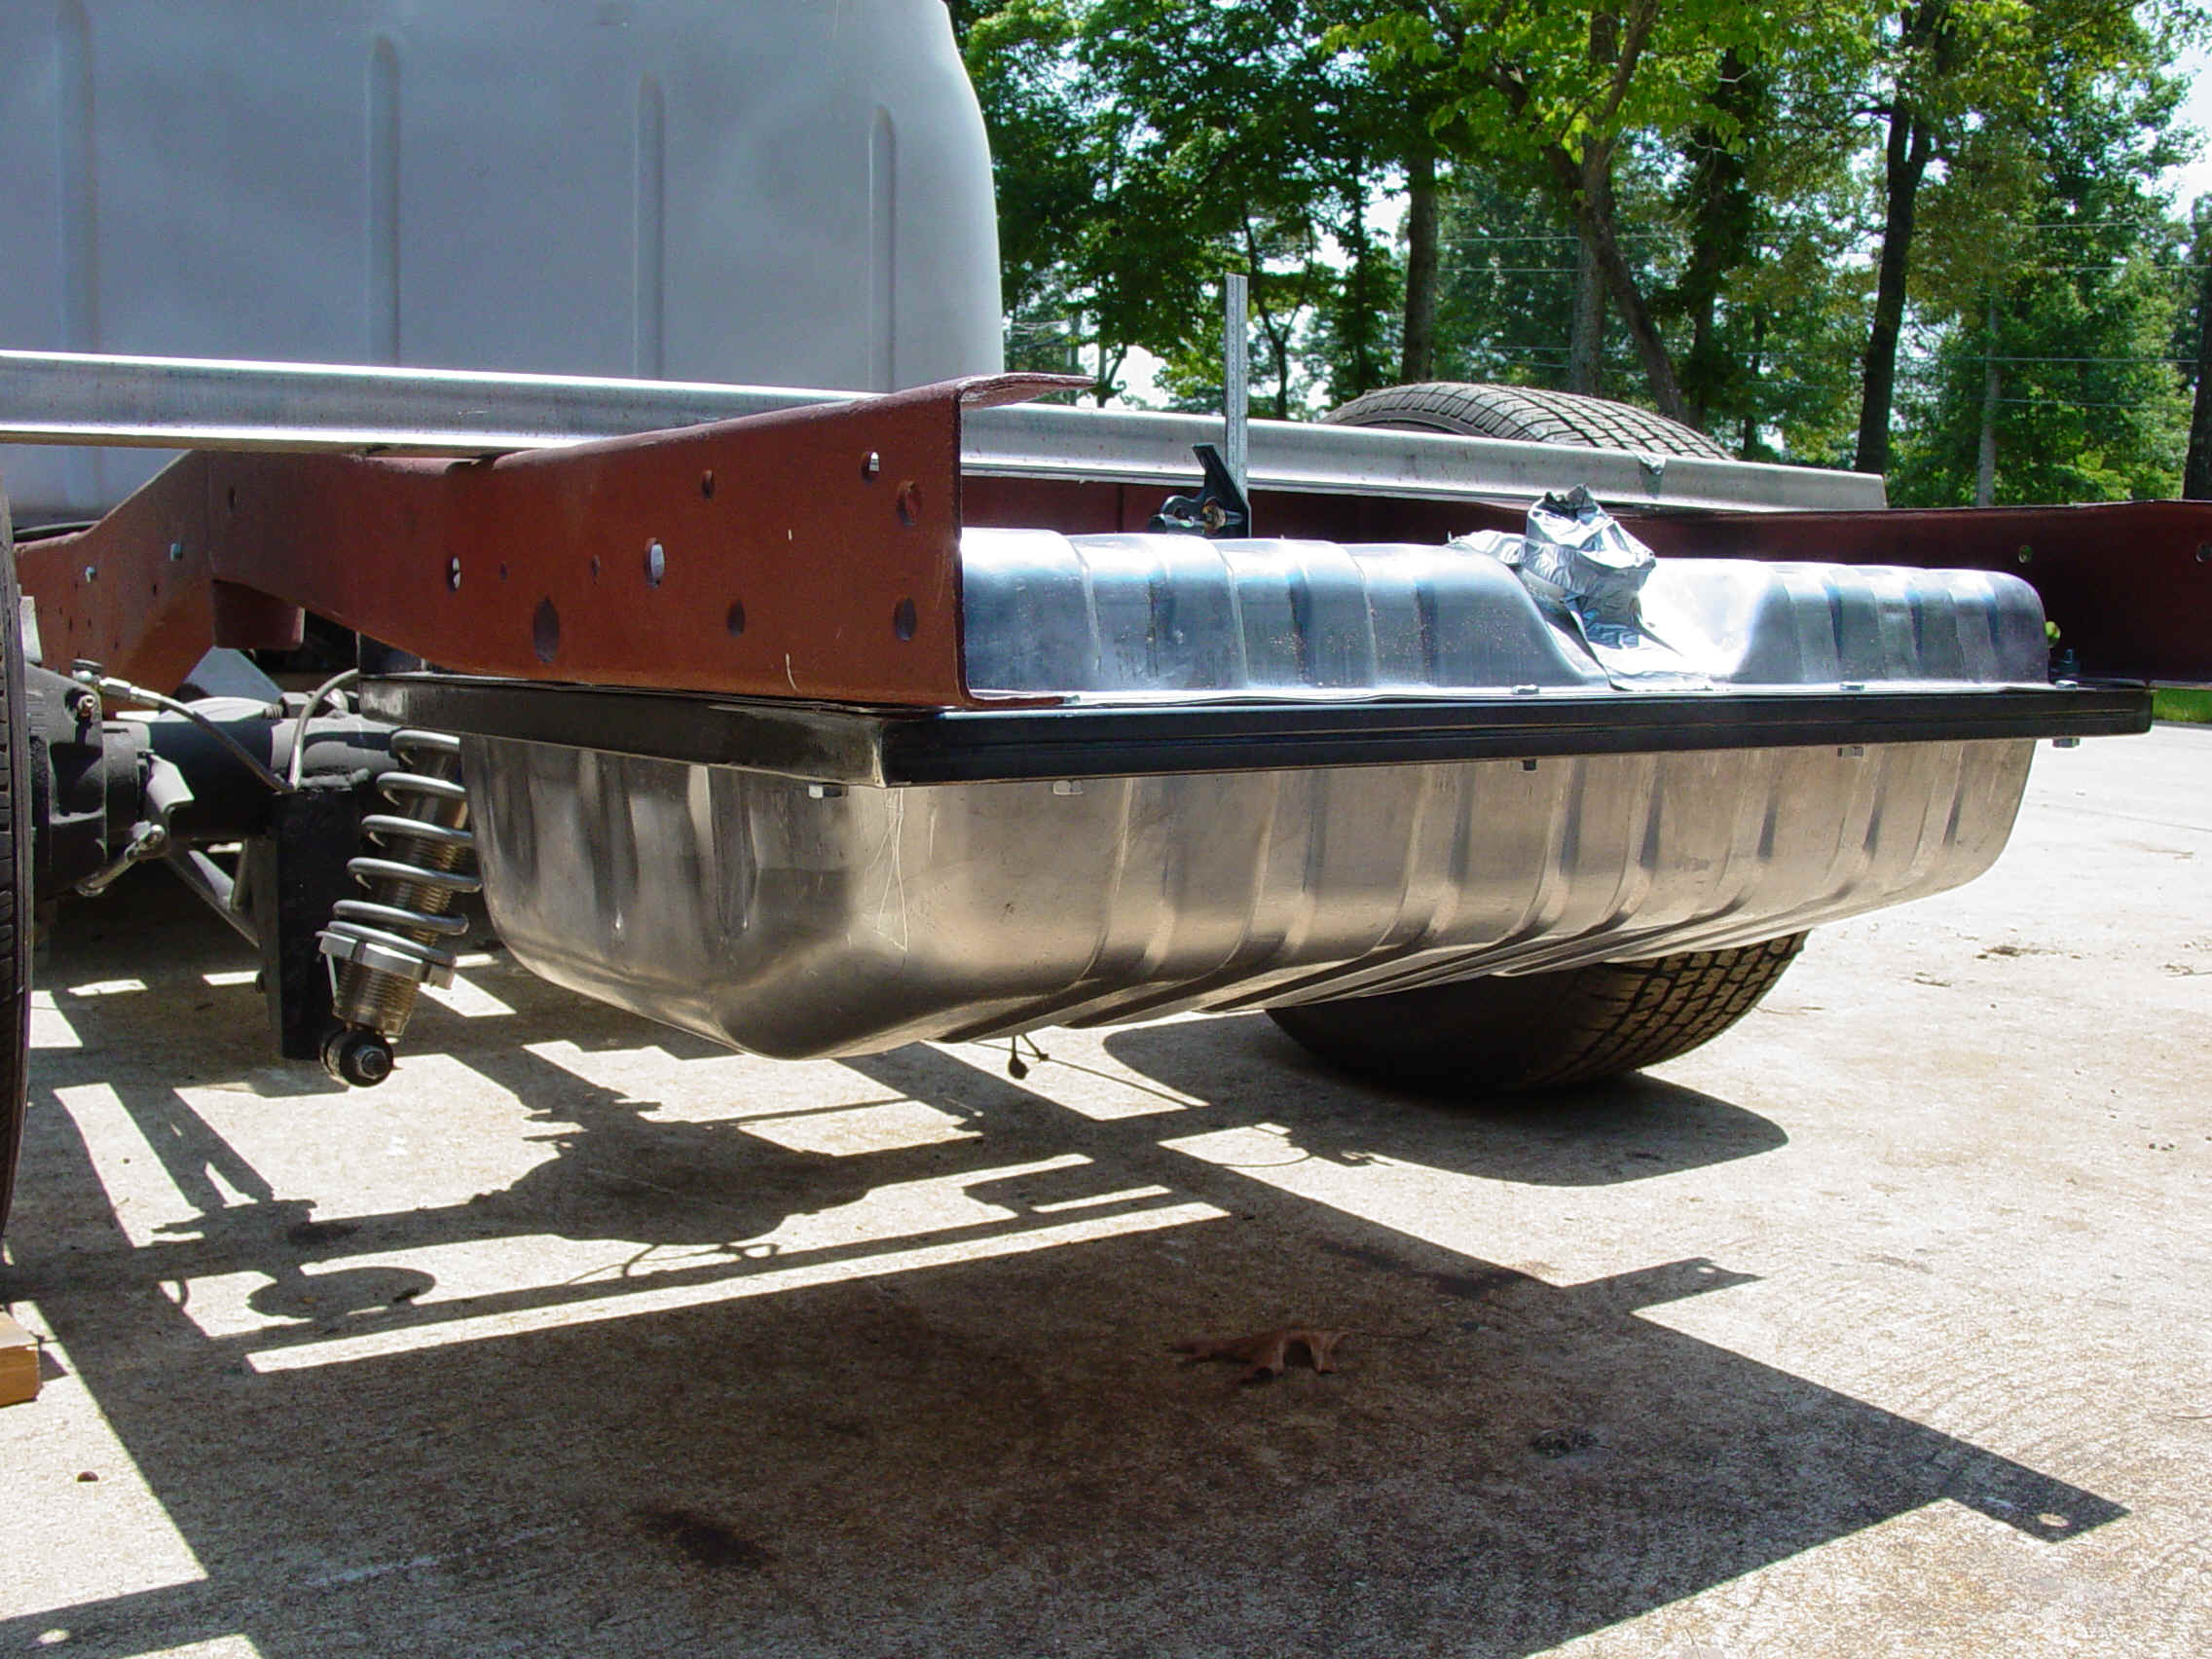
the last few pics are installed shots showing the location of the tank, the brackets and such.
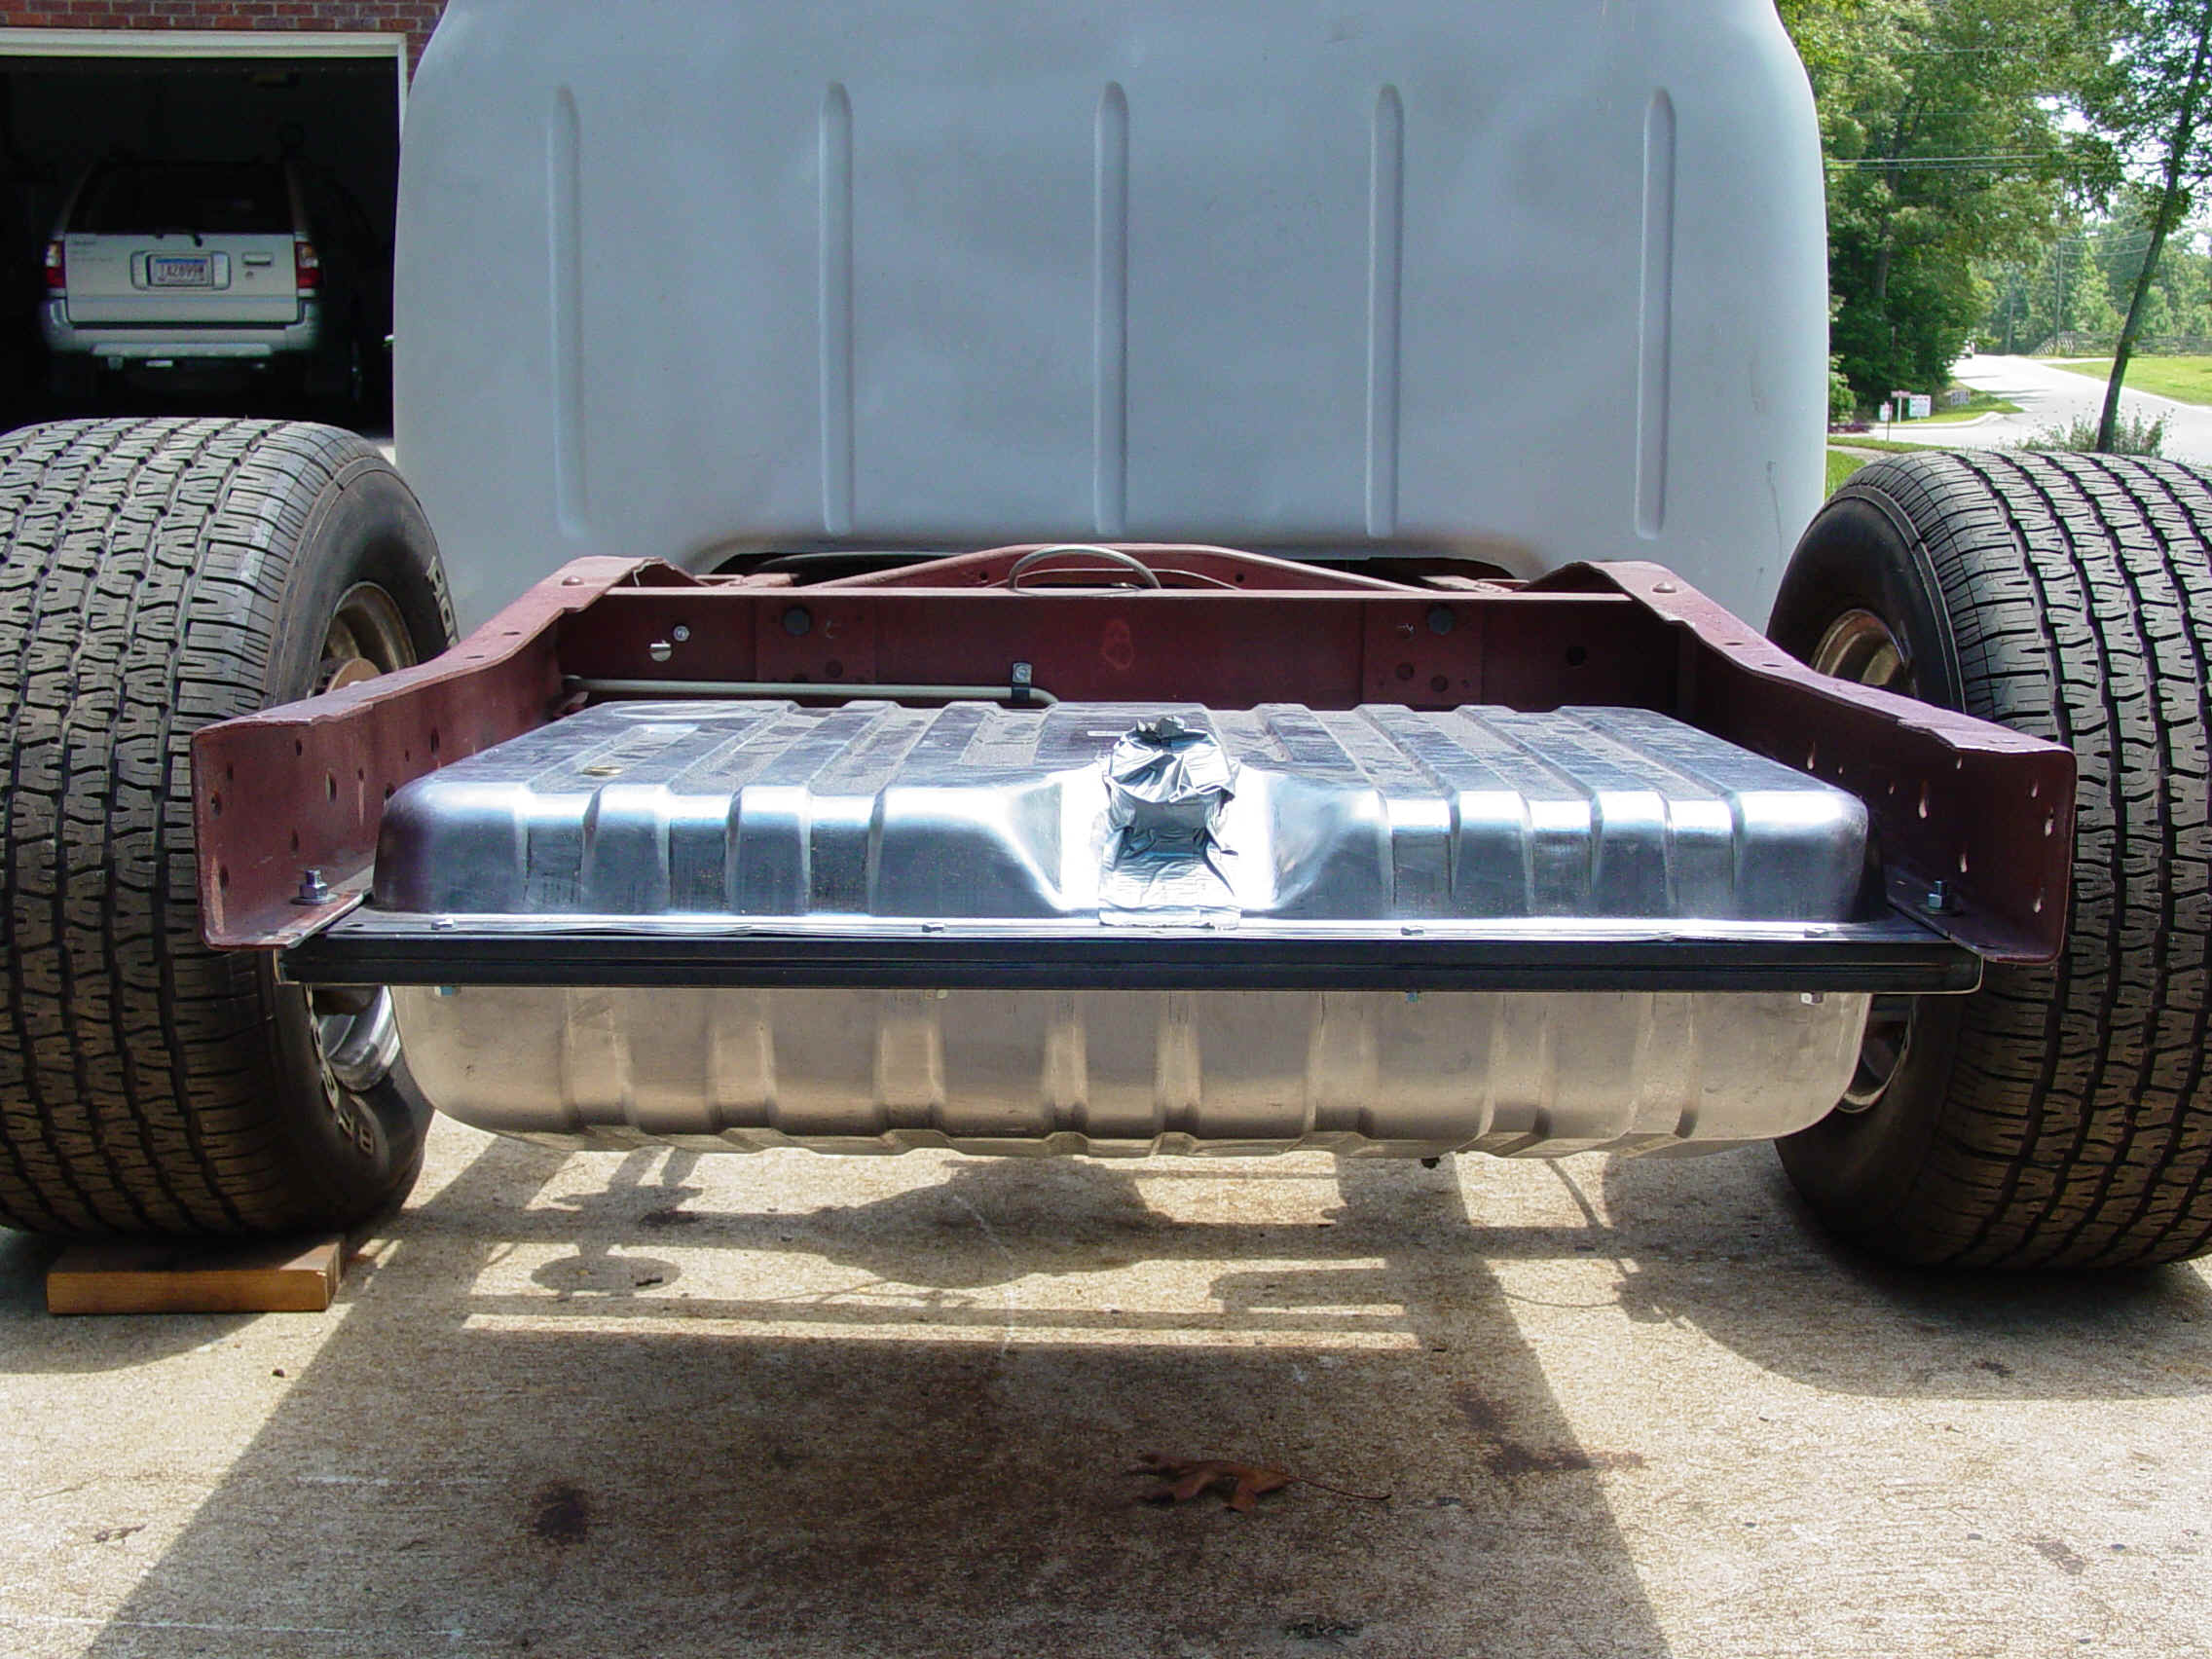
because of the difference in tank depth, the 22 gallon doesn't hang much lower than the 16 gallon
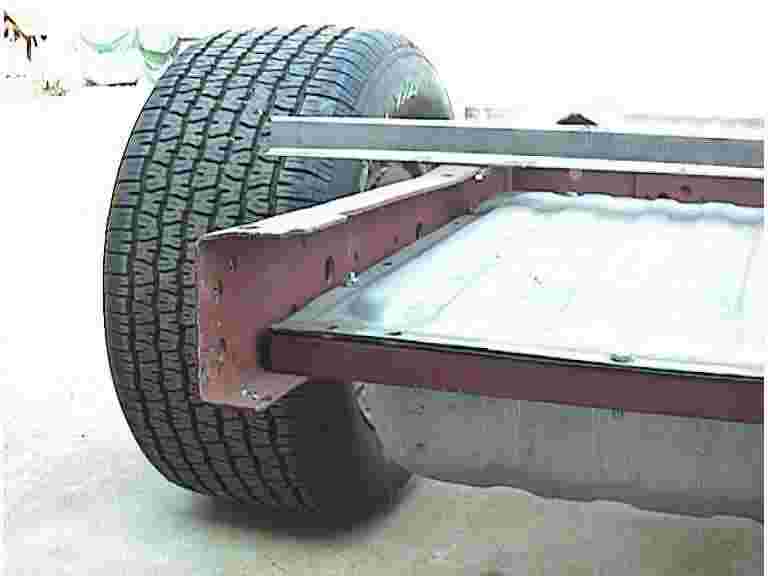
you can see the bed wood clearance here

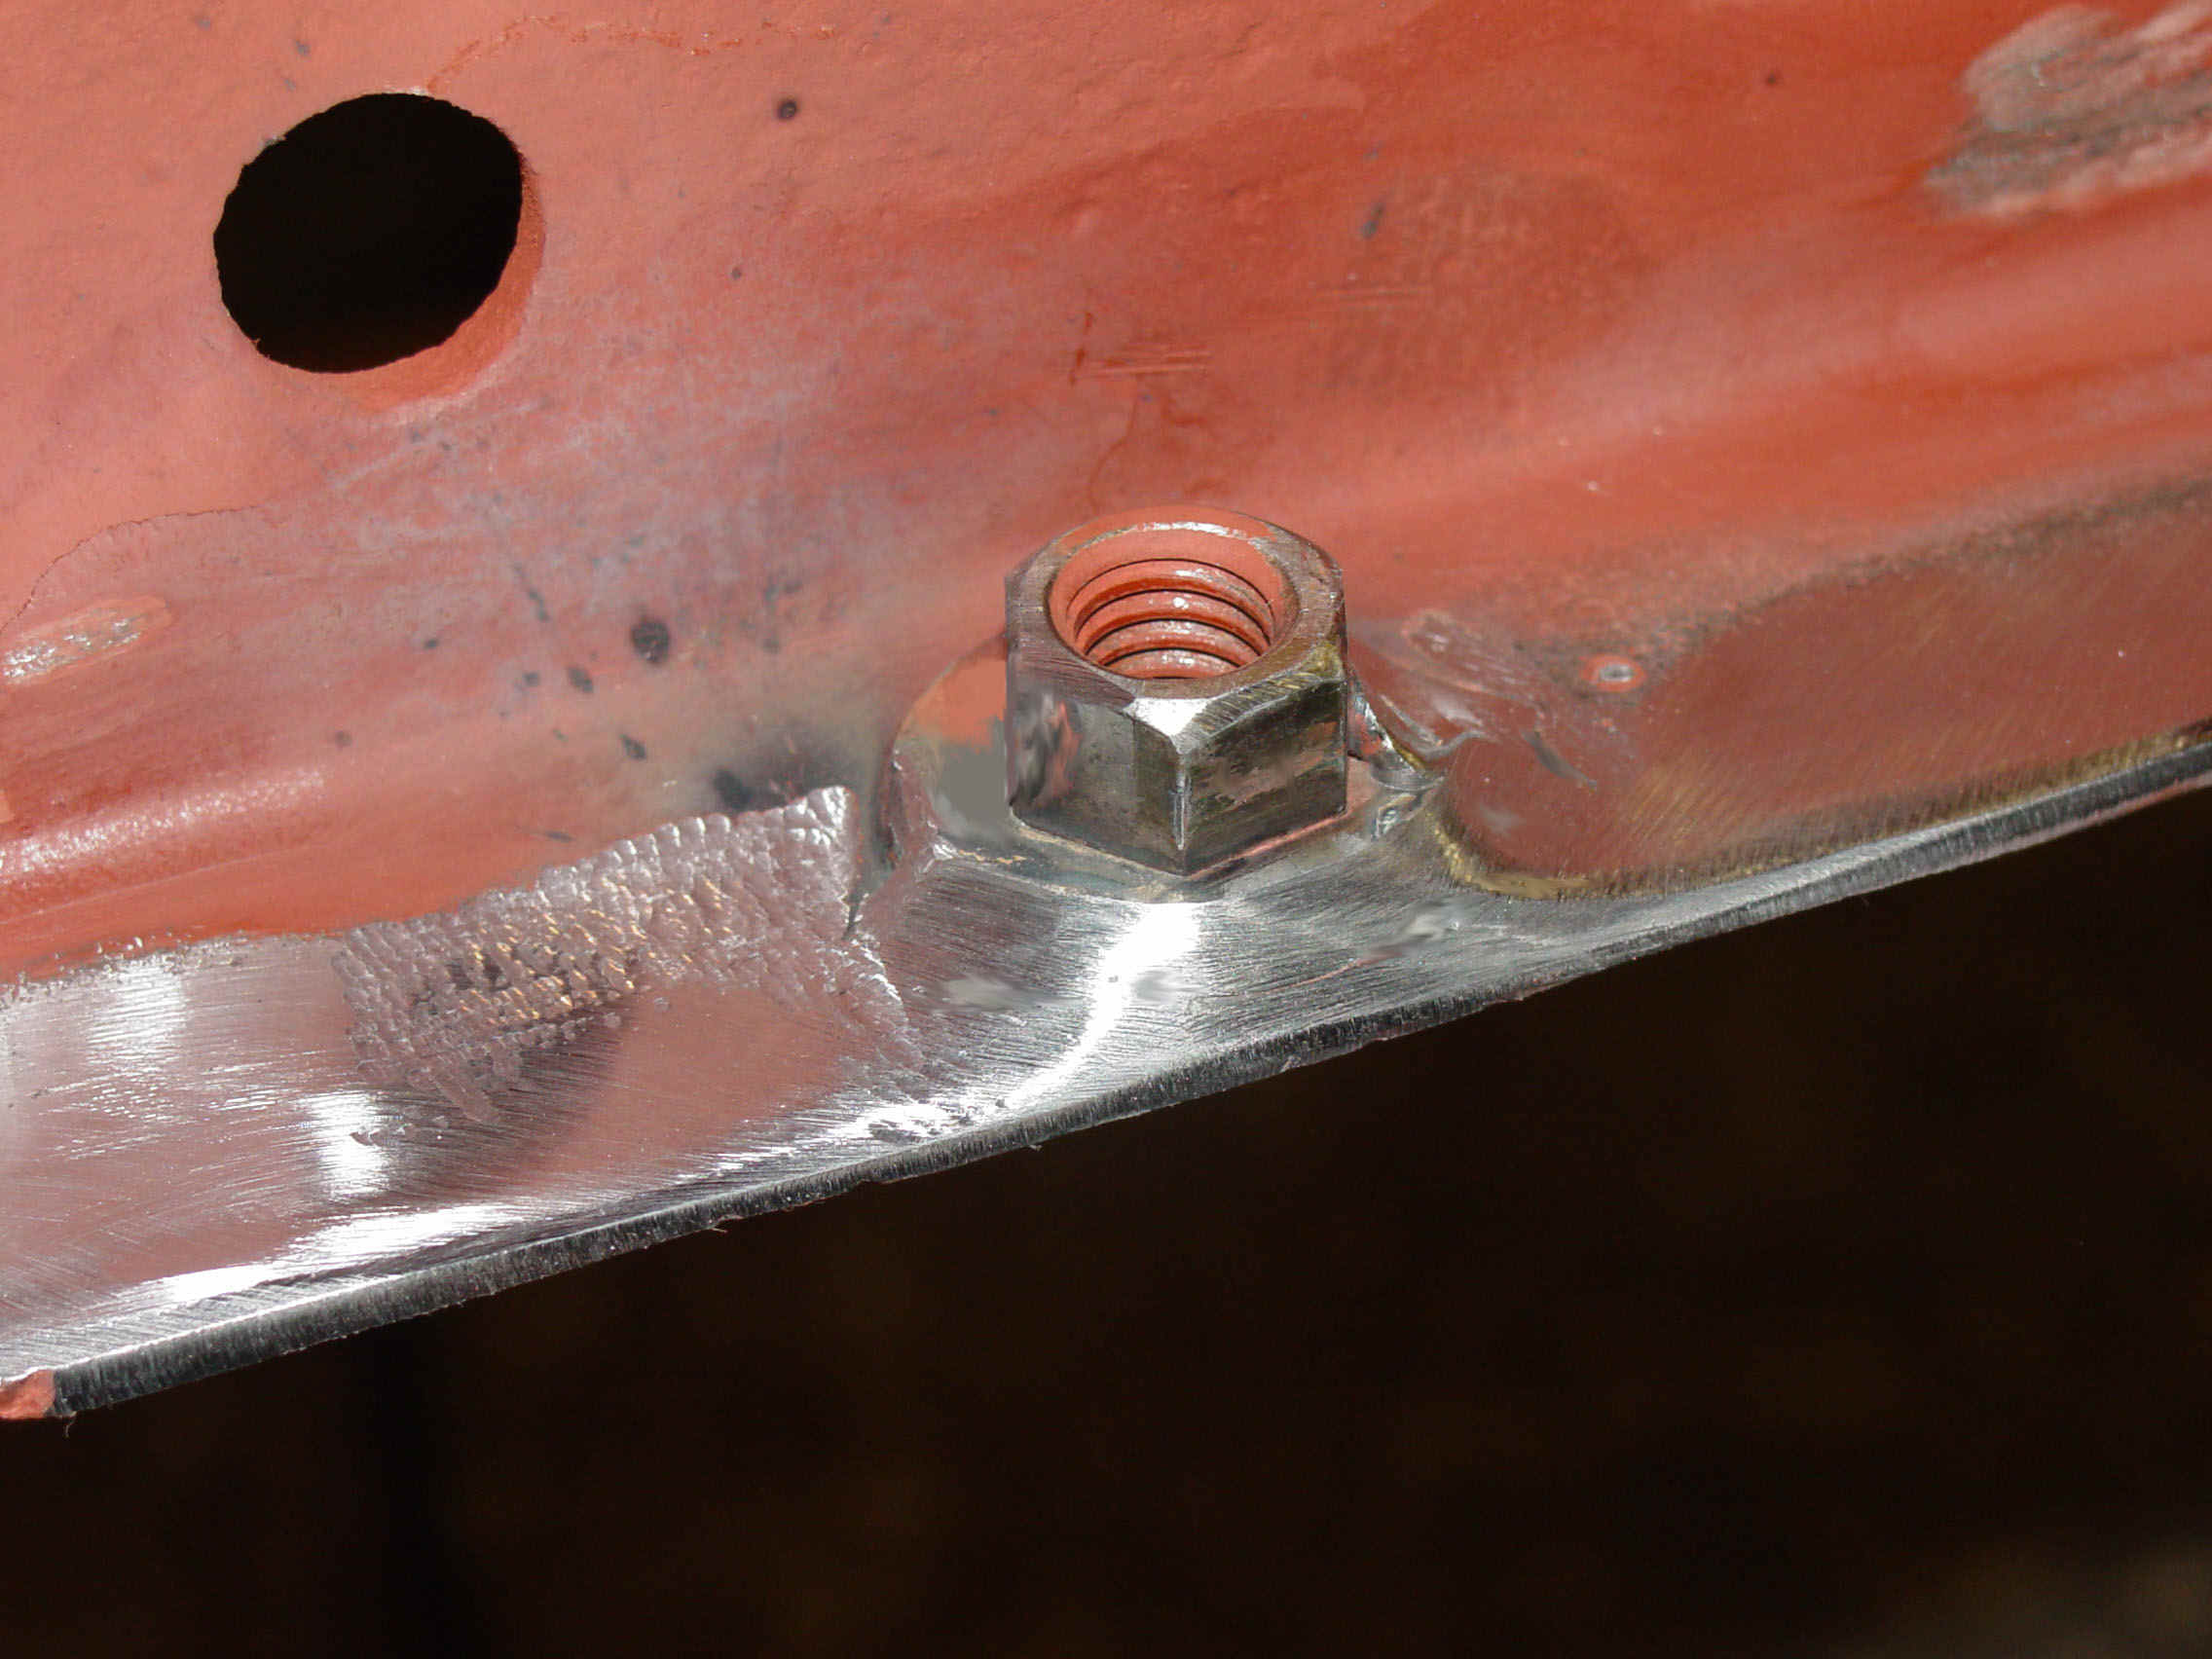
The pic above is a little out of focus but it's main mission to to show the forward mounting location. The standard nuts on all four corners will be replaced with a welded in flanged locknut. This will allow the bolts to be removed and replaced (should the need arise to remove tank) and still be able to thread the bolts in easily.
I used 1/4" hardware to hold the tank to the frame across the front and rear flanges. and 3/8" to mount the frame to the frame rails.. 22 gallons of gasoline weights around 137 pounds plus approximately 20-25 lbs for the tank/frame... so we're not dealing with a lot of weight. You can go bigger if you want...it's just larger holes !
You can see the use of standard hardware to hold the tank frame to the frame rail. After some discussion with others, the point was made that should the tank need to be removed it might prove a problem to install the nuts and tighten them... good thought. Using flange (or flared) nuts
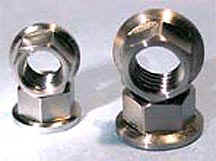
I tack welded them to the frame rail. The flare gives you a little more material to weld too. The welded nut gave me a secure threaded nut that will make it easier to attach the tank frame.
TANK VENTING
I received an email from Quinn Bergmann asking me how I handled the tank venting. I replied that I was sure there was a vent tube in the sending unit. But I went to look and there was none ! Your mind plays like that when you're old.... just 'cause it can. So Quinn came up with this dandy venting work around that should serve him, me and all yall well.
I'll cut/paste Quinn's own explanation (complete with part #s, how nice is that of a guy) with his pictures... it's a neat job and a very inexpensive necessary addition to the mustang tank... AND a nice fix on the problem of how to get a connection between the filler hole and the marine neck a lot of us plan to use.... pay attention...
John:
Well My tank is done, and I owe you a lot of thanks. I did pretty much every thing you showed in your tech article. But as a follow-up on the vent on the tank I did find something that I think will work well, and also be a safety feature. From "TANKS" inc. I purchased several items.
1. Vent Valve Item # V V [Roll over vent valve]
2. 1/4" NPT Half Coupling-Steel
3. 2" ID 45 Degree Fule Hose.
Then from ShipStore.com. I purched.
1. Deck Plate Gas 2" Fuel Filler. For mounting in the bed of the truck.
Then it was just having the 1/4" half coupling welded to the top of the "New" tank. Also because of the two different metals when tig welding [He thinks there may be some cast metal in the Half Coupling] which caused some problems when welding, as far as the tank metal cooling faster than the coupling. Creating some possible pin holes. He though that he had a good weld but to be sure there where no leaks I also applied a tank patch material around the weld. Then applying a good rust preventing paint on the tank, and tank frame. I used a product called Por 15, and have had good luck with it.
Then there was the fitting of the 2" 45degree fuel hose to the New tank. The filler pipe was closer to 2 1/4", so I used a good heat gun which helped soften up the rubber enough to slide it on the the filler pipe on the tank. One thing that is important about the Hose I bought is the angle of the hose. I bought the 45 Degree hose, and I know now that that is the wrong angle. Now that I've finished. What I should have done was checked the angle of the filler tube on the tank before I purchased the fuel hose. Even though everything worked it may have been better with the 60 Degree Hose.
Also one nice thing about the Vent Valve is it also a Roll over vent valve. No spillage if in the unlikely event the truck where to end up on it's top or side. I have the tube to connect to the vent valve, and a piece of some kind of filter screen on the other end to keep bugs, and debris out. I will run the tube to a higher location above the truck bed.
Along with all of this I'm sending some pictures of what was done, and if you wish to add this to your tech article you sure can. I know how long it takes to figure out some of this stuff, and if this helps save someone time, as your article did for me. Then go ahead and use the information. I'll send you the pictures separately.
Thanks again.
Quinn
and here are the pics...
the first one shows the 1/4" coupling tig welded into the tank
... AGAIN REMEMBER
DO NOT ATTEMPT THIS IF THE TANK HAS OR HAS HAD FUEL IN IT
THERE ARE SPECIAL THINGS YOU NEED TO DO TO KEEP FROM BLOWING YOURSELF UP. GASOLINE FUMES CAN LINGER IN A TANK FOR YEARS
FIND A QUALIFIED WELDER TO ATTEMPT THIS WITH A USED TANK
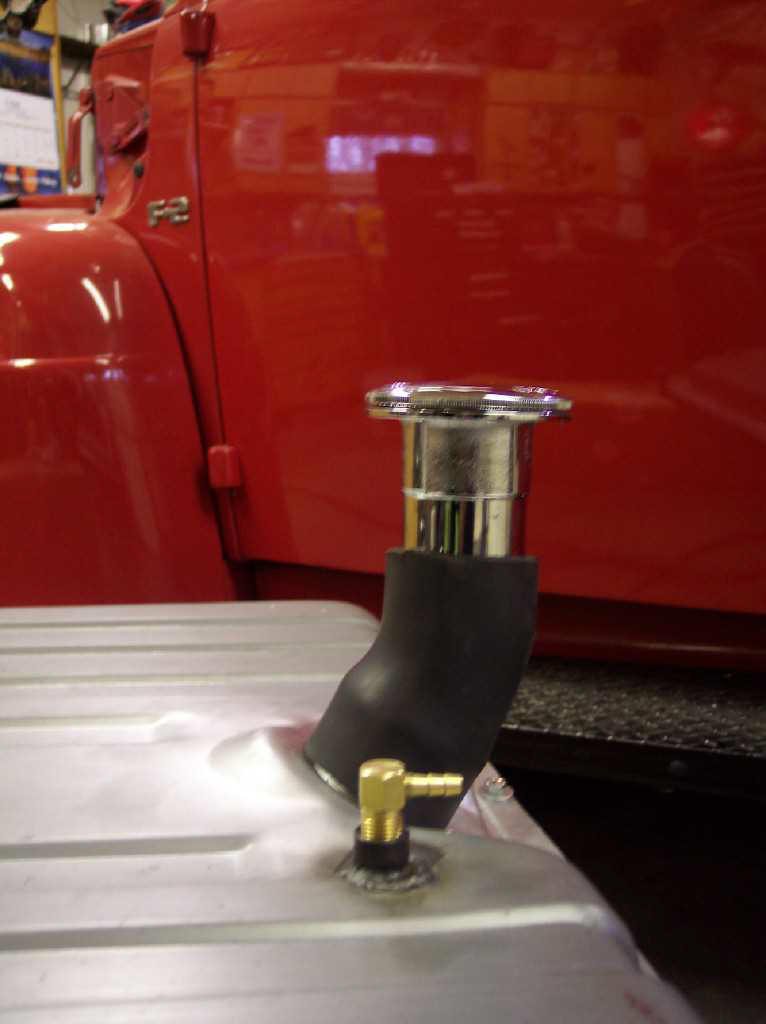
The next picture shows the tank with the vent installed and the 45? filler neck tube holding the marine filler top.
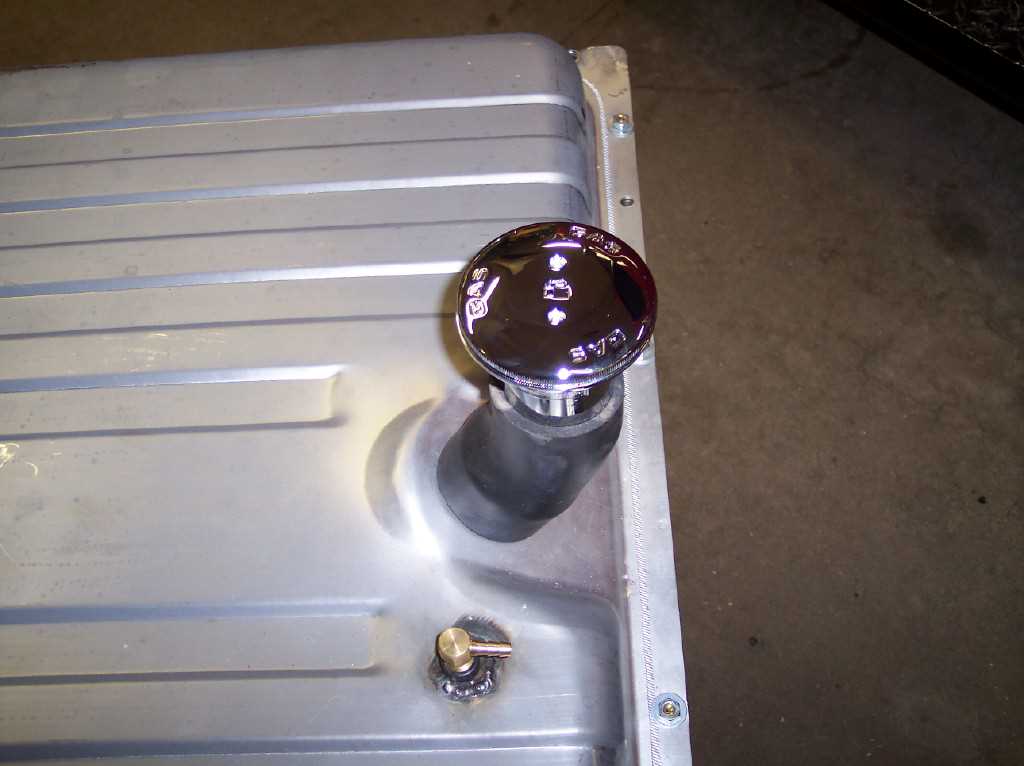
and finally one more overhead view
I think Quinn did a great job solving this problem and I appreciate him letting me add it to my article... hope it helps some other folks as well..
More on my tank
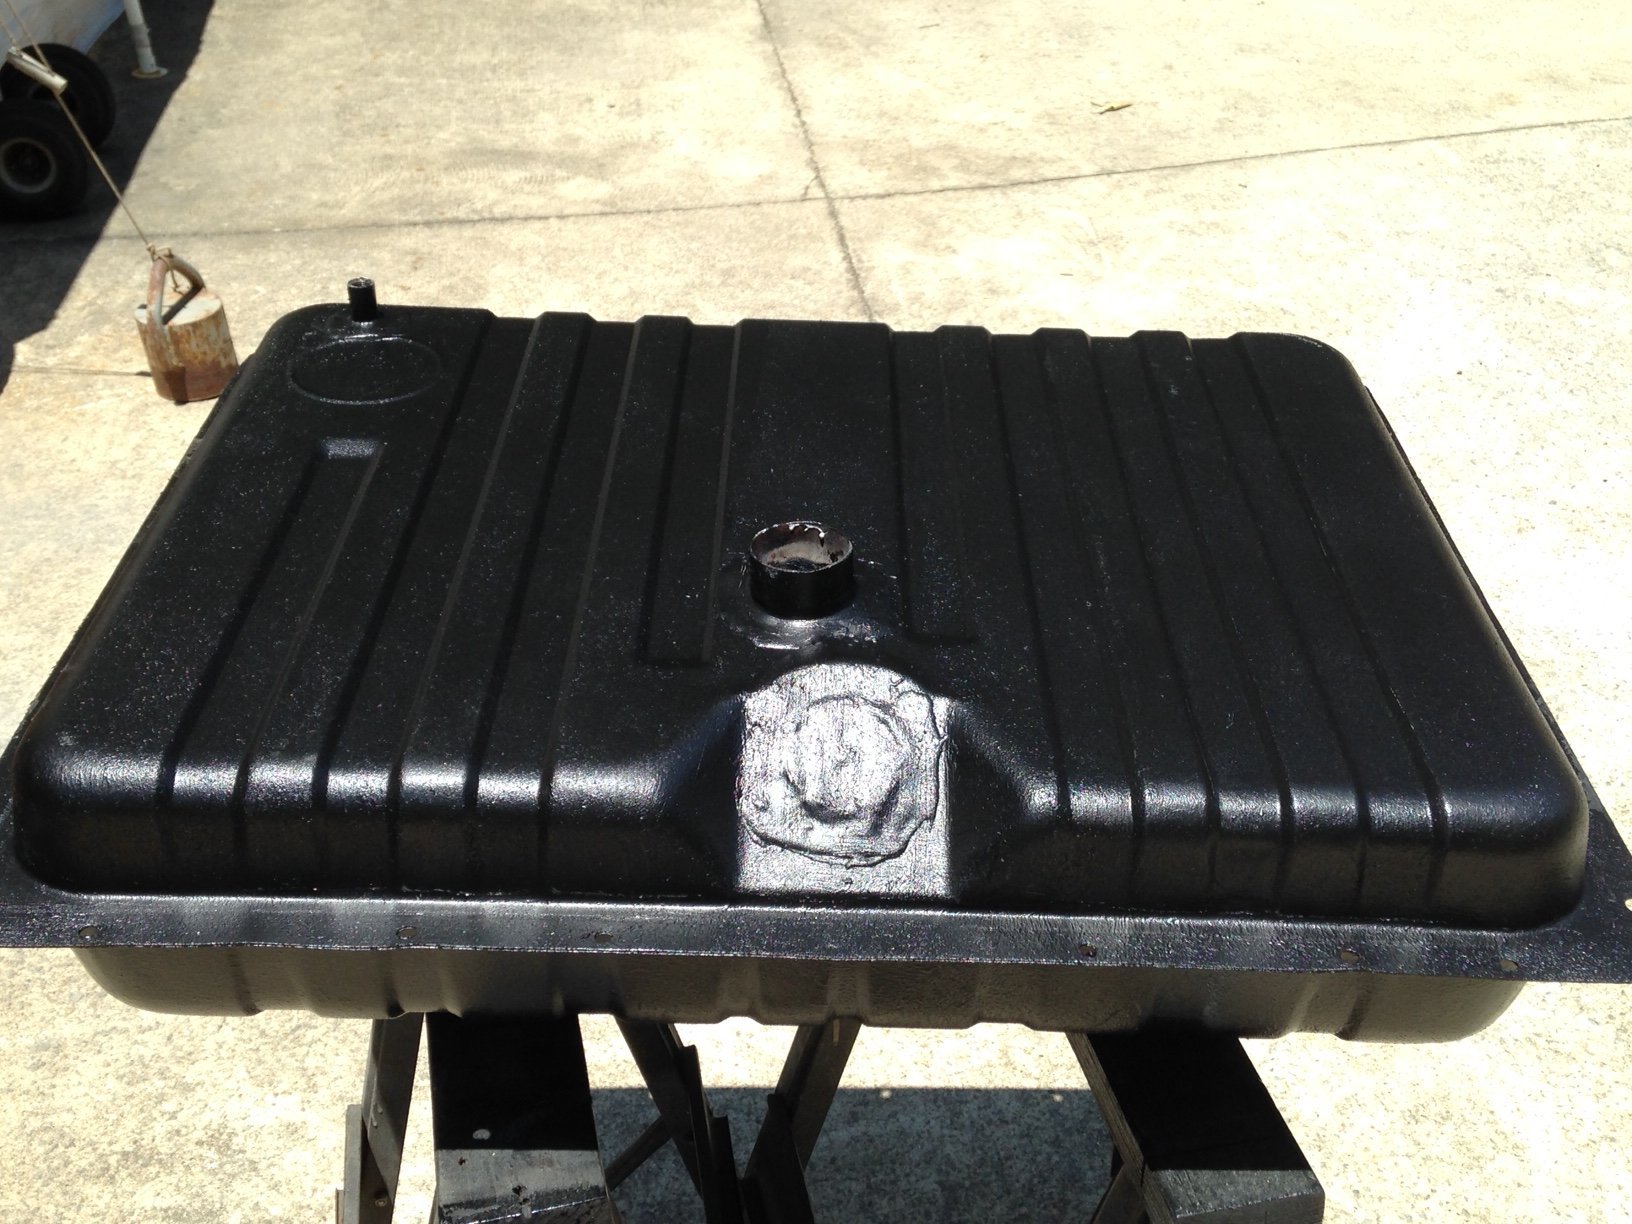
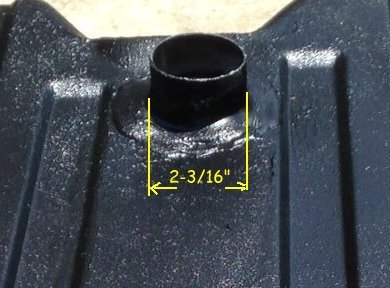
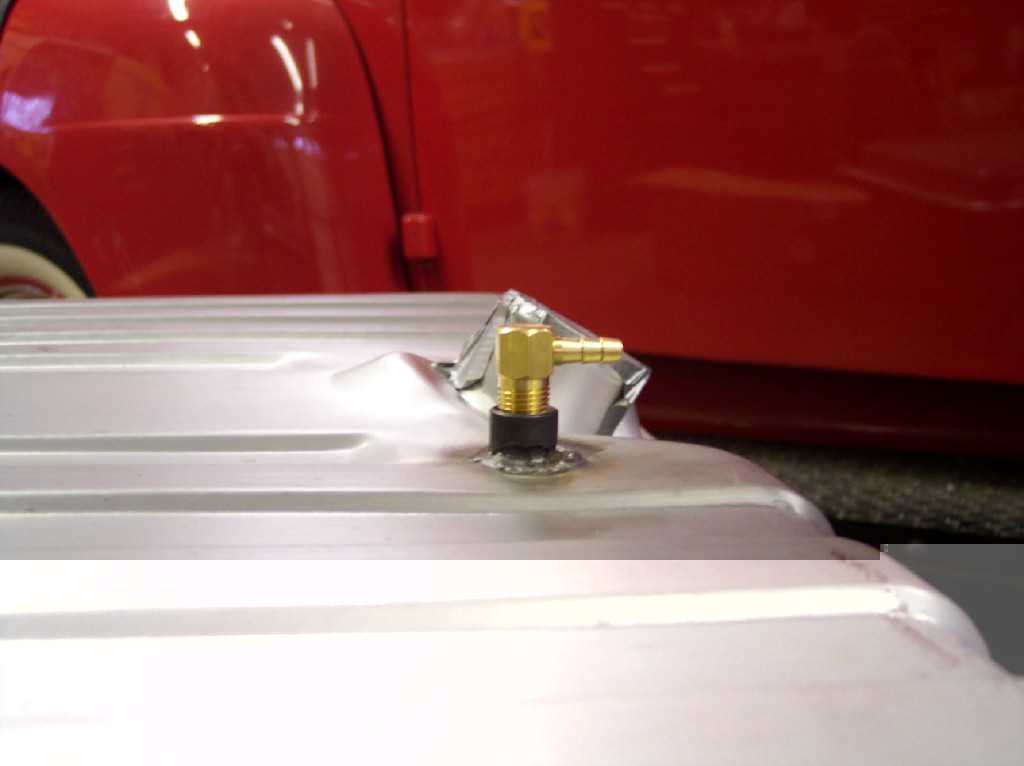
I've finally gotten back to working on my truck again and had left the tank just unfinished till now. I'm trying to finish up loose ends since we're nearly ready for paint. I wasn't sure how I was going to finish off the tank... just clear coat it, paint it to match the frame... but finally I decided to undercoat it with bed liner finish. It should protect it fine and cuts down a little on the empty can rattle it has. Before I coated it I needed to move the gas filler pipe to the center of the tank and up on the flat part... and add a rollover valve/vent. After searching I found I did not get a picture of the tank with the new holes cut BEFORE I coated it. I think I was in a hurry to get to the welders. You can see below in the rear left corner where the vent was put. A 3/8" nipple was tig welded into the tank and the vent valve screws into that. The gas filler was moved up top and centered on the tank... it will sit in the center of one of the bed boards. My filler tube was 2-3/16" in diameter (larger than I thought) and it necessitated getting a different fuel hose to connect the filler outlet to the neck of the tank. I found a 2" to 2-1/4 reducing hose that fit perfect on each end... couple of screw clamps and we're in business (pic down below)
|
|
|
|
| Looking at the picture above you can see where the old filler hole was. After we welded in a plug we pressure tested it and found no leaks... but because I wear pants and suspenders I covered all three welded places with industrial strength epoxy.
So after the truck is painted and reassembled but before the bed wood is finished... the hole for the filler cap will be cut in the bed wood, the filler tube cut to length, then... after finish the clamps will be installed and the deal is done... only thing left will be installing the sending unit, routing the vent line, connecting the fuel line and filling it up. |
| Boilerplate denial of liability
statement… i.e. the fine print |