INSTALLING A TRAILER HITCH
ON A '53 F-100
| The
plan from the very beginning was to pull a neat little trailer made from a Coco-Cola
cooler box. I'd seen several at the shows and liked them from the start. They
give you a good amount of waterproof storage and keeps you from scratching up that nice
bed wood. Here's an example of what I want. Someone did a nice job putting
this together. 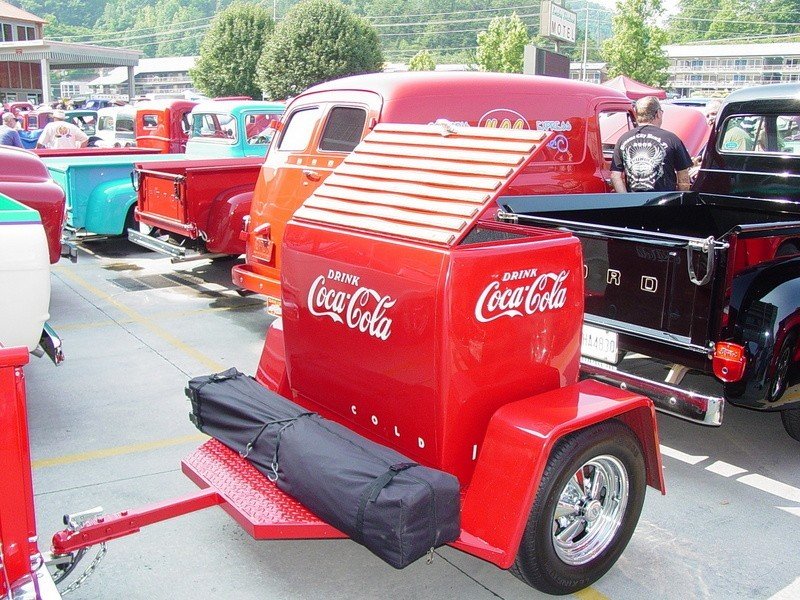 Well, as the plan came together the trailer idea was put on the back burner... finishing the truck first was the primary objective. So, things got done and peices came together until recently when I was talking to my body man/design helper. We were working on fitting up the bed panels and rear roll pan and I remembered the trailer. I figured I'd better fit the hitch into the plans before we got too far along. The fuel tank had already been moved to the rear of the truck fitted between the frame rails and it took up a fair amount of room. This is what I had to work with when I finally remembered I needed to stick something else in there. 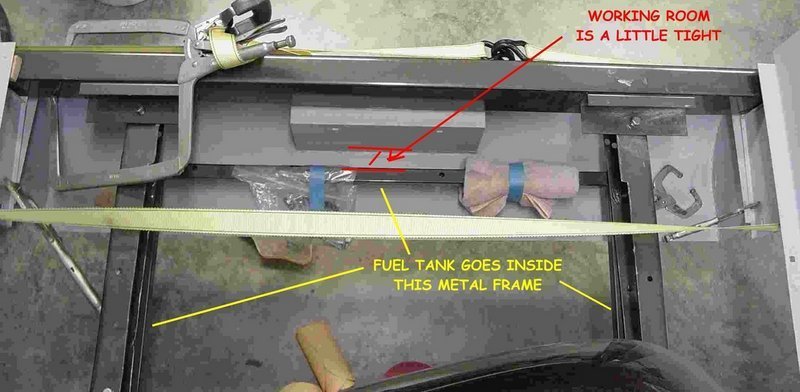 I started researching
what was available... most of the manufactured hitches had a long receiver neck...
5-7" and that would stick too far out the back. I needed something with a short
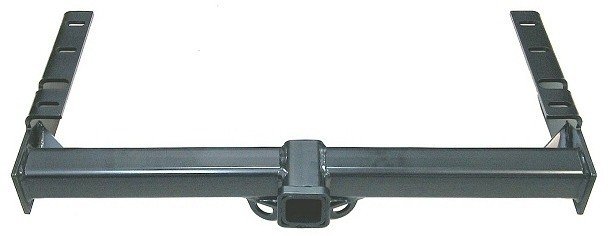
neck and the proper width and the only thing I could find came from Early Classic.
This hitch was built to bolt under the frame rails. but it was the right width and
had a short neck. My problem was that the fuel tank also mounted under the frame.
I was hoping that I could modify the mounts to make it work for me... Order
was placed.
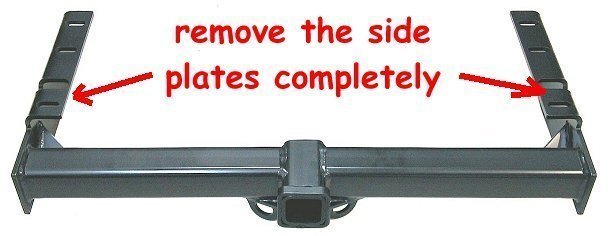
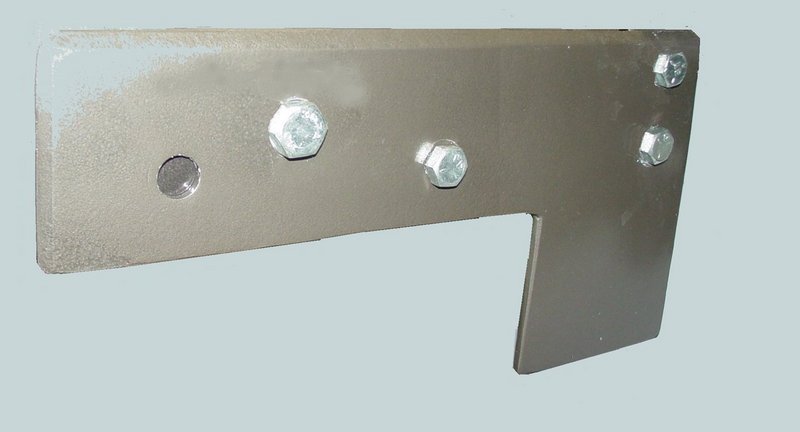
NOW I had something could work with. I cut two side plates to attach the draw bar to the frame rails on the outside of the frame. I drilled the mounting holes to match the existing holes in the frame rails where the rear crossmember bolted on.
Once these were drilled and dressed a little, I bolted them onto each
frame rail to check for fit.
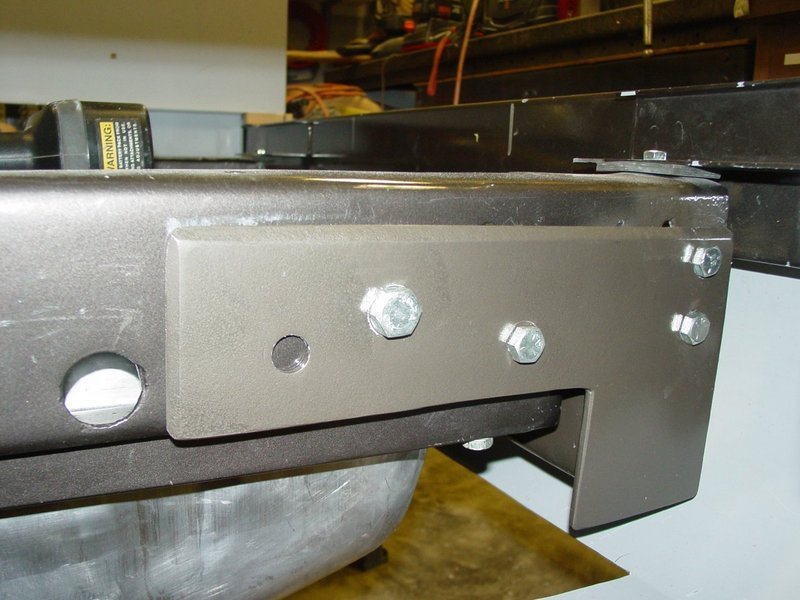
When I liked the fit I slid the cross bar into place... checked for plumb and level and when it was just right I tack welded the cross bar to the two side plates .After the tack welds cooled a bit I carefully removed the assembly to prep for the final welding. I added a cross brace made from angle iron and two nuts and bolted it at the end of the assembly away from the cross bar. This should prevent any bending due to heat. I wanted the side plates to stay parallel. I had already cleaned the weld areas of paint, so they were ready to weld. I set the whole thing up on the bench and welded the crap out of it. I moved around doing the welding, not concentrating on one place. I welded one side on one end then moved to the opposite side on the opposite end until every thing was done. I let it cool down while I did some other things and came back to it. Another pass was added in the same way. later I did a final pass over the first two. My welding skills are somewhat lacking from lack of practice but I got good penetration on my welds and I don't worry about the strength. The cosmetics suffer somewhat. Next, I Cleaned everything with lacquer thinner and then prep-solv to remove grease and oil then sprayed it with a coat of etching primer. 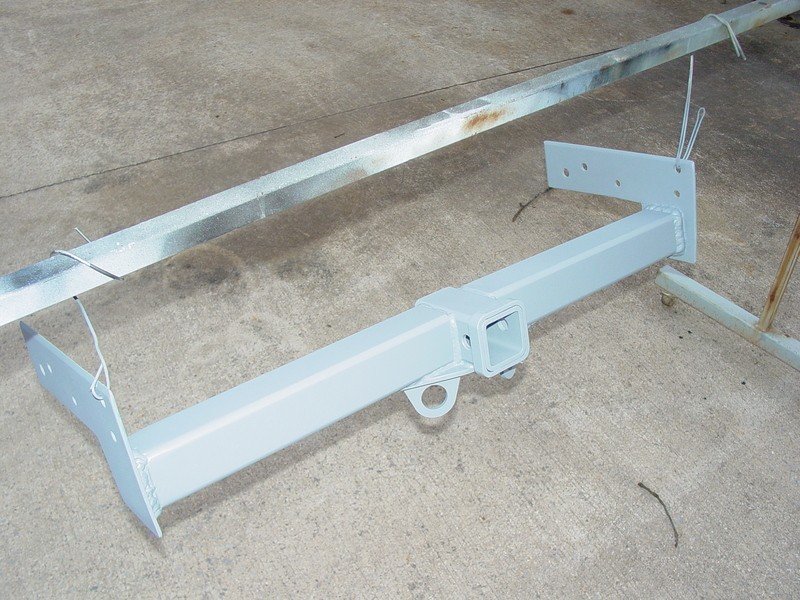 After the primer had dried, I followed it up
with about three coats of body color and let that sit for a while... actually the next
day. This hitch is heavy. I'd estimate about 40 pounds and it's cumbersome to
handle by yourself sitting under the frame trying to hold it in place and stick a bolt
through a hole that is 'just about' in the right place. I had to ask for assistance
from my ever present shop helper... my floor jack. A long time ago I fabricated a
helper pad... a piece of 3/4" plywood with a plate and 1" stub bolted to it.
That stub fits in the cradle hole on the floor jack. I've used it for a
hundred different things, but most recently for installing the fuel tank at the rear of
the truck and now the hitch. Setting the hitch on the pad and blocking it up to
level, I raised it slowly moving it into place around the frame rails. When the
cross bar hit the frame rail, I 'persuaded' it forward a bit with a rubber hammer until
all the holes lined up and the bolts went in. Ratchet/wrench/ratchet/wrench and it's
in. 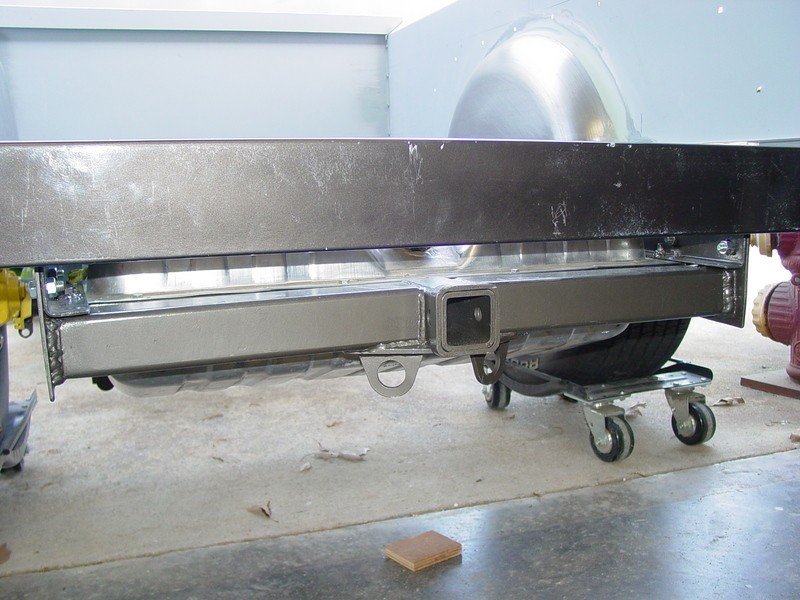 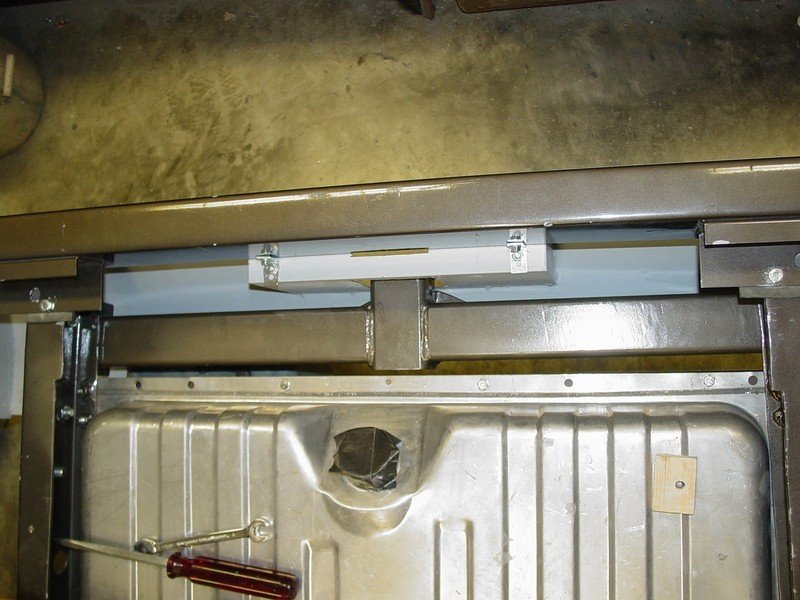 The receiver tube for the hitch even being as short as it was, was
going to stick out through the roll pan. There just was not enough room to stuff it
all behind it. Even with moving the tank forward as far as possible, I still had about
3/4" of 'stickout' in the tag box on the roll pan. This was acceptable since I
can just move the tag mount out that much and cover the hitch and the tag will still be
recessed in the box. 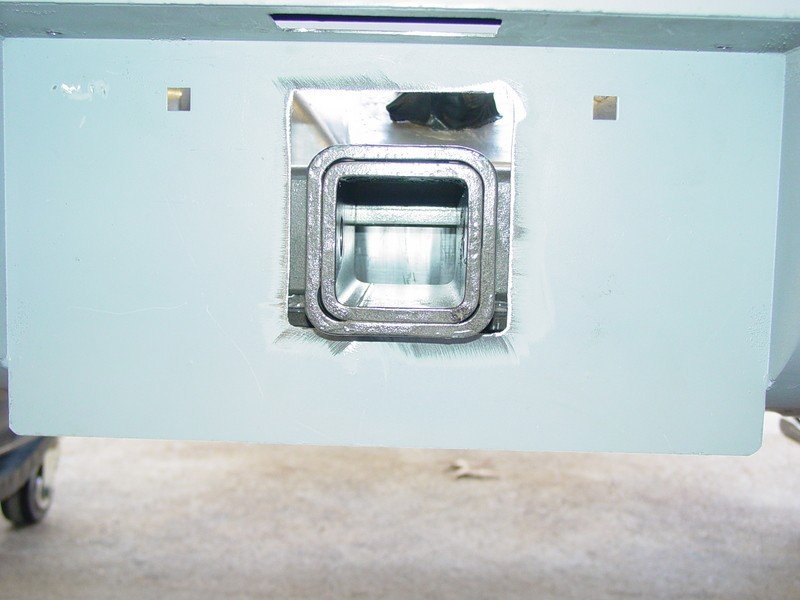 I need to
dress the hole up a little but it works. My dremel tool is on loan right now.
After final paint the tag will be mounted on this frame... It will flip up and the
draw bar can be slid into the tube. It will take a little effort to get the pin in
and clipped and the safety chains attached... but no more than I will use it, I can deal
with that. Boilerplate
denial of liability statement… i.e. the
fine print This
device is something I came up with to prevent me from spending too many dollars on a
commercial patented device, although that part of the plan didn't work. It is not
patented, engineered or even perfect… it is what it is, a home made
contraption. I’m sure there are alternatives to this design some even
better/cheaper/easier, I just didn’t think of them or warrant them necessary... there
are several similar units on the internet waiting behind Google for you to
see/copy/build…(just like I did) This work was done by me and for me or by
friends who were nice enough to help me out. I only ask that if you reproduce it give me
credit for it and if you make money from it… give me my percentage. Since
I have no way of knowing your level of competence, welding or cutting skills, mechanical
ability or estimated intelligence, there are no guaranties or warranties either verbal,
written or implied with this article. Along with this article I am giving you absolutely
free of charge…that’s right ! FREE !!...the liability,
total and complete liability for the use or misuse of this contraption will be yours and
yours alone. It
belongs to you and keep that in mind… I am in no way responsible for any damage,
injury or embarrassment you may suffer from the use of this homemade device. If
it doesn’t look like something you’d be comfortable using… don’t
build/use it. If you’re not intelligent enough to make that
decision about your comfort level… ask a family member or friend.. but here’s a
hint… if you have to ask someone… don’t build it ! Pictures
were made at different stages of construction and all assemblies in pictures may not be
complete in each shot. I.e.. a picture showing ‘some parts’ only means that it
was not finished, but I’ve tried to make the idea complete to the best of my ability.
If you have questions or see mistakes or problems, let me know by e-mail and I’ll
make the corrections if possible.. Use
these ideas at your own risk. Modify them at your discretion and to suit your purpose.
Your mileage may vary, batteries not included, much assembly required... wait one hour
after building to enter the water, additional charges may apply. not all applicants will
qualify for advertised A.P.R., for ages 10 to adult…side effects are comparable to
placebos. Do not take drugs when building or operating machinery. JUST SAY NO. Copyright . 2012 John Niolon, All International Rights Reserved. This document may not be copied or published without prior written consent of the author- jniolon@att.net |