|
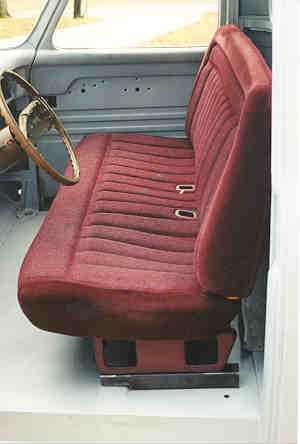
After searching the salvage yards and finding a primo set of Caddy 60/40 - 6 way power seats, paying the man and lugging them home, I had a revelation. They look like a sectional sofa in the cab of a truck. These seats are BIG. Plenty comfortable.... Infinitely adjustable... but BIG !! So the search went on. The Ford Truck Nationals at Pigeon Forge is like a walk through Sears & Roebuck Catalog of truck parts and ideas. Virtually every part sold for 53-56 trucks can be seen over that four days. You can walk and browse and go back and compare and look some more. There are hundreds and hundreds of combinations of parts, pieces and unique ideas, too much in fact. There are too many choices. But, if you're looking for seat ideas, this is the place to go. From stock seats to import bucket seats...ReCarro and Glides... even Kirkey racing seats. But for installation ease and general comfort the Mid 80's Chevy truck bench seats are the overall choice. They are readily available, their backs fold forward for access to the area behind the seat (good storage), seat belt installation is easy and you could fill the bed of your pickup with the number of them you could buy with the money for one set of Glides. Mine came from a local Van & Truck Conversion shop. It's in good shape and $50.00 brought it home. It will need a new set of covers... but hey... the whole interior will be have to be done anyway. Fitting the seat to the cab....
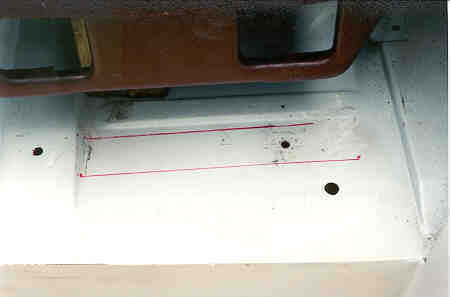
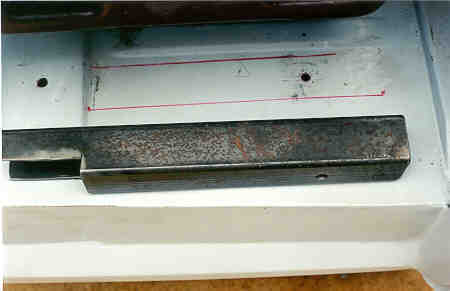
Adjusting the seat.... Sit in the seat ... hopefully your steering column is installed and functional. Check out the feel. How is your visibility ?? Are you sitting too low ?? Does your arm hang on the window comfortably? Mine was about 2" too low. Trial fits with 2x4's and shims of different thicknesses determined the amount. Your height and weight will have a role in this formula also. Is someone else going to drive your truck ??? I had to consider that the seat must adjust to a comfortable position for my 5' wife. The seat had to be pushed a little forward to get the slide to move it close enough for her comfort. There was plenty of adjustment in the seat slide for my 6' frame to be comfortable also. There is a raised rail across the cab floor. This was where the old stock seats bolted in. The front of the new seat frame was on this rail while the rear was on the cab floor. I cut a two pieces of 2x2 square tubing to the length of the seat frame. Then with a portable band saw, I removed a notch for the raised rail. I then marked the four mounting holes on the cab floor and also on the two pieces of tubing. I planned on using 7/16 hardware so my holes were drilled to 1/2". A drill press is the best way to keep the holes plumb when drilling through the tubing.
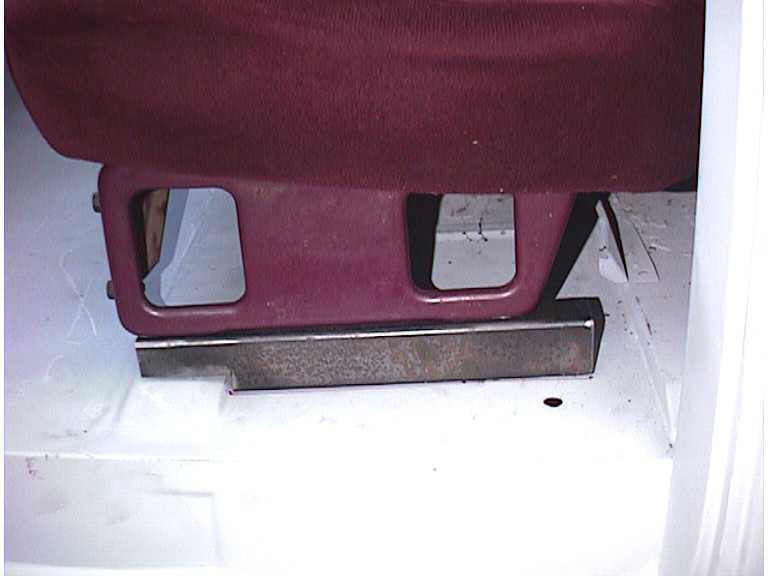
There is a reinforcing channel that runs under the raised rail at the front of the seat. A bolt, flat washer, lockwasher and nut were adequate to hold the seat at the front. At the rear of the seat I used bolts, large fender washers, lockwashers and nuts. In the future the fender washers will be replaced with a flat plate that will reinforce the floor pan area under the seat and the seat belt mounting bolts. I think it would take a heck of a collision to tear the seat from the truck but plate is cheap and safety should be a concern. Disclaimer paragraph |