THE BLUNDER
The reason for all the measurements
is that my truck is in Hueytown and my engine is 70 miles away… while fitting up the
tilt front end and attaching fenders and such I thought I’d drop the radiator into
its spot to see how things were coming out…. Therein lies the tale… the space
where my radiator is to sit…. Isn’t there !
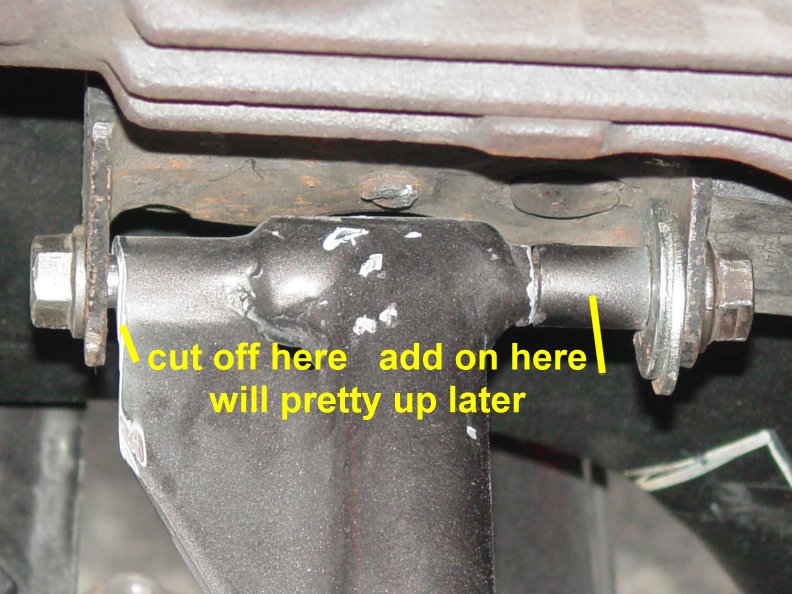
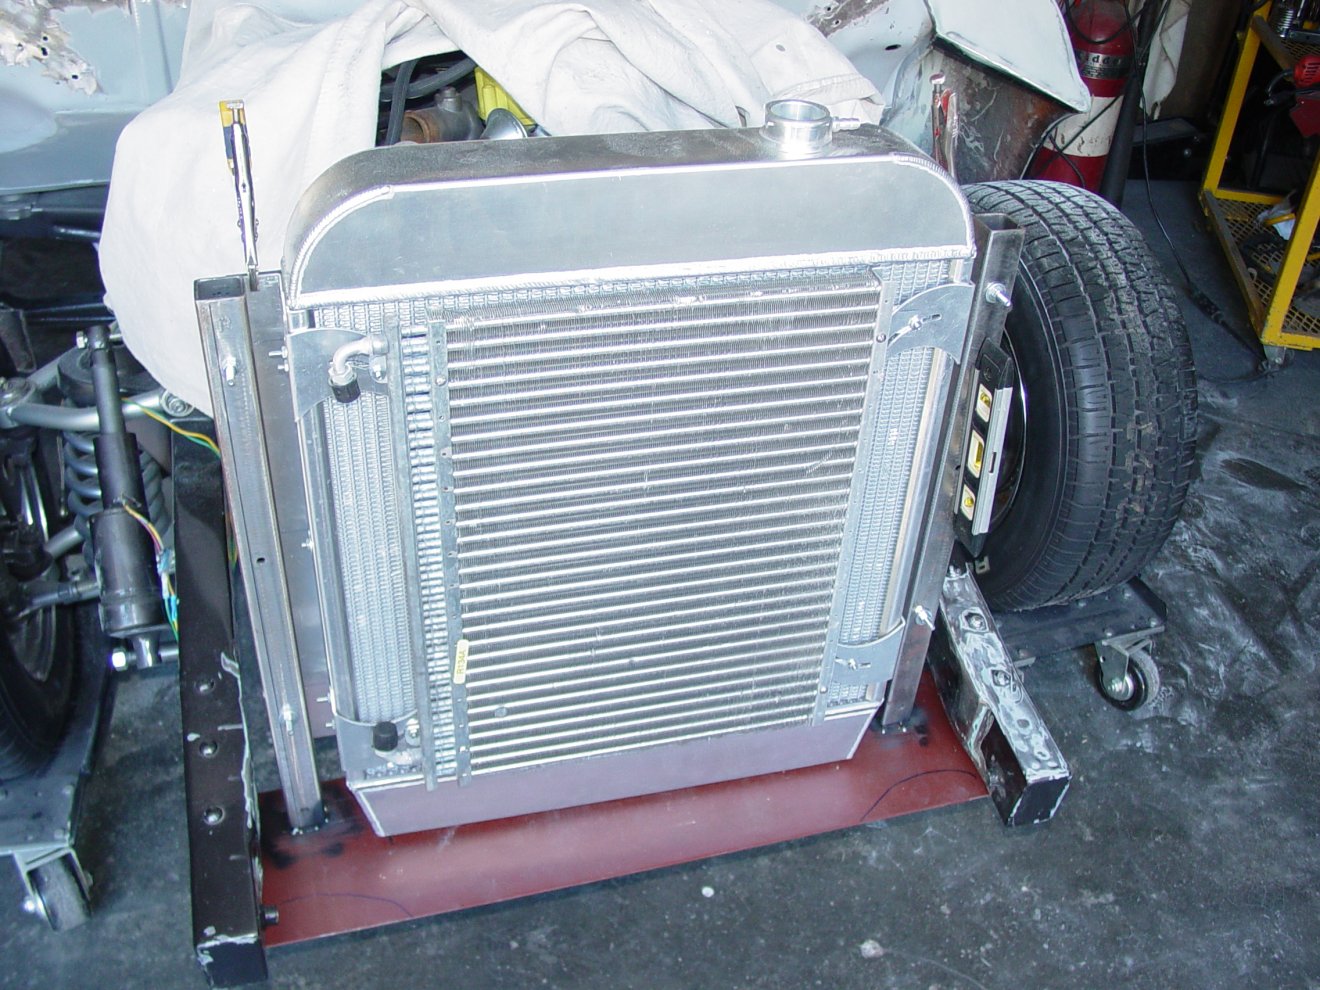
When we were mounting up the radiator
( a nice shiny 4 tube cross flow aluminum unit by PRC) we used a fabricated mount similar
to what they use on drag cars… two posts mounted on the crossmember (the stubs) and
two mounted to the radiator that slide over the stubs… kinda like this
|
|
|
|
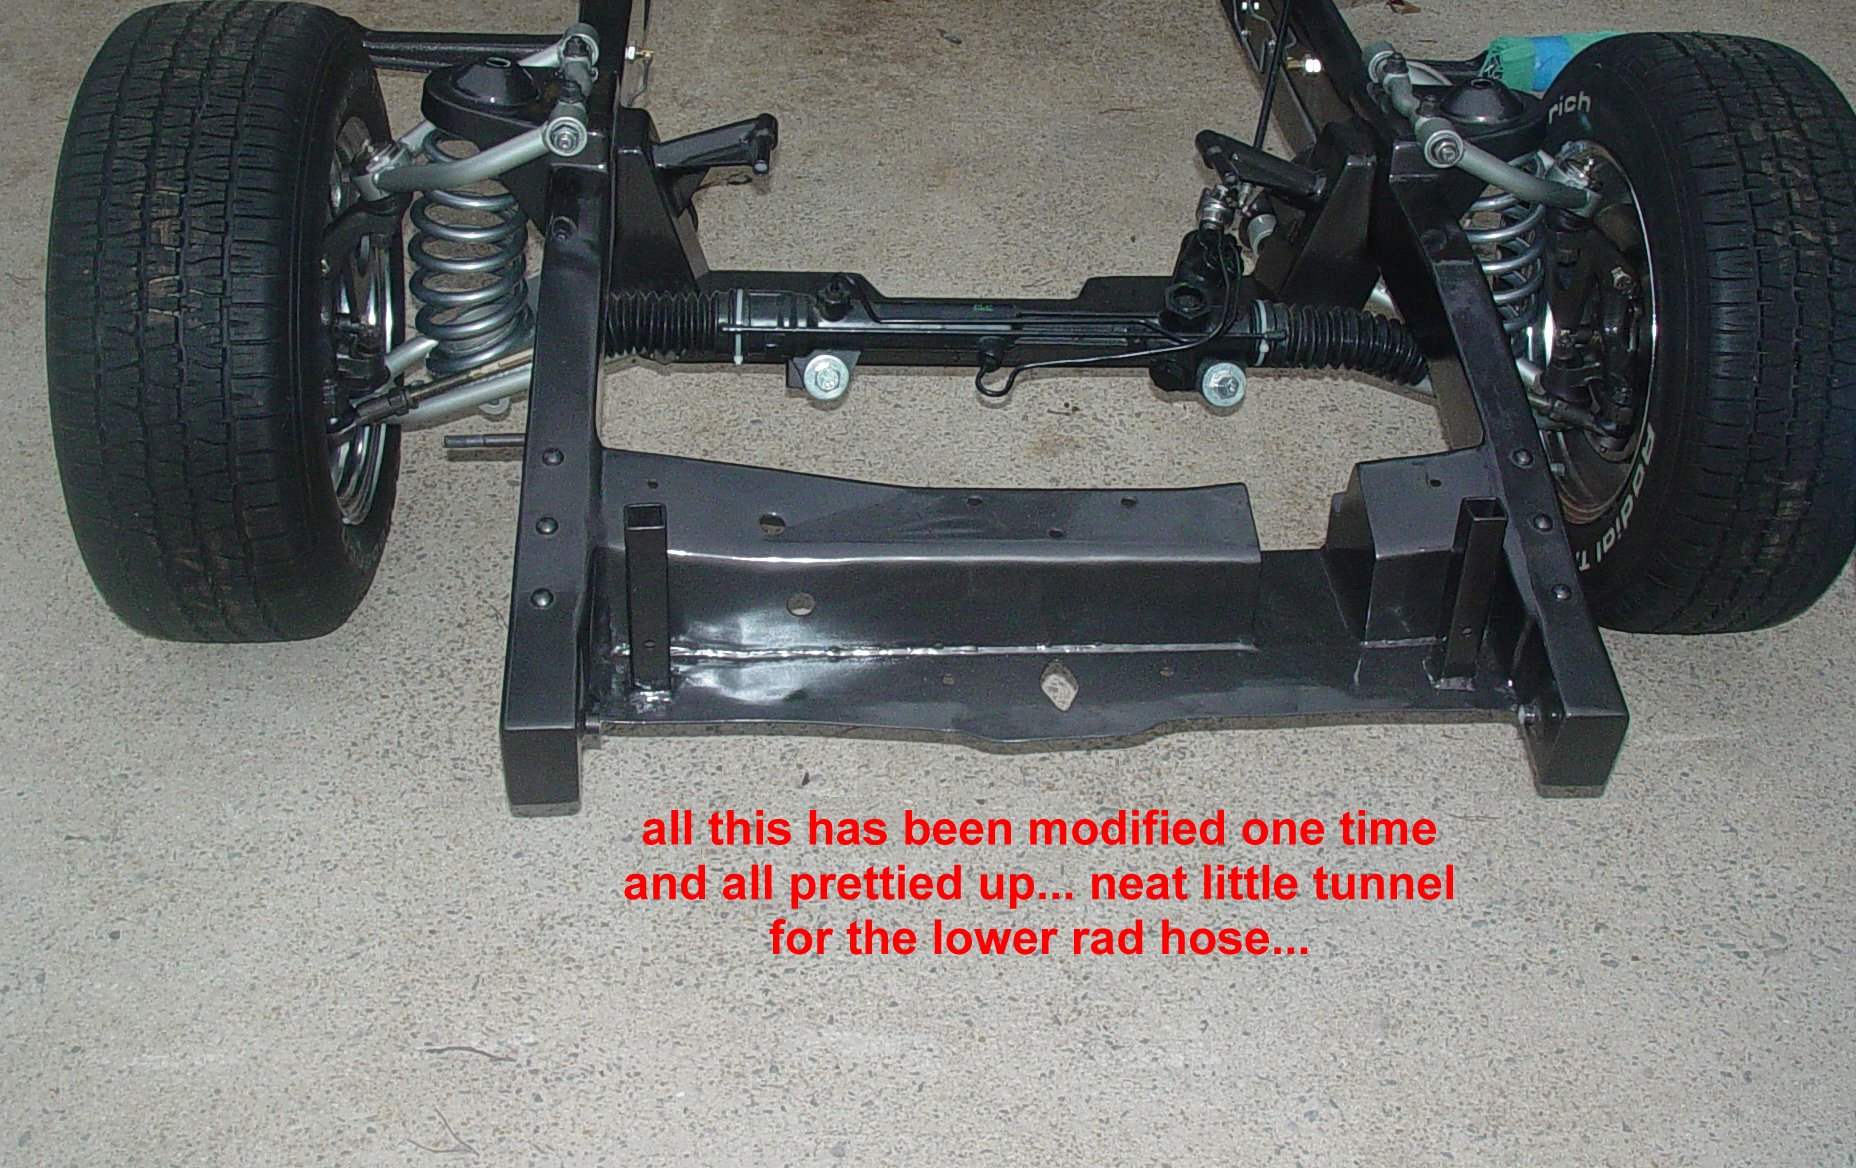
We did some ‘rearranging’
of the front cross member, added a window for the lower
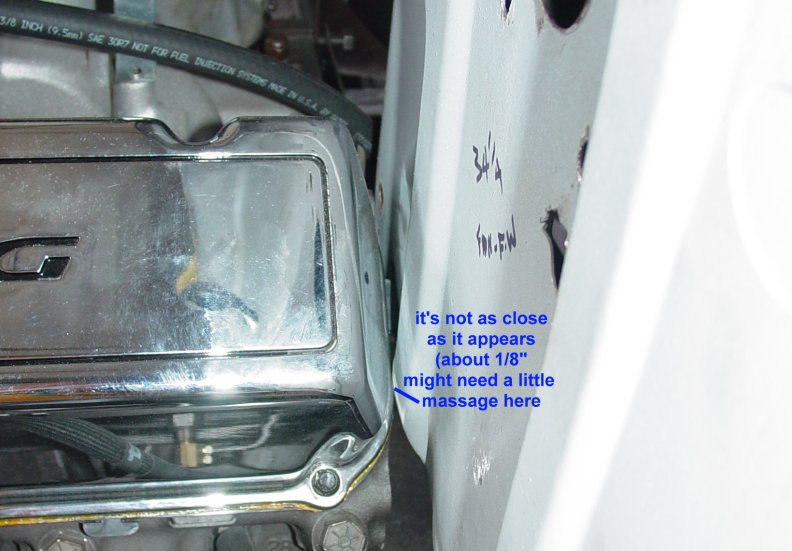
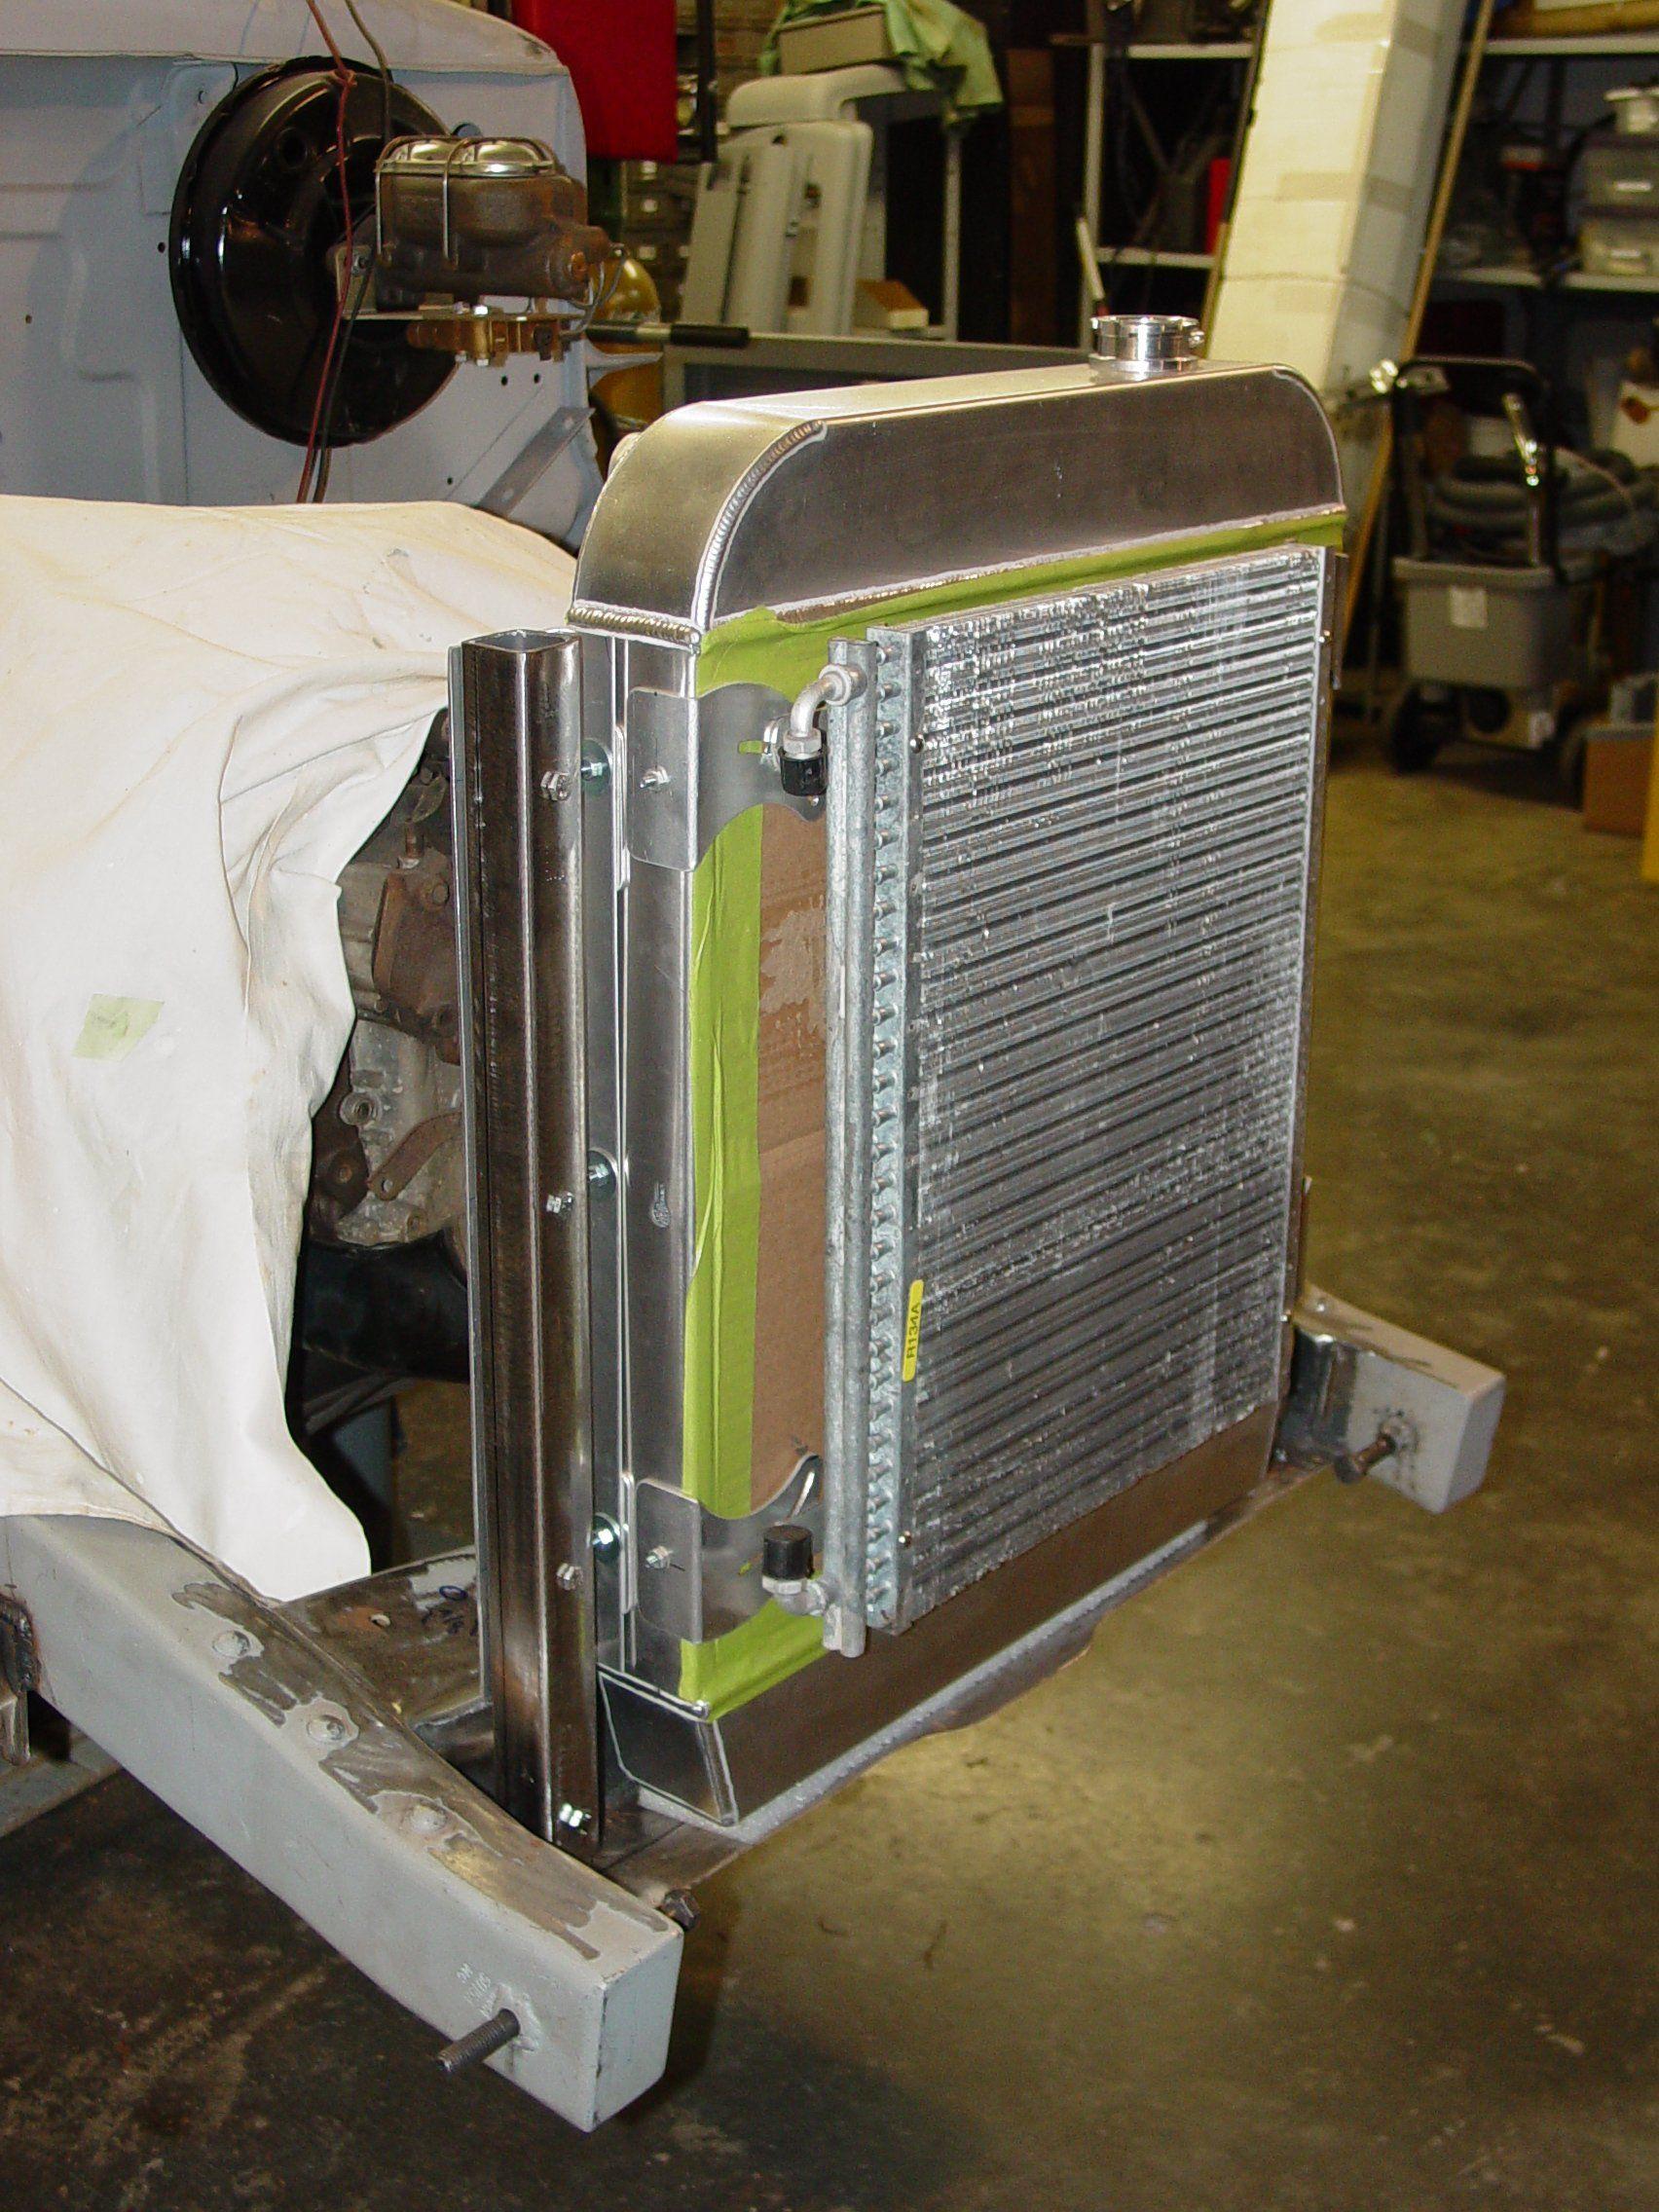
Now back to today… the tilt hood
is in place and in the ‘up’ position. When I put the radiator over it’s
stubs … it was within 1/2" of the a/c coil and the hood closes about
1/4"” before the lip on the inside of the air deflector wants to crush the a/c
coil. It protrudes about 1.25” into the
engine area… So a quick thought comes… we’ll just cut that part out and let
the hood come down around the radiator… but the gods are cruel… the grill mounts
directly onto the air deflector and there is no room for the radiator to move into that
area.
I sat for about an hour looking at
the problem and cursing myself… at the end of the hour I was thoroughly cussed,
flayed and left to broil in the sun…with only one solution… cut away all the
crap (fancy mounting system/cross member mods and move the radiator back toward the
engine. But… (and the gods are laughing
hardily now) how much room do I have ??? Right now there is about 70 miles between the
radiator and the water pump pulley, so judging the space is a little hard… so I’m trying to calculate it from one engine
mount bolt forward.
I think my solution (space
permitting) is to cut out the cross member completely and weld in a flat plate for the
radiator to sit on..(but it's all pretty and painted and slick...waaaaaahhhh) If I
just back up the radiator I’d have to raise it up on the high part of the cross
member, and then I have hood clearance issues. (can you add a hood scoop for your radiator
?).. so the raised cross member is history. I’ll
probably add a secondary cross member piece…maybe a 2x2 tube under the flat plate
just to keep things together…or not.. it’s still in the chalk stage right now.
So based on Charlie and Sam’s
dimensions my front mount bolt to water pump pulley distance is about 16 7/8”
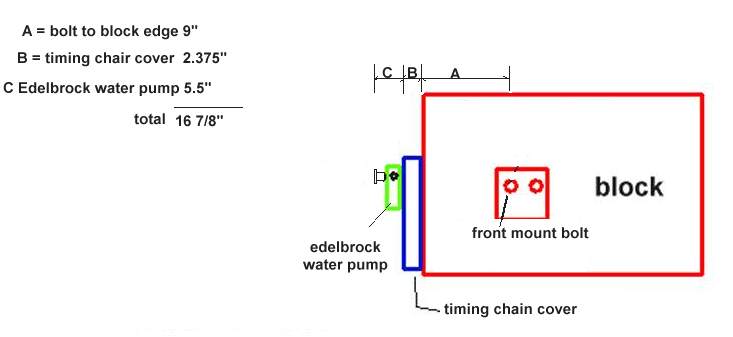
Now I can put the engine mount on my
motor mount on the frame… measure forward 16 7/8” … add 8.5” for the
radiator thickness ….. and see how
bad I’m screwed…
Hopefully I’ve paid enough dues
and put enough in the Sunday plate and helped enough old people across the street that
something good will happen… please cross all the collective FTE fingers…
Have any of you ever done anything
this stupid… please tell me so and make me feel better… this gets written on the wall under John’s
major blunders… ain’t it all fun ?
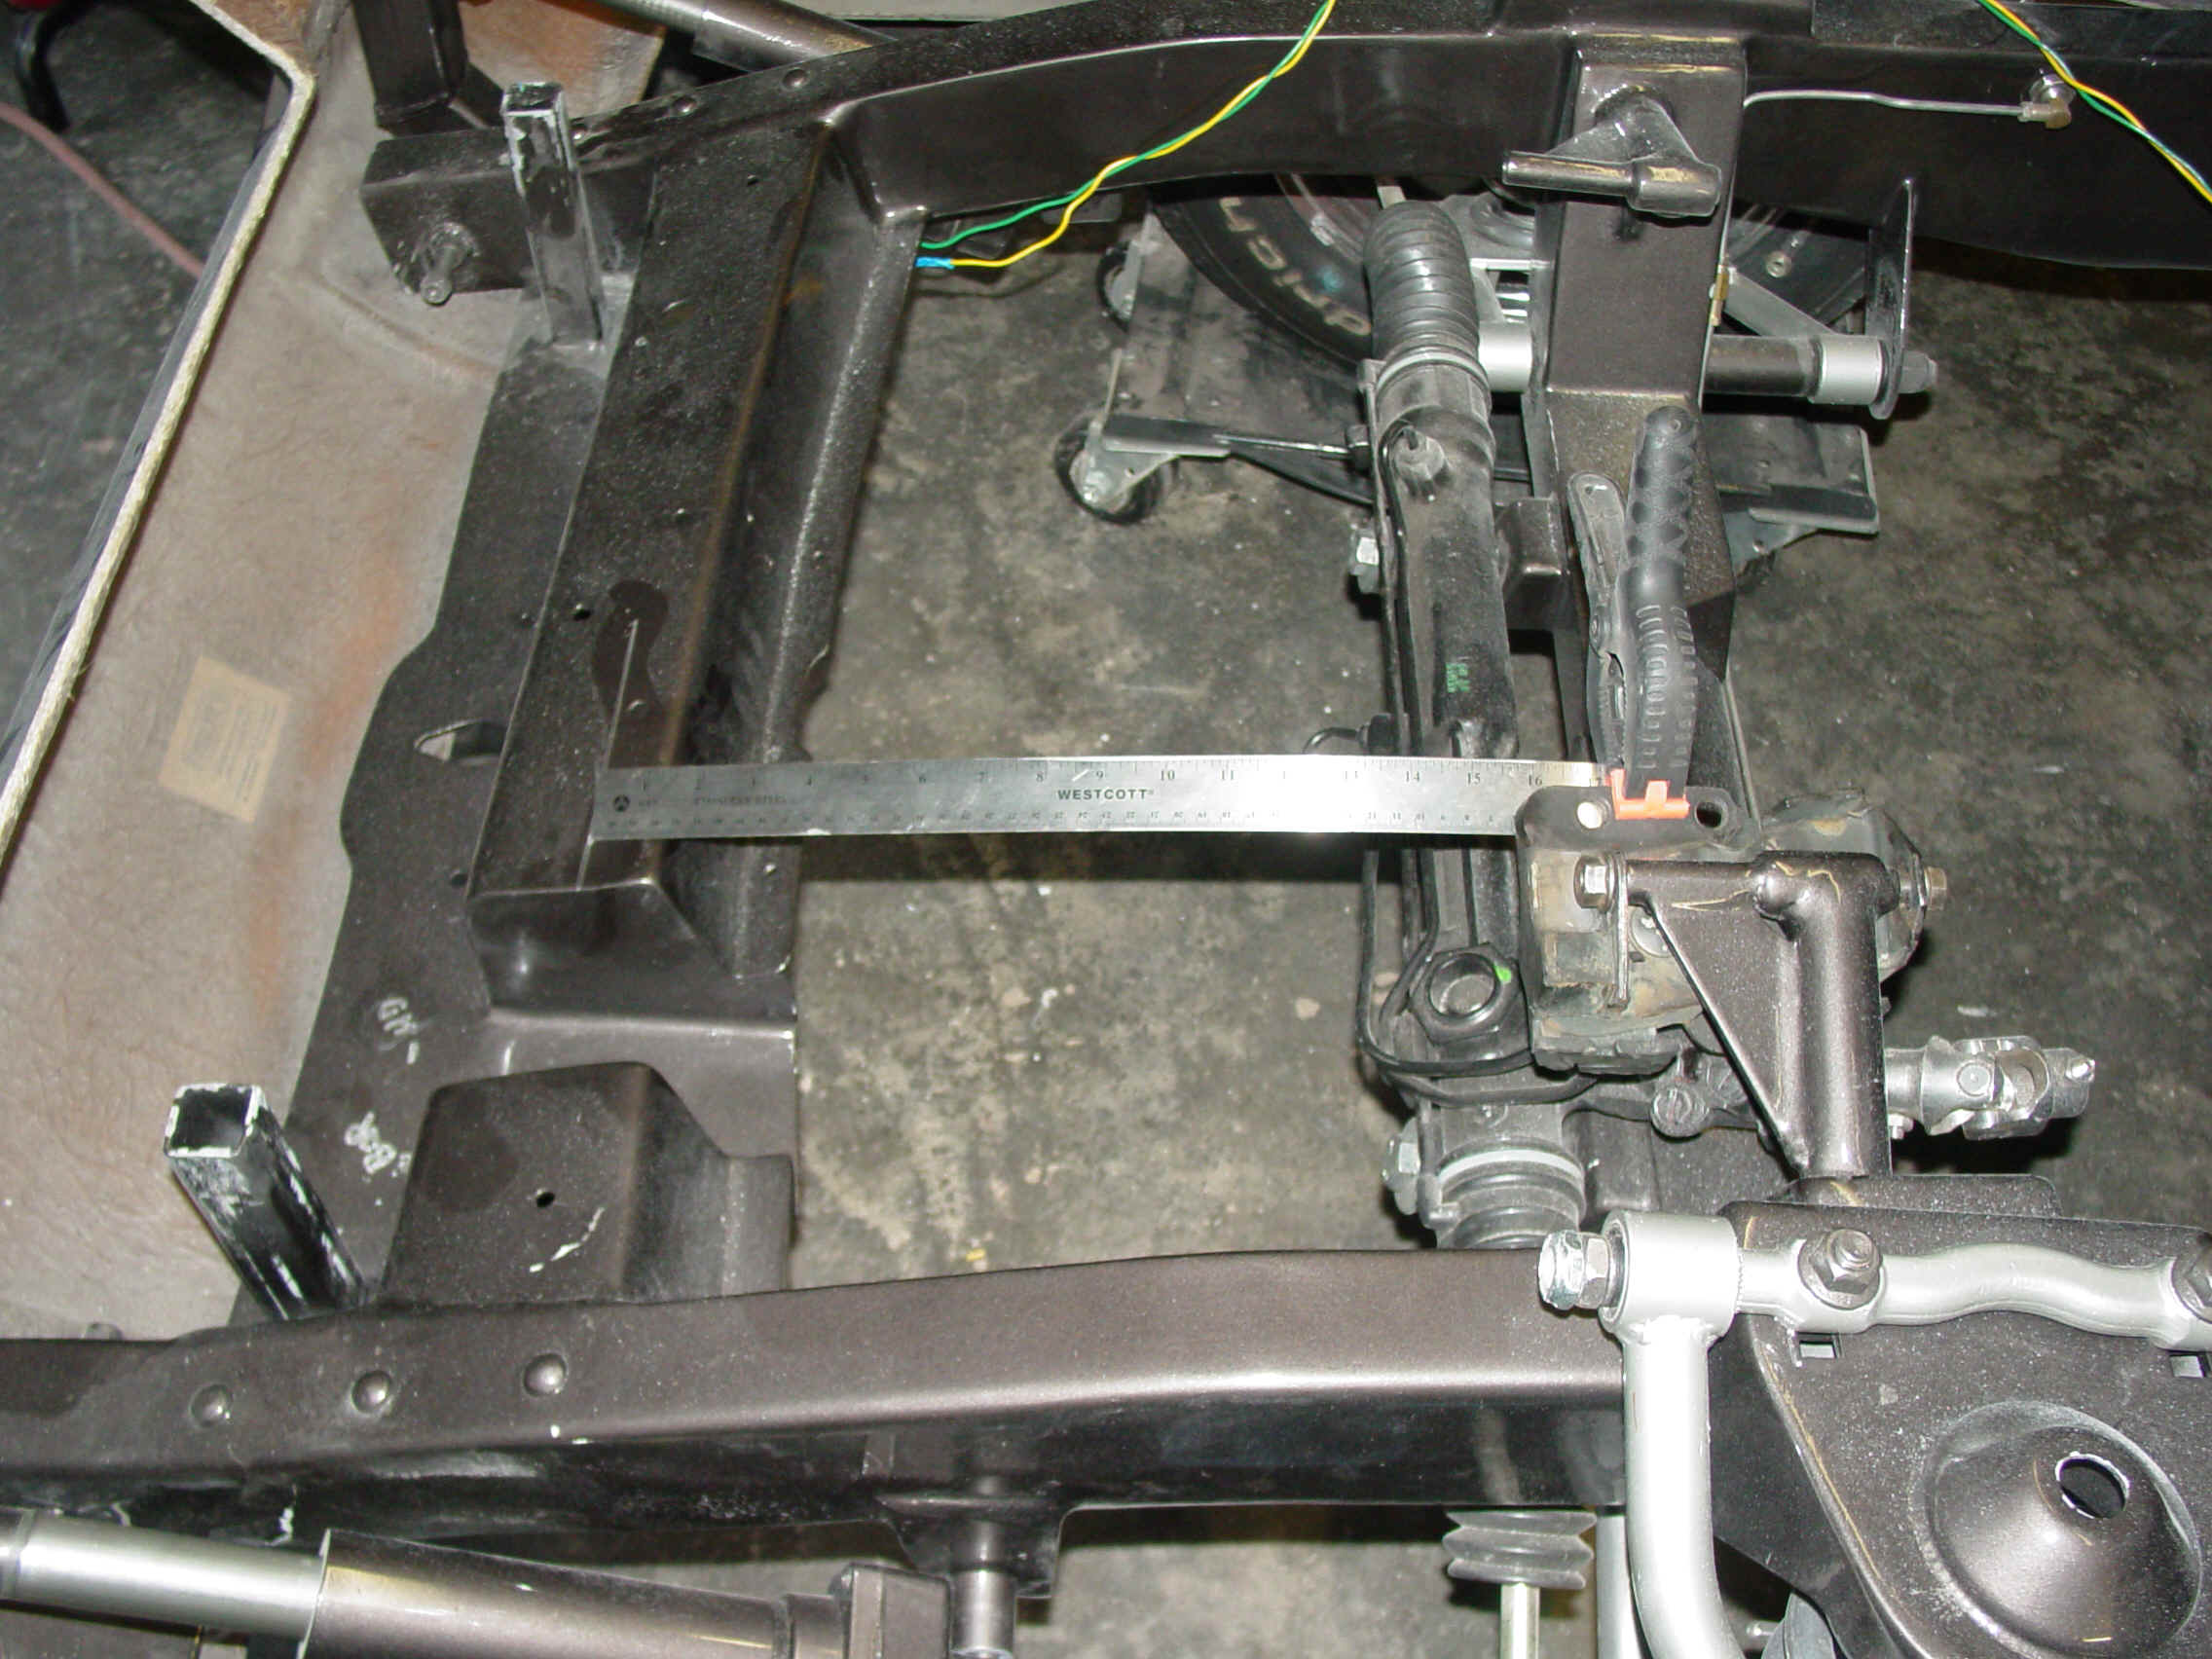
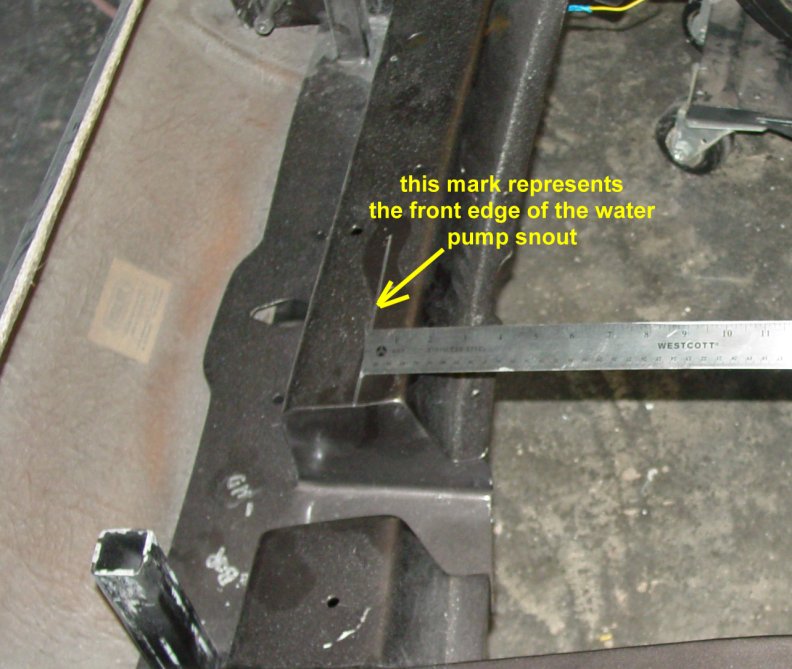
Figuring it out.
motor mount put onto the engine mount and mark made on frame 16-7/8" forward of that.
|
 |
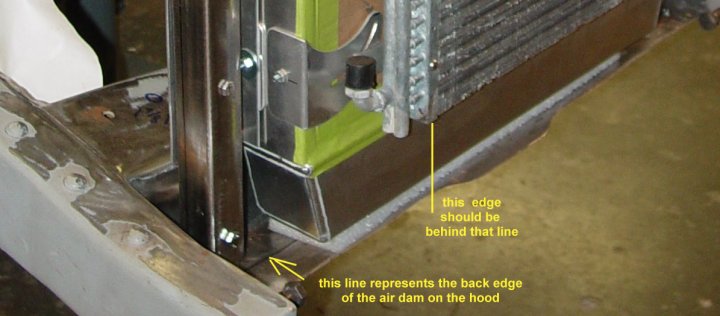
in the next picture you see where I measured from the above mark to the mark on the crossmember that shows the rear edge of the air dam portion of the hood...it's 3.5"
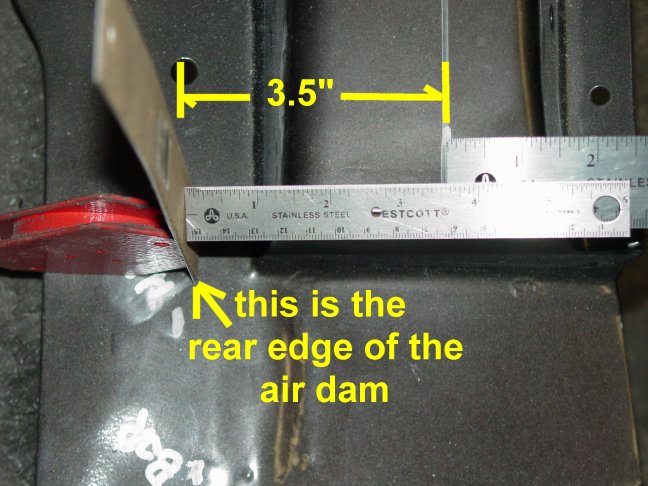 |
I'll bet you're beginning to see my problem, eh ??? Remember above I mentioned that that radiator/fan/condenser was 8.5" thick ??? Evidently I haven't paid my dues. The cussing, flaying, kicking of garage objects continues. Lots of discussion with friends, non interested parties, FTE gurus issues concerning a solution... obvious ideas were "get a smaller radiator" (I've got several hundred dollars in a non refundable unit here)... "cut out the firewall and move it all back" (probably the most logical but less desirable solution... all the frame paint is done and pretty...requires moving engine mounts, transmission mounts, maybe shortening drive shaft... etc and more problems created under dash for A/C and wipers, etc)
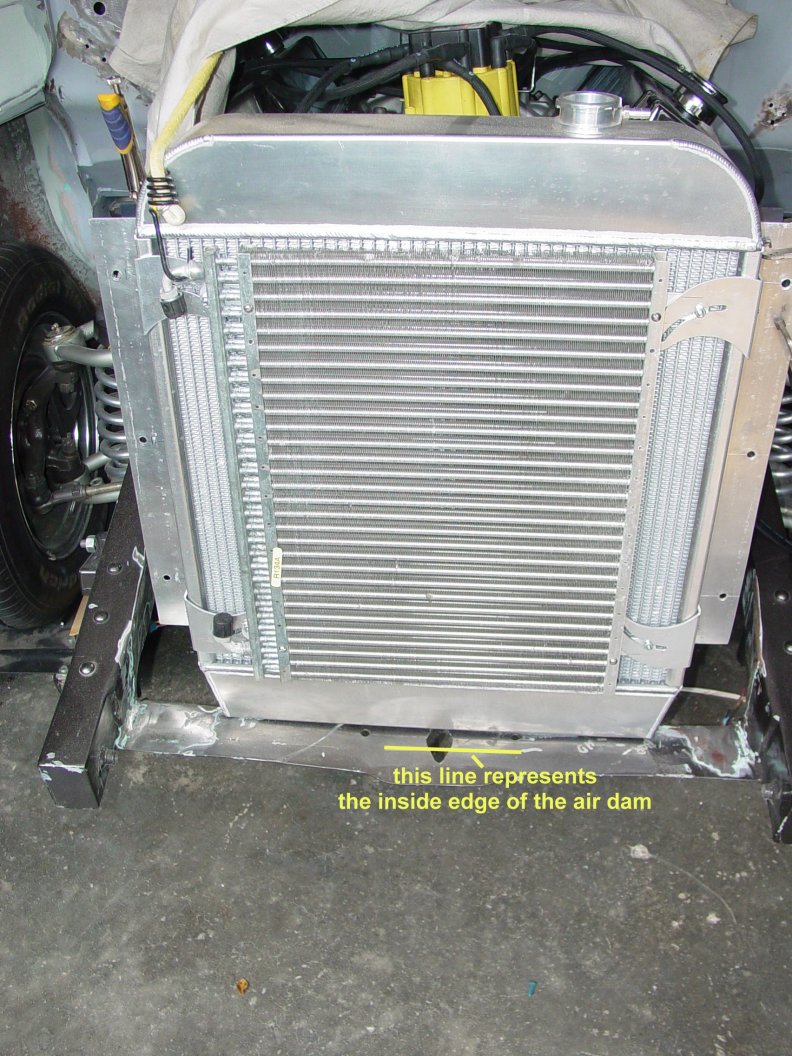
I decided to approach this slowly with small changes to see what I could gain before taking the axe to it. I cut away the flage on the air dam... gained 3/4-1",
Cut away all the pretty raised portion of the radiator cross member since it's in the way of the move...
|
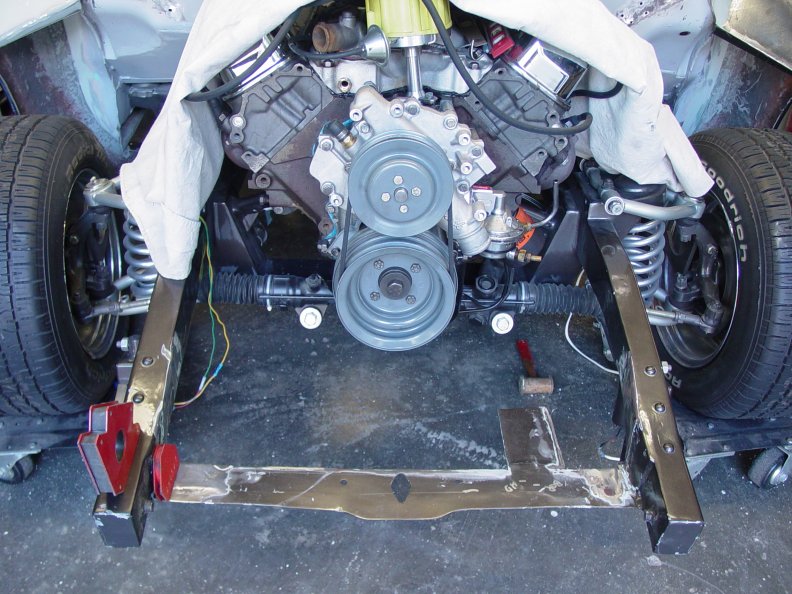
Moved the engine back 1" by adjusting the motor mounts (hacking off an inch and sliding it back)
|
|
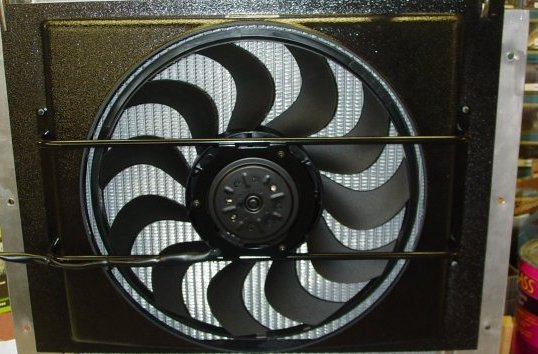
Broke down and bought another fan that is only 2.5" thick with the same cfm. Cooling Components unit 2200 cft on low 2600 cfm on high
(anyone need a brand new spal 16" sucker fan ?... it's the pretty one in the first picture ^)
 |
|
This is the CC fan... temporarily mounted to the radiator. It will have to radiator be trimmed, seal the edges and bolted onto the radiator mounting flange... and or course wired up one day... I set it on what was left of the crossmember and took a deep breath.... it all fit together... with about 3/8" on either side (front and back)... then we took out the raidator and waited till I had some help to remount the hood. I've done it before by myself, but it was a strain...this thing is called a doghouse... but it's the size of a doghouse for a St. Bernard and a German Shepard together.... it is easier to wait on Kenny. So, when Kenny showed up next visit we remounted the hood and slid the radiator in place... lining it up with the marks on the crossmember.... lowered the hood looked at the damage. The gap was maintained at the back side but the front was a little to close. We relieved the radiator opening in the hood by about an inch on the bottom edge and everything could breath again.
|
The next step is to remove the hood (AGAIN) and let Kenny work on the inside surface to pretty it up... and I'll start rebuilding the cross member and radiator mounts
Fun ??? not really... but hey... what fun would it be if you didn't have a setback or two OR TEN !!!!!!!!!!!!!!!!!!!!!!!!! wonder what the next one will be.
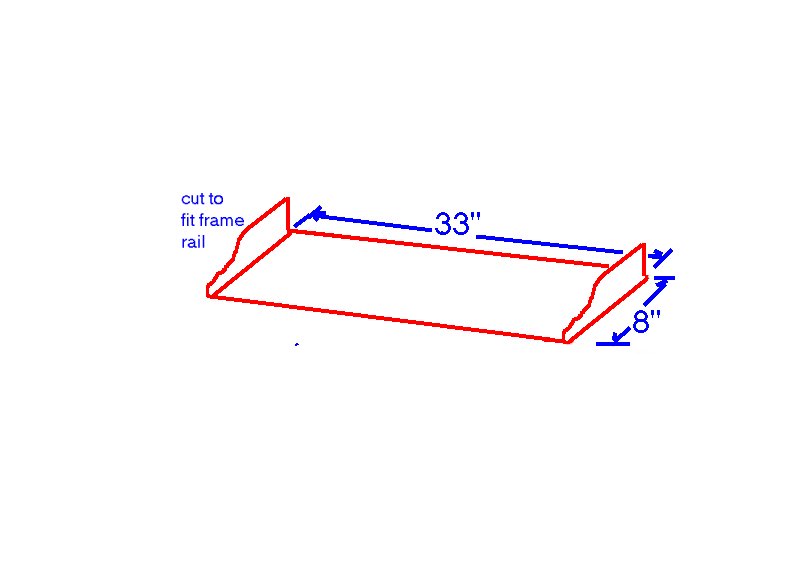
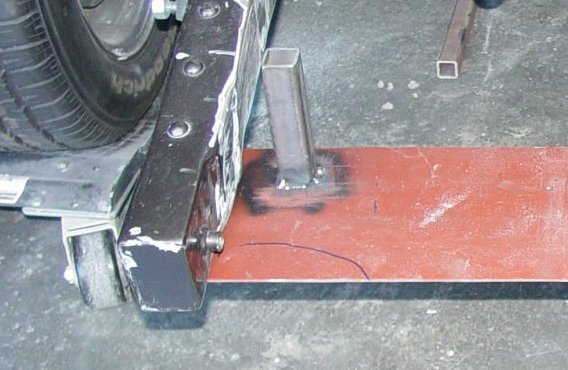
So, I cut away the what was left of the cross member... cleaned up the frame rails and measured for the new radiator support/ cross member. The frame rails kick up right behind the radiator so little wedges had to be fabbed on each side of the new mount instead of just welding it directly to the cross member, and just to add a little more fun to it... it had to be contoured to fit the curve in the rail. The sketch below gives you an idea... but the curve to the two end pieces are somewhat exagerated.
|
I didn't get a picture before I tackwelded it in. ... here's more pics
 |
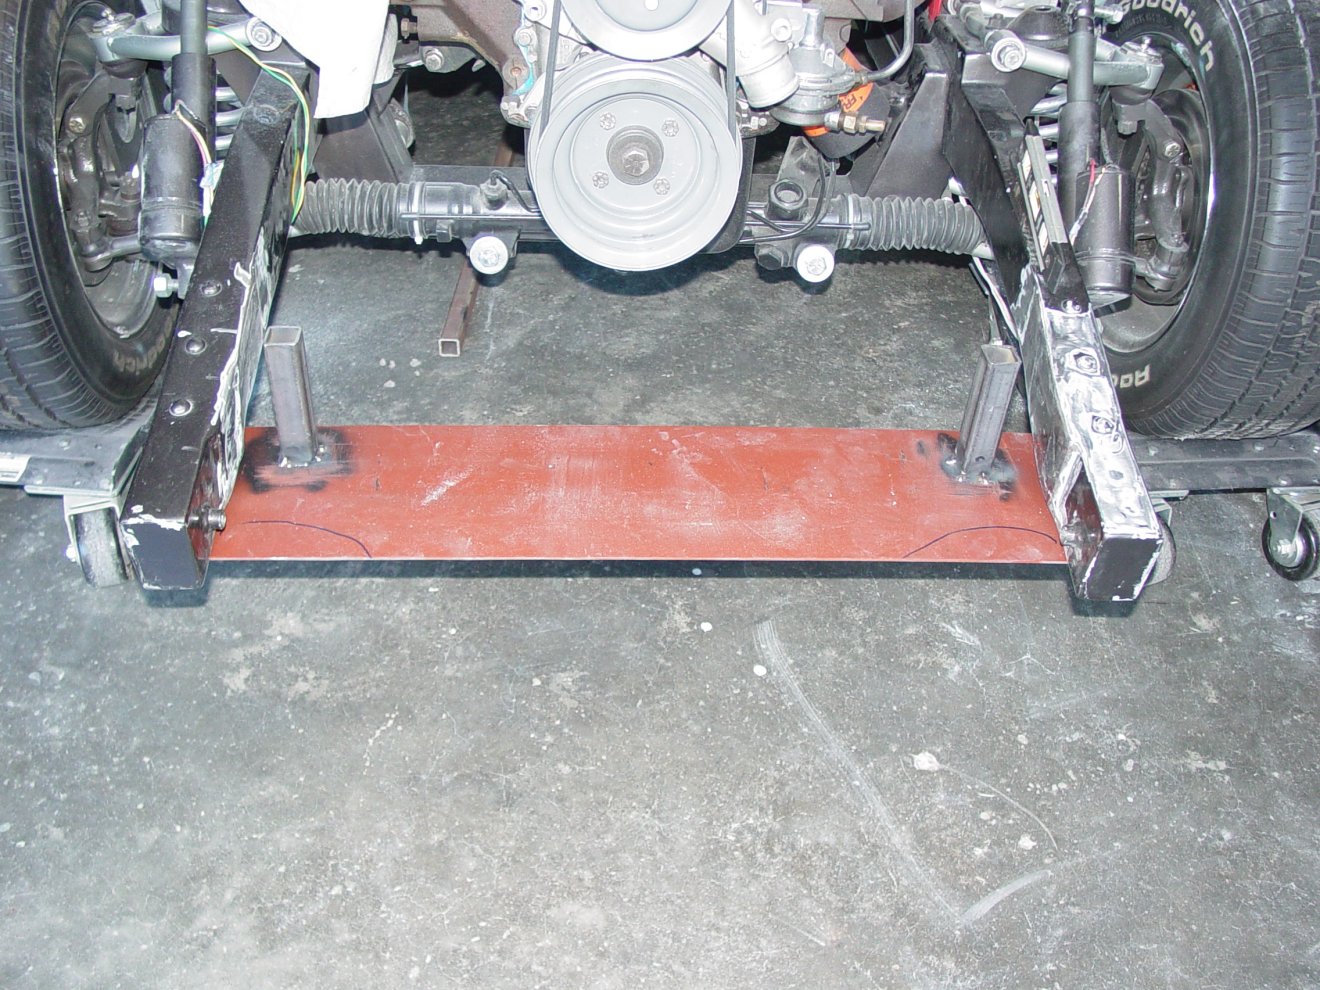 |
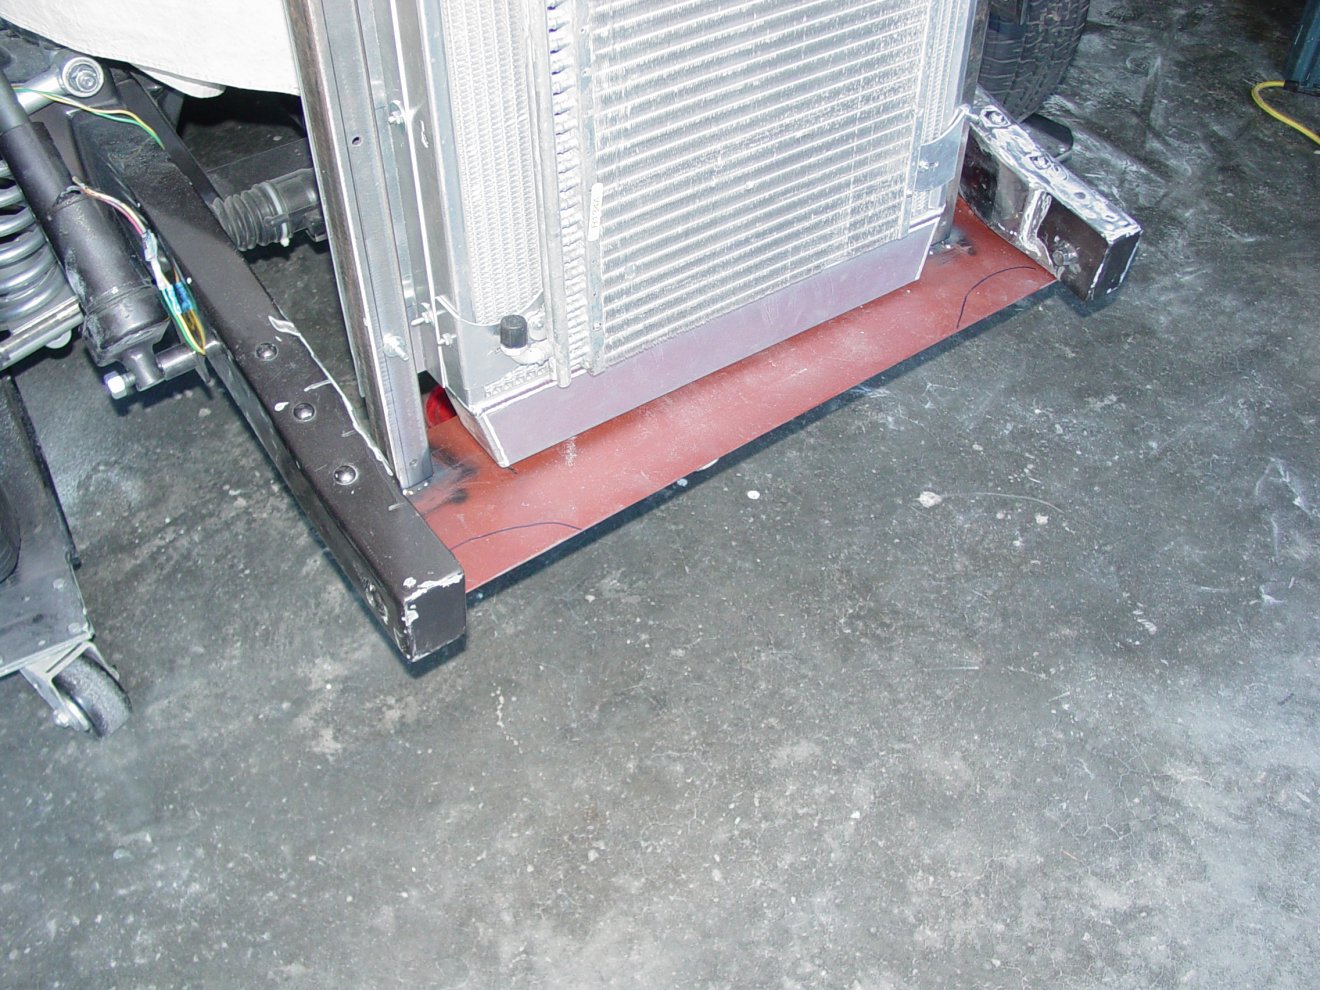
I set the radiator on the cross member and got it where it needed to be. The mounting stubs were inside the legs. I raised the radiator up about 1" and let the stubs slide out... then marked the positions of the stubs. Then took everything off the cross member and spot welded the stubs to the cross member. The next pic shows the radiator in place
|
Due to my excellent fabrication and welding skills (yea, right) and a healthy dose of luck (it's about time for some) the radiator slid nicely down on the mounting stubs and after checking all my measurements (remember that's what got me in this pickle) it's ready to weld in place. We did find one minor problem we need to address. You can barely see two blue lines on the cross member. I didn't think about the pivot bolts for the hood... the new cross member blocks access to them between the frame rails which means I can't put on the nuts or tighten them up... I'll cut out some access openings in the cross member for than before welding it in completely.
|
then after all that is done... all that is left is to repaint everything I screwed up, scratched up and ground off trying to fix this blunder.. on to the next challange !!!!!