MUSTANG II SUSPENSION UPGRADE
LATEST
STUFF..... 4-24-03 |
Things have been moving slowly... other family
commitments... and I've been researching the recent reported failures of the M-II front
suspensions.. There's been a lot of discussion on the various hot rod boards and a
number of 'fixes' have been offered to help eliminate the failures. The problem
seems to be the elimination of the strut rods and the added stresses on the cross member
by the lower tubular control arms. Here's what I've decided to add to mine.
this information is also
included in the complete article.....
|
| Well, the pieces are installed and the welding is done... thanks to
Dave for his expert work... I had originally re-drilled the hole in the rear
of the cross member ( 1-3/8") to accept the one piece sleeve. We installed the single
piece sleeve first, then connected it with the lower control arm in place. We
snugged up the bolt to pull everything in alignment and tack welded it. After removing all
the lower control arm parts we (Dave) finished welding in the sleeve with full welds
around the sleeve at the front, rear (inside cross member) and rear outside the cross
member. |

this is the
passenger side |
| After things cooled we reassembled the lower arm hardware and
spotted the rear cross member brace (strut rod eliminator stuff). Bolted everything
up tight again and tack welded the brace to the frame. After a quick alignment,
movement check, we again removed all the hardware and the finish welds were
made. This is a picture of the drivers side after final welds. Although it isn't
shown, this brace extends up the inside of the frame rail. You can see the picture
of the actual brace further down the page. This is the addition
that I think does the most for the suspension as far as strengthening it. It
eliminates the up/down thrust that braking would cause and hopefully eliminates the
flexing of the cross member rear face. The lower control arm is now completely
supported from the front of the cross member to the rear of the control arm. |

|
| While
I initially had planned on adding gusset plates above and to the side of the sleeve, Dave
has convinced me that with the additions we made already, the gussets are not
necessary. And, after looking at the work so far, I agree... besides it's a lot of
welding in one small area and it's his belief and he convinced me that you can have too
much welding in one area. |
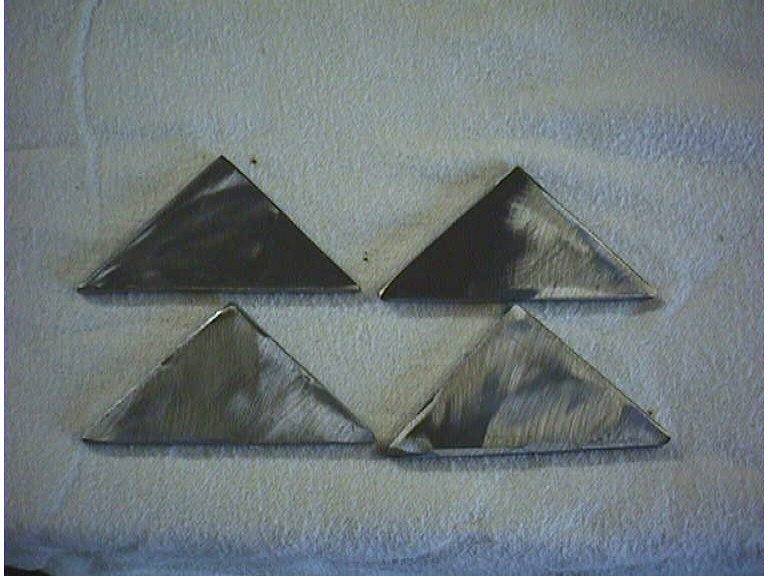
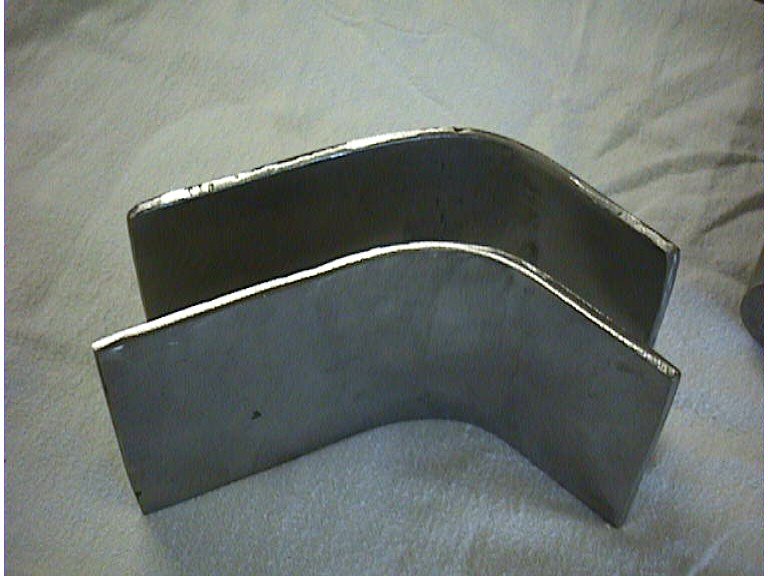
| The last step in the additions is capping the end of the cross
member. This ties the pieces of the cross member together and adds a good deal of
structural integrity where it's sorely needed. I bent the boxing plates to match the
curve of the cross member (picture below). I held them in place while Dave tacked
them in. A little 'adjustment' was needed in the curve to get a good fit and a fair
amount of welding expertise was necessary to fill in the gaps from my sloppy fabrication,
but Dave made them look 'factory'. |

|
| Here is the final assembly. Welds still have to be ground down
and made pretty and everything primered... but it's done... I feel like this is a
safe and strong installation and confident that it will hold up for years |
 |
|
historical and previous
stuff as of 2-5-03 |
|

|
some of the cross members and tubular arm kits come with internal
bracing sleeves and some don't. Some come with two separate pieces for inside and
outside the cross member. It was suggested that a single tube through the cross member and
welded in would be much stronger. The picture at left shows the supplied two piece
braces (far right) and the new machined one piece units.; |
|
|

|
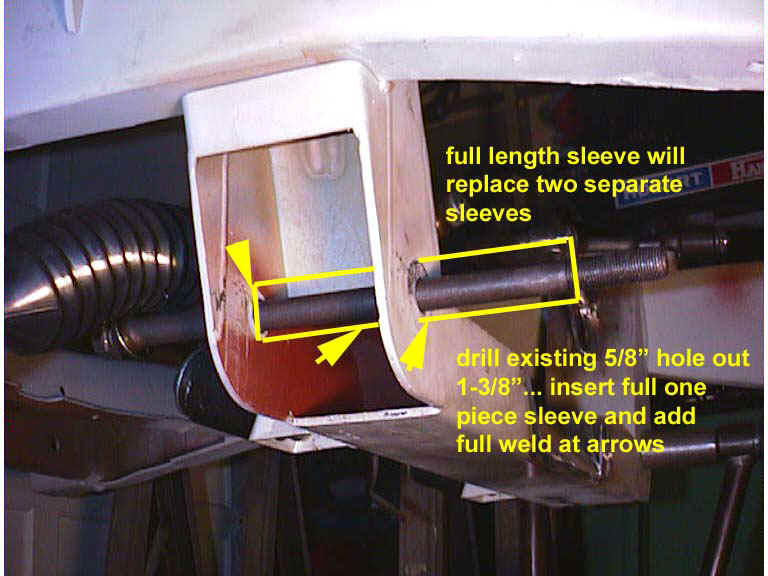
the usual design has two sleeves (one inside cross member and one
behind) which support/brace the lower arm. |
|
|
|

The rear hole in
the cross member will be enlarged to 1-3/8" and the one piece sleeve will be slid in
place. (yellow outlined box) Full welds will be applied to the inside of front
plate, inside of rear plate and outside of rear plate |
|
|

|
Gusset plates will be added on the
inside (horizontally) and top side (vertical) of the new one piece sleeve.. adding
some support and bracing to the lower control arm attach points.. |
|
|
|
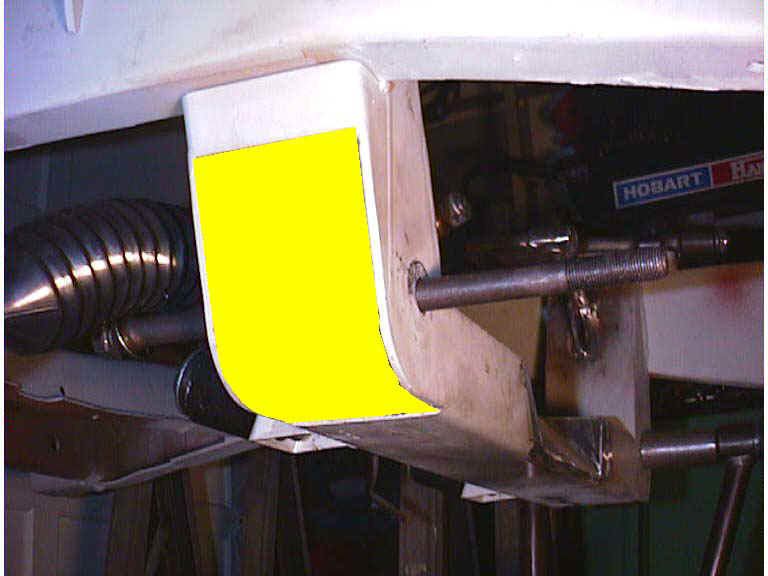
 After the cross member is drilled and the sleeves
installed and welded, the gussets attached to brace the sleeves, the final step will be to
box in the ends of the cross member to strengthen the ends and give more support for the
lower control arms. These patch pieces were bent from mild steel material the same
thickness as the crossmember (approx 1/8") |
|
|
|

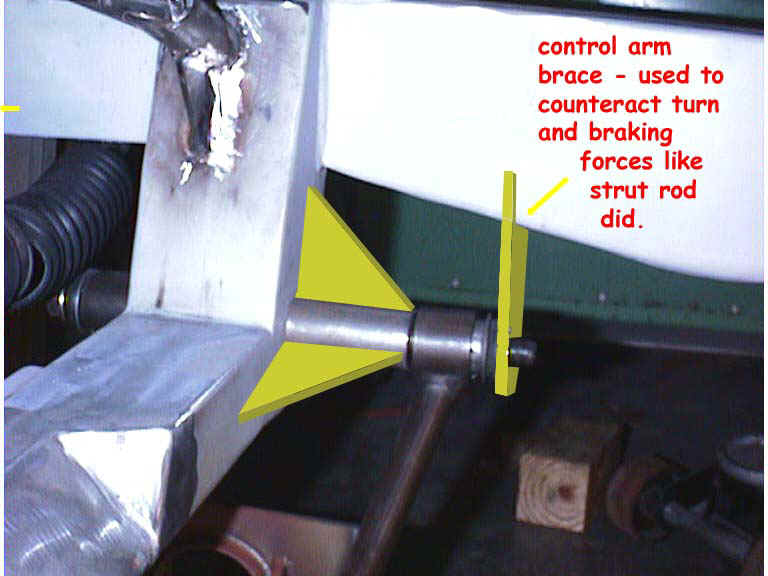
;The last step and I think the most important is the addition of a brace between the lower
control (at its rear most point) to the frame directly above it. While this won't
perfectly duplicate the strut rod function.. it will eliminate a lot of the stress and
flexing forces that braking and turning have on the lower control rod.. It's
not as 'unattractive' as the strut rod and still provides some needed support at this
point |