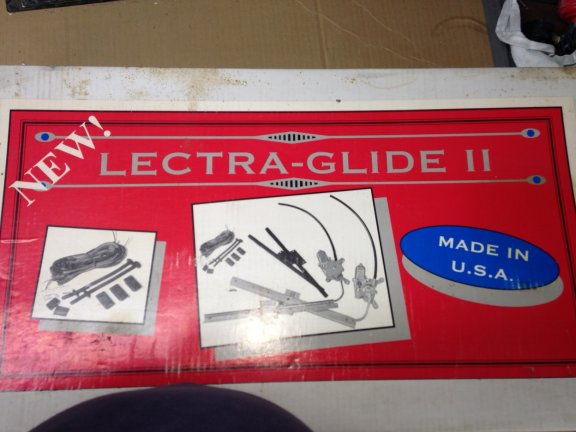
| Well... this is a redo. Originally I installed some universal car show specials to raise/lower my windows. They were difficult to do with the one piece window panes and took a lot of persuasion to make them work properly. | |
|
|
|
| It seemed like a good idea
at the time
and the price was right, so I bought them and put them on the shelf. Fast forward several months in the
project and I drug the box down off the shelf and was ready to
install. Everything was there...but the instructions !!
A lot of internet searching ensued till I found something similar that might help. BTW the vendor was long gone with no contact info. |
|
| In the end they sorta
worked.... for about three years. One day when I tried to lower the
drivers window, it dropped about 1/4" then stopped, then
nothing worked. The relay clicked in but no movement of the
window or noise from the motor. That left me with 1/4" slot of wind
noise. I removed all the inner upholstery panels and the inspection
panel, hoping it was a stuck roller or something I could put back in
place but, wasn't so lucky. The other problem was the window was up and I couldn't get to the bolts that attached the window to the regulator. My only choice was to remove the motor and gear and force the window down. I didn't want to try this till I had replacements in hand. |
|
| Research led me through
several choices but all seemed to be "put together" kits by
vendors that didn't excite me . The best looked like the Nu-Relic # 75381 which was built for the one piece glass. It was highly recommended by several expert builders. The stuff ain't cheap but is built like a tank. The previous units were built from lighter gauge material and were more flimsy and flopped around easily. These don't... period. |
|
| They come well packed in heavy cardboard box with each unit shrink wrapped to a inner panel with at least a hundred feet of paper padding. Everything needed for one window is wrapped together. | |
|
|
|
| SOME WIRING NOTES |
|
| I
did not need wiring or switches as those were in place from the old
stuff. If you order switches they should be installed before you
install the windows, at least temporarily as they will be needed to
position the regulator when attaching the window. Nu-relic offers a
number options for single, two, three, four switch panels with
associated wiring. The wiring diagrams and instructions are
available on their website. I'll just refer you there. (
nu-relics ) Basically the motor is a DC motor and is actuated by reversing polarity on the contacts to change direction. A ground wire must be used at the motor in addition to the 12 v positive wire and not just screwed to a body part. If you can't/don't want to do the wiring now there are other options for temporary power to the motors... an external battery or jump pack with jumper leads works well. Get the juice close by and we'll get to that shortly.
MOTOR CONNECTIONS The connectors for the motor come in a little plastic bag unassembled. It includes the plastic housing x 2 and 4 brass female connectors. They are crimp on type and un-insulated. I'm a belt and suspenders kinda guy and I did crimp them on tightly but then soldered the wire to the connector....foregoing problems down the road. |
|
|
|
|
| I made up pigtails for the motor
connector that will tie into existing wiring when the job is
complete and functional
|
|
| The made-up pig tails slide into the "motor end" of the connector housing. Pull them through until the brass connectors slide into the housing at the right angle. You should feel them click in and they should not push back out. Below is a show of completed unit. The blue shows the housing shape and the red shows the clip that holds the connector into the motor. You press on the slender end of the clip to release it. The connector will only fit one way. | |
|
|
|
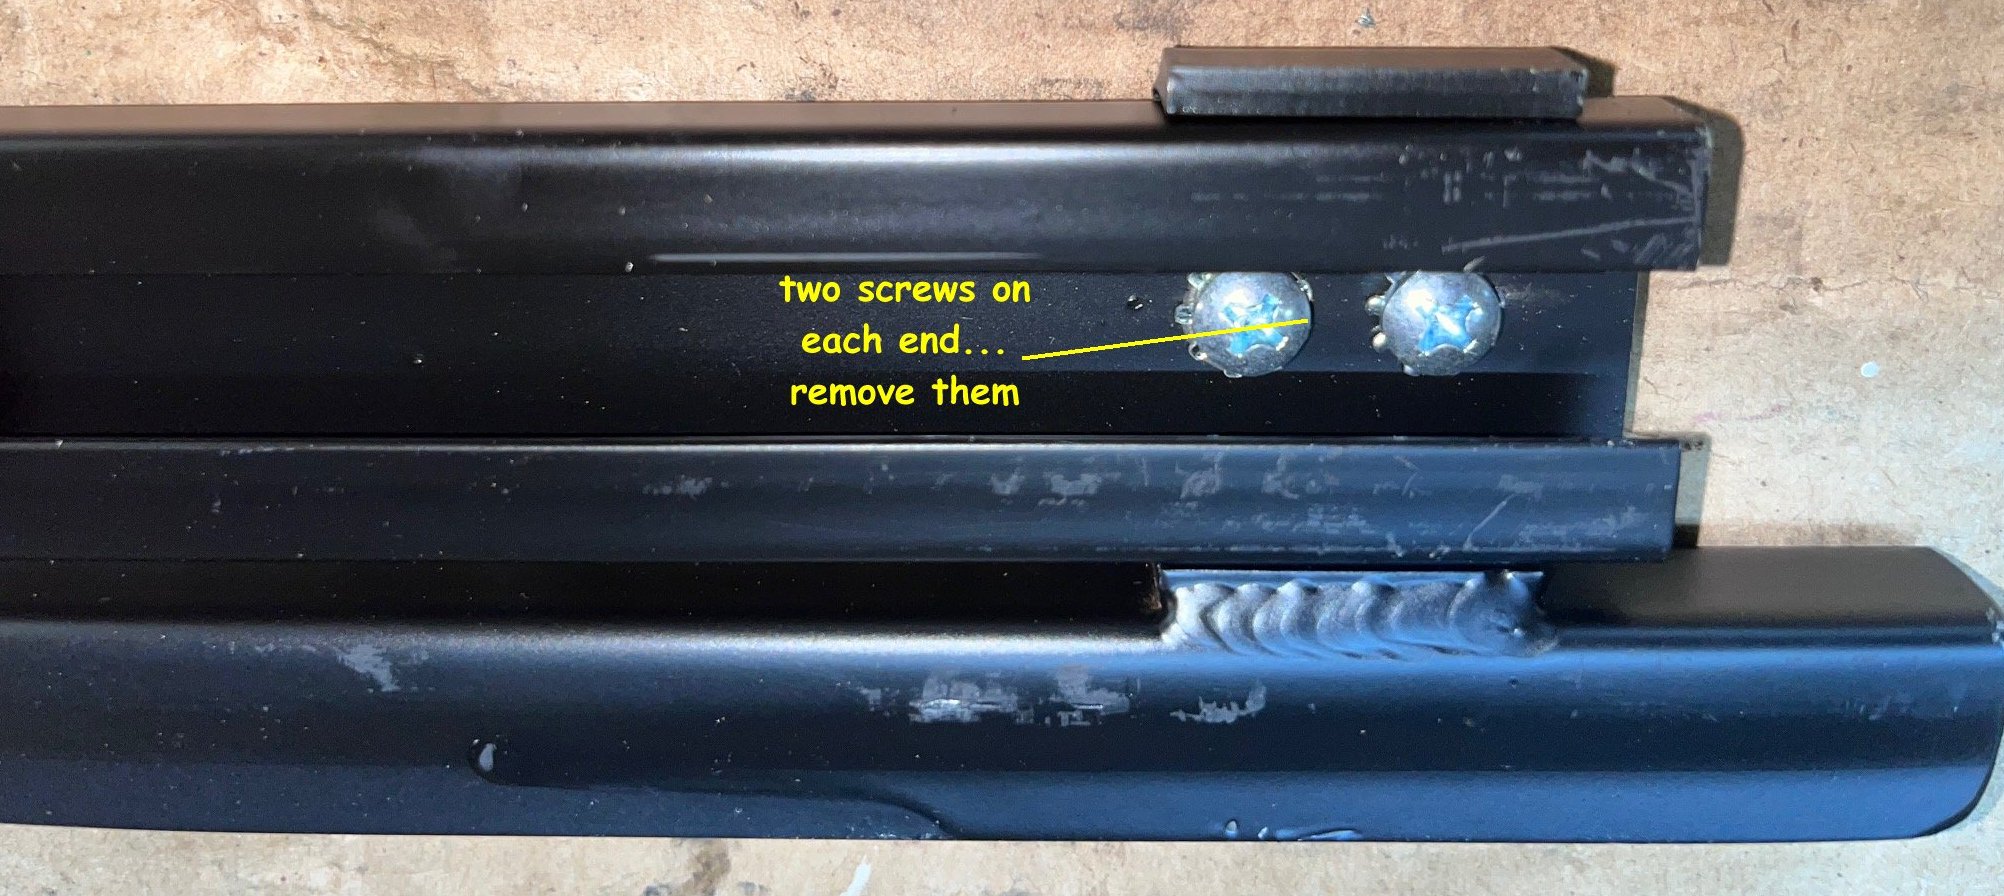
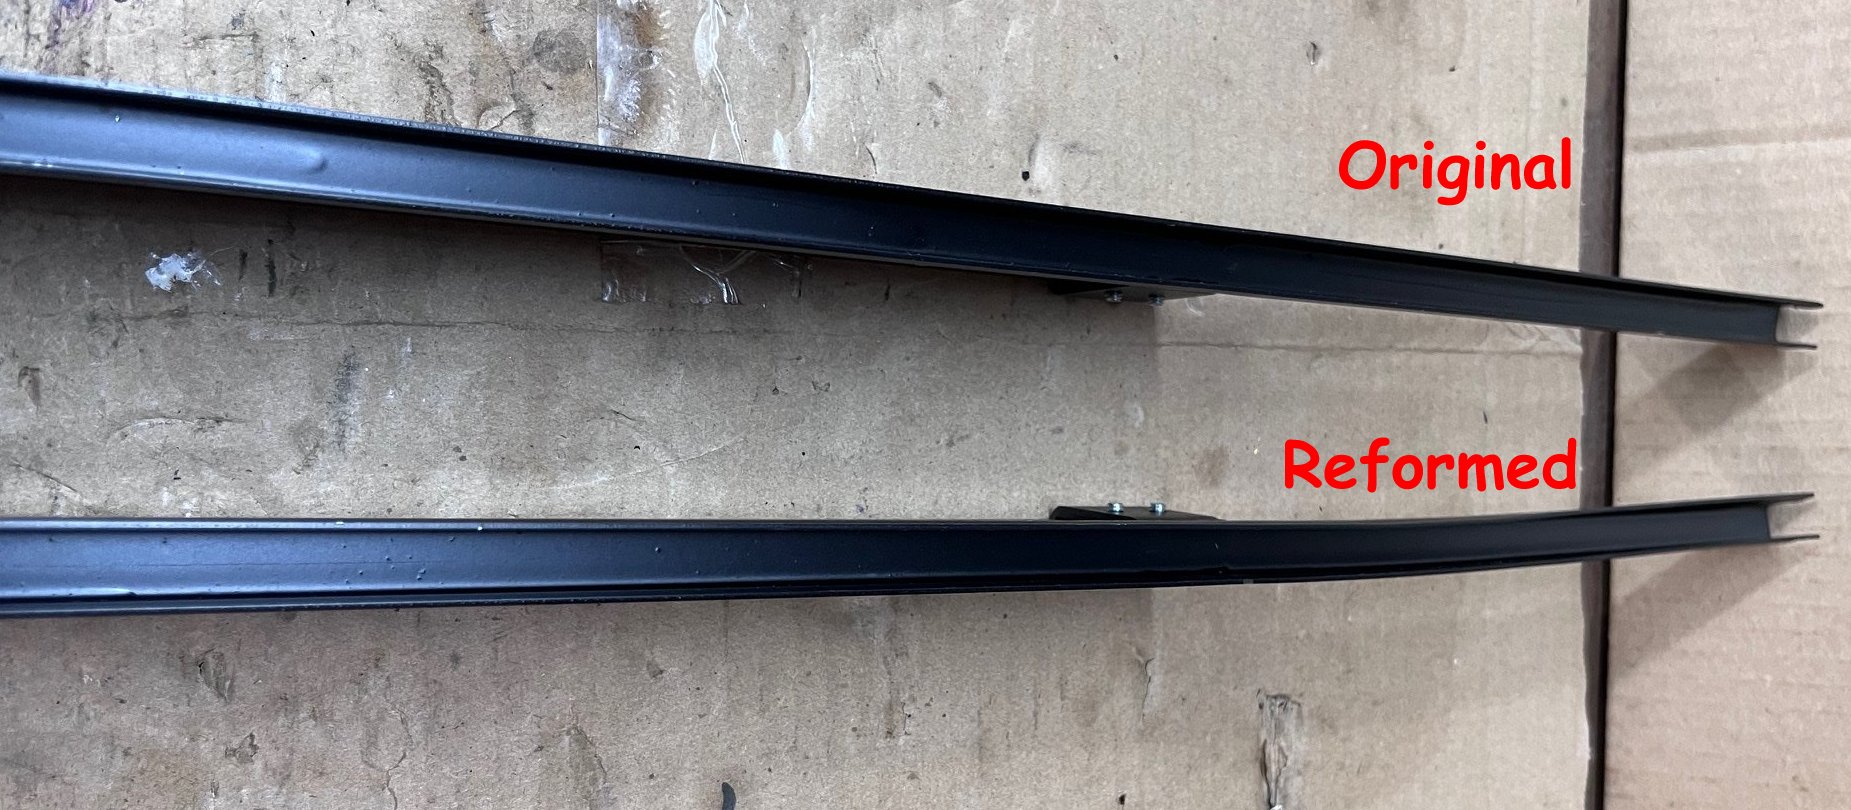
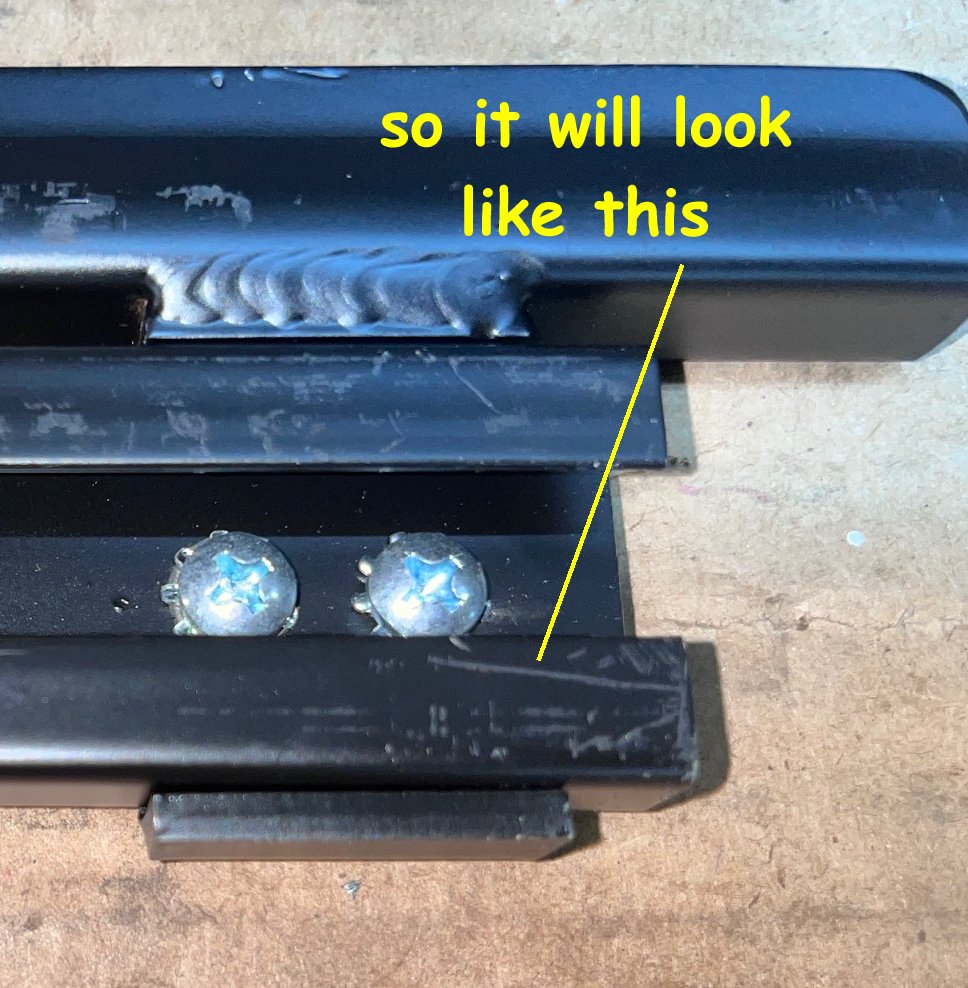
| PREPARING THE CHANNEL The glass for the '53-'55 is a curved glass and the channels provided are straight. You need to form (bend) the channel to the shape of the window. When you get the parts, the window channel is screwed to the roller channel (the track that the regulator rollers ride in) that attaches to the regulator. There are 4 screws that hold them together. Remove the screws (but don't lose them ) Lay the roller track aside. The window channel can then be laid on it's side and pressed gently...well,, pretty gently... to reshape it. Only the last few inches need to be reformed. Do this in stages and check your progress. |
|
|
|
|
|
|
|
|
|
|
| GLASS IN THE
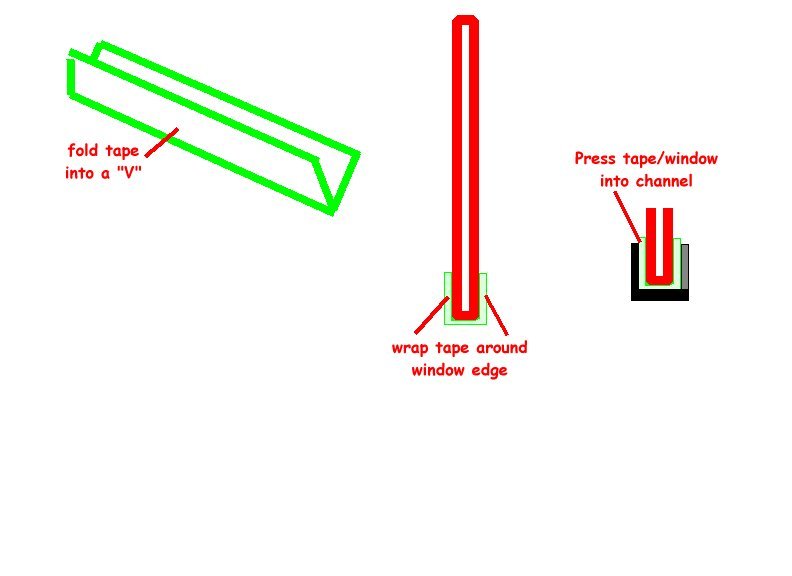
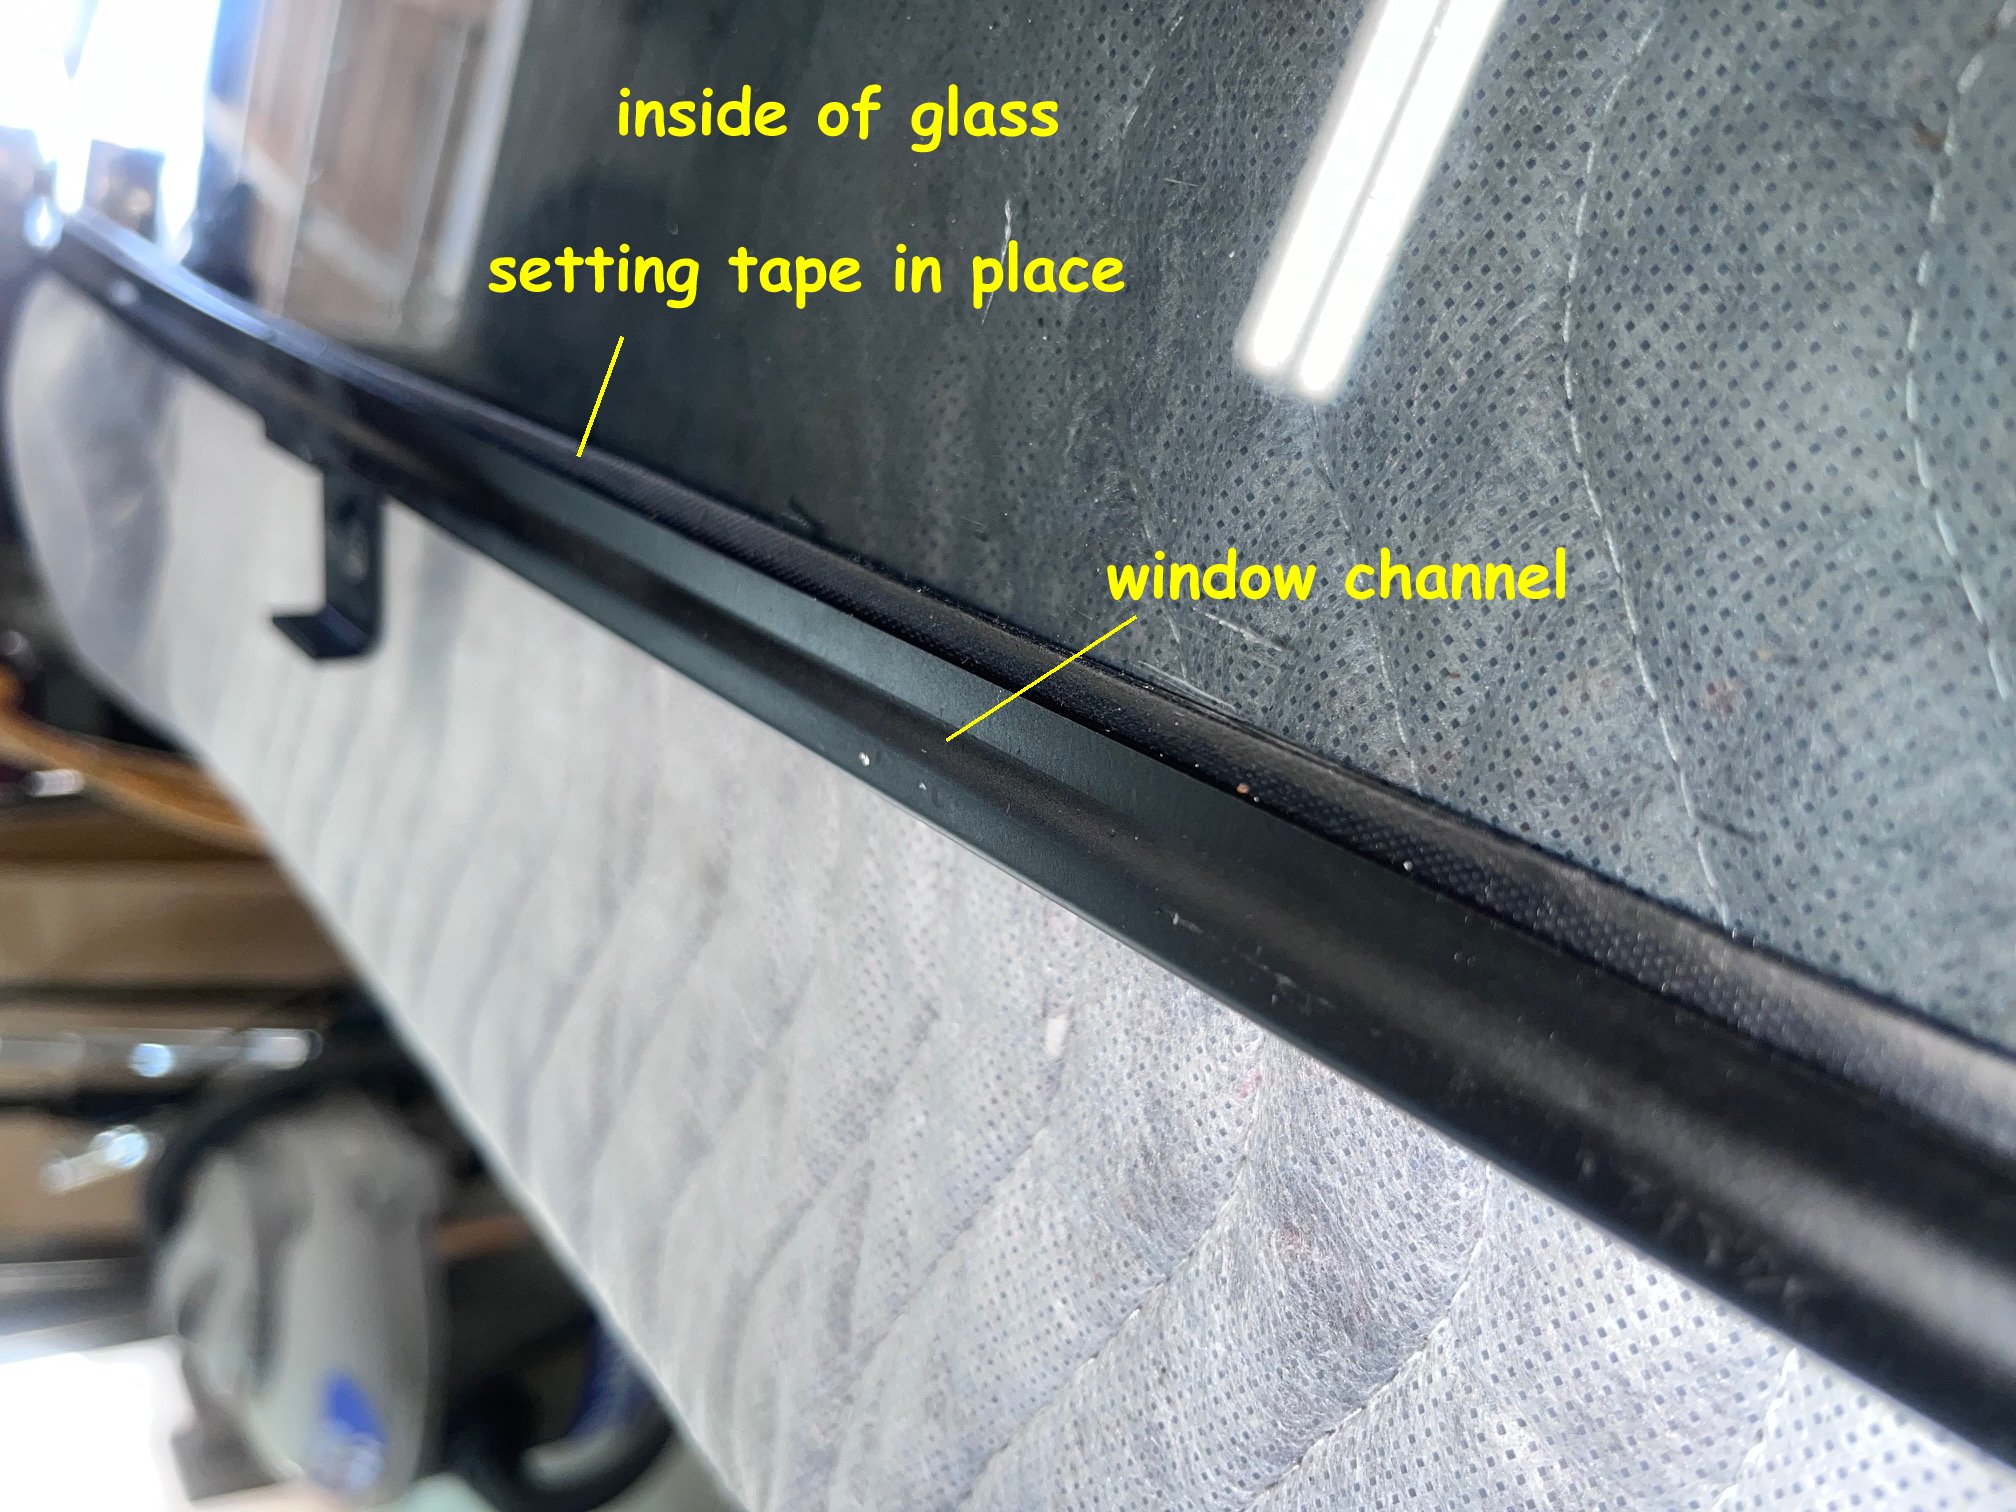
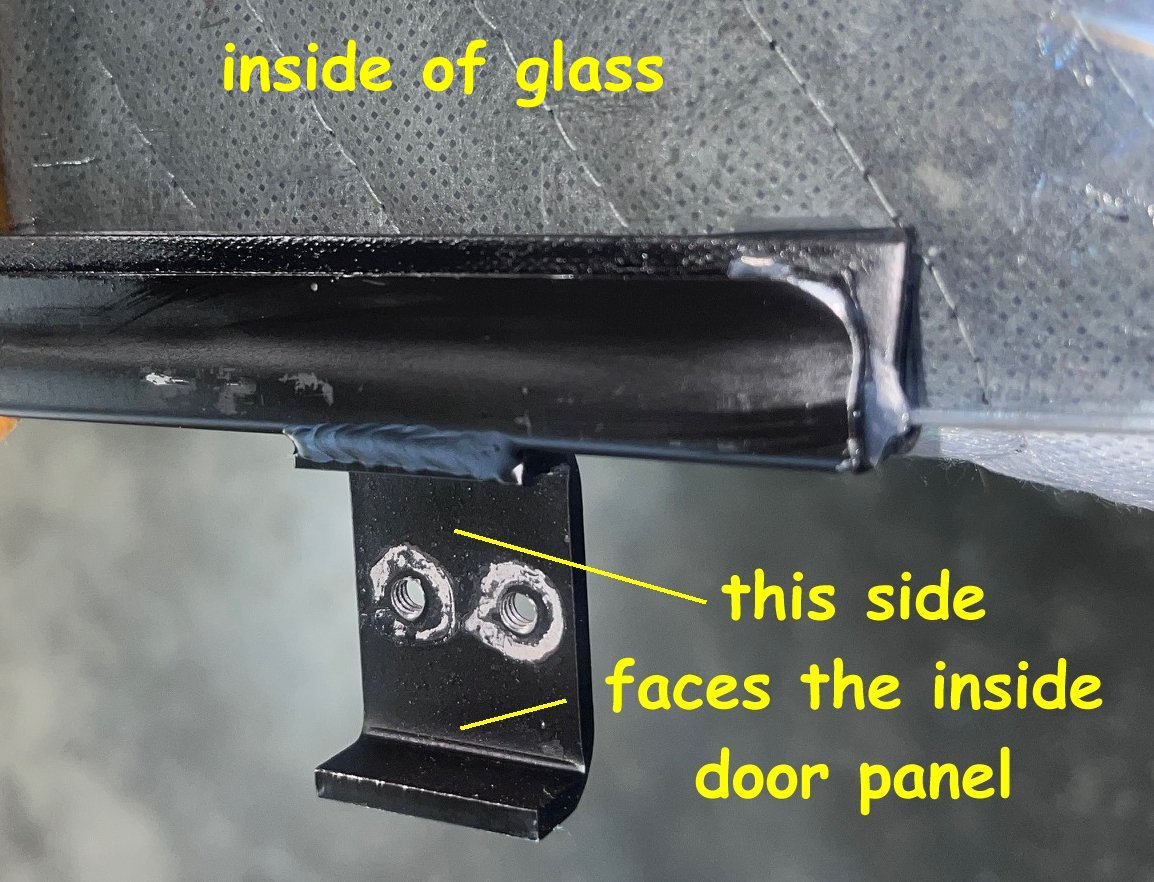
CHANNEL The window pane needs to be secured to the regulator channel so it stays in place when lowering and raising the window. There are several methods but the widely approved method is using "glass setting tape". It wraps around the bottom edge of the glass and has a press fit into the channel. Measure the length you need and then fold it along the narrow side (1-1/2" tape will give you a 3/4" v-shaped strip.) Wrap the tape over the bottom of the window edge. The press fit comes from lubing the tape with oil (anything from motor oil down to kerosene before pushing the tape and window into the channel. BE SURE you have the window centered in the channel end to end. NOTE: make sure you have the proper window channel so that the connector for the roller track faces in toward the inner door face
|
|
 |
 |
|
The lube will cause the butyl tape to expand and hold the glass in the channel. Then press it into the channel. A rubber or leather mallet might be needed to persuade the tape/window into the channel. Don't go crazy and flail away at this...remember gentle persuasion. Tap on the channel instead of the glass.
As for the setting tape.....You need to use the correct thickness to 'fill the gap" between window and channel. This little chart might help
|
|
|
|
|
| My channel was 25/64" wide and my window was 15/64" thick. 25-15 = 10 / 2 = 5/64s. YMMV. | |
|
|
|
| SO... now you have the window pane installed in the channel...Note: I didn't know if the channel would move around after setting it with the oil so I wrapped two bungee cords around the assembly to keep everyone together and happy. | |
|
NOTE:
After all that explanation, I've changed course, after two failed
attempts to install the window and hook it to the regulator.
The window and channel came apart using only the setting tape, and
this was after allowing it to sit for several hours to swell.
My last attempt was a combination approach. I cleaned the
window and channel... applied a new layer of tape and lubed it as
instructed. I wrapped the tape around the window but before
inserting it in the channel I applied a strip of 3M window adhesive
into the channel THEN put the window and tape back in the channel
and tapped it into place I then ran a bead of same adhesive along the edge of the setting tape where it met the glass and reattached the bungee cords to hold it all together for a full day. It didn't take that long to set up but I had other chores to do anyway. I swore I wouldn't glue the glass in... but I'm backsliding. It will be difficult to remove if I ever have to... but I'm gonna hope I won't have to. |
|
|
PUTTING IT ALL IN THE DOOR... BIG NOTE !!!!!!!!! WINDOW GETS INSTALLED IN THE DOOR FIRST !!!!!!!!! |
|
| The one pane glass install is a little funky. You have to install it from the outside of the door. (but you need to be on the inside of the door to do the maneuvering. Make sure you have the right surface facing out The curve of the window bows outward. Turn the window so side "d" goes in the hole first | |
|
|
|
| Ease the window down into the hole
and rock it back and forth to fit the edges b&d into the felt channels.
When you have it in the channels push/pull/slide it all the way to
the top of the door. (a helper here is great... I never have a
helper so I have to invent helpers) Use
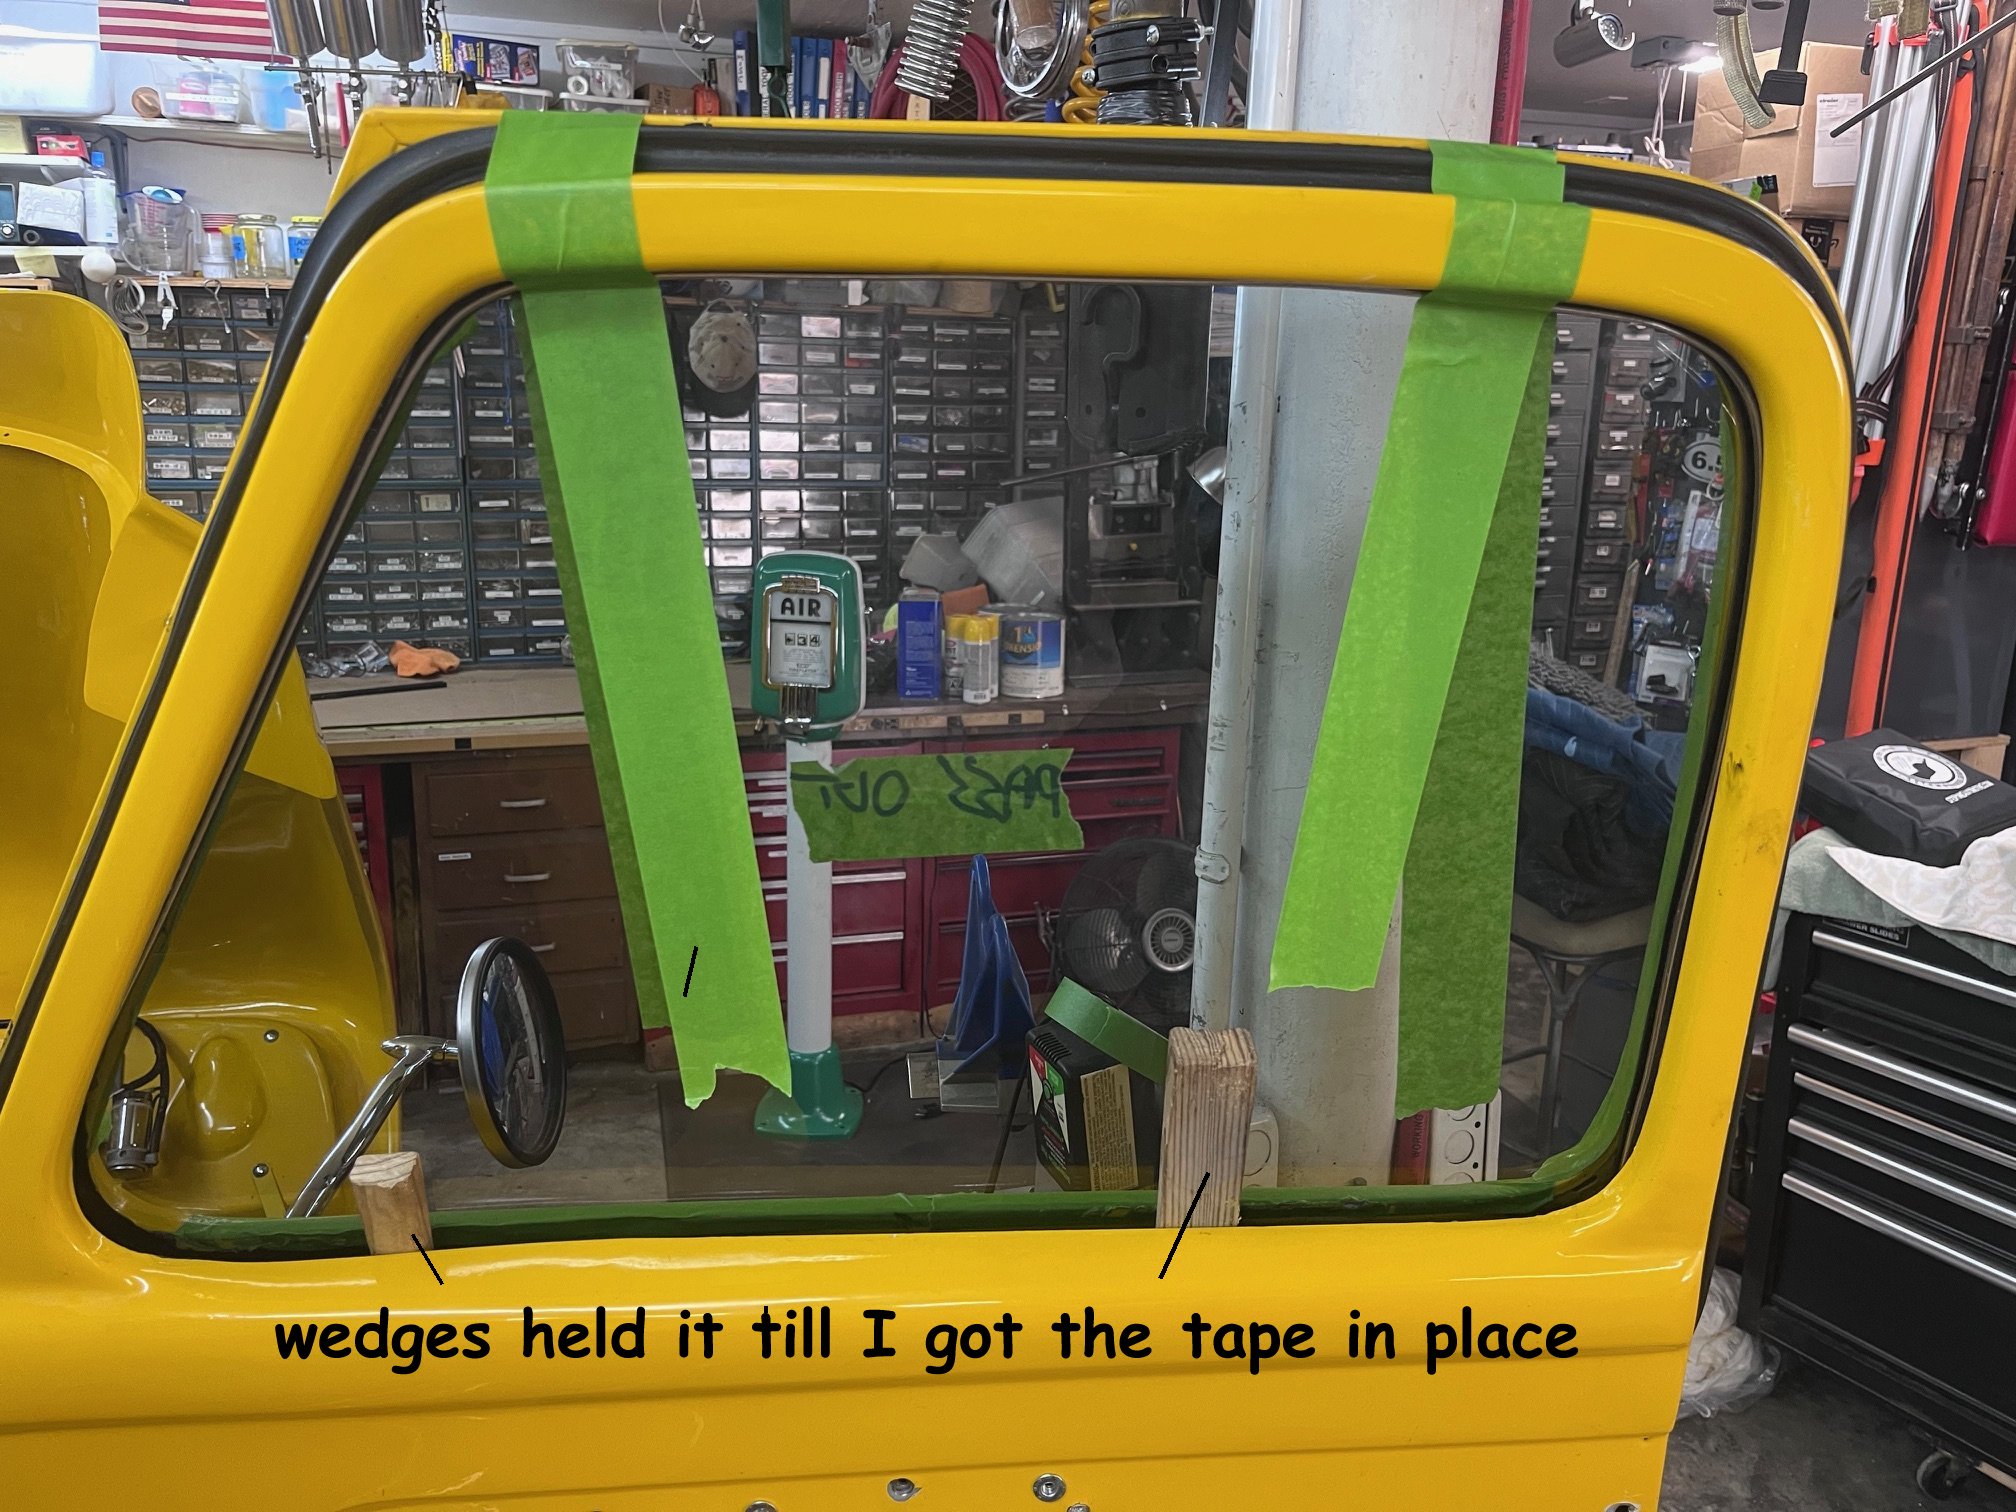
masking tape ..not duct tape, wrapped up the window, over the door
and down the other side to hold it in place I used two strips (belt
and suspenders). I do not take responsibility for duct
tape removing paint. 2" masking tape will hold it. I
have also used wooden wedges carefully placed between the glass and
the window opening...read CAREFULLY. Once you get the
window in the door and in the channels and secured with tape...we'll
go on to the motor/regulator. Another note: this install is done WITHOUT the door sill fuzzies in place... it gives you much more room |
|
|
|
|
| THE REASON FOR WINDOW IN FIRST I made the mistake of installing the motor/regulator first, thinking the window would just wiggle into place and set right on the roller track. WRONG !!!!! with the motor and regulator in place there is no room to maneuver the window down and around into the door and turn it...then align it with the tracks.... so all that time installing the motor was wasted. |
|
| REGULATOR INSTALL | |
| Last step before putting the
regulator in place is lubrication... Oil all of the pivot
points and hinge points... anywhere two pieces rub together...
The gear on the motor and the gear plate should have grease applied generously. Nu-relics suggested using Hi-temp Wheel Bearing grease. Here's mine |
|

 |
|
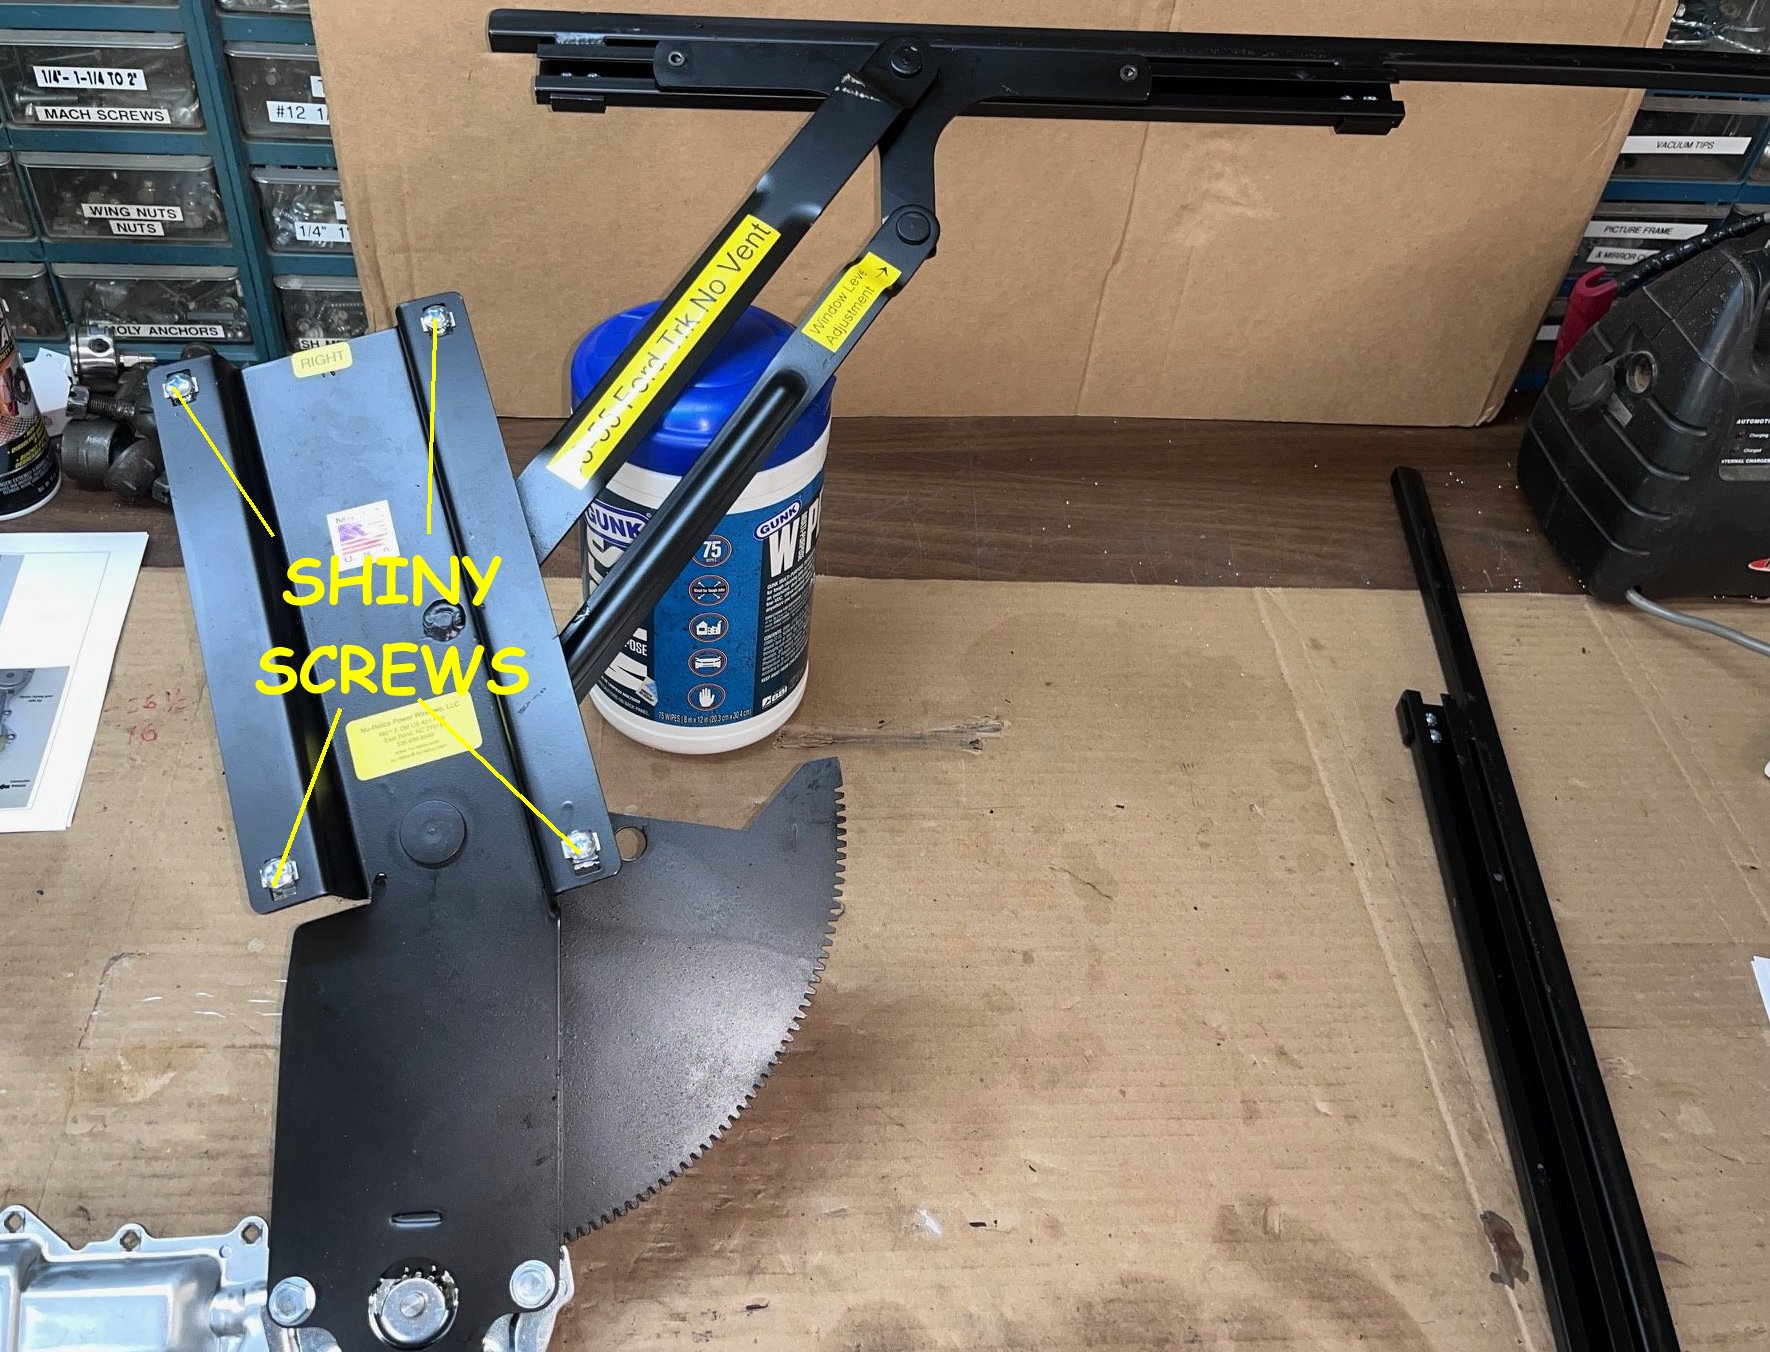
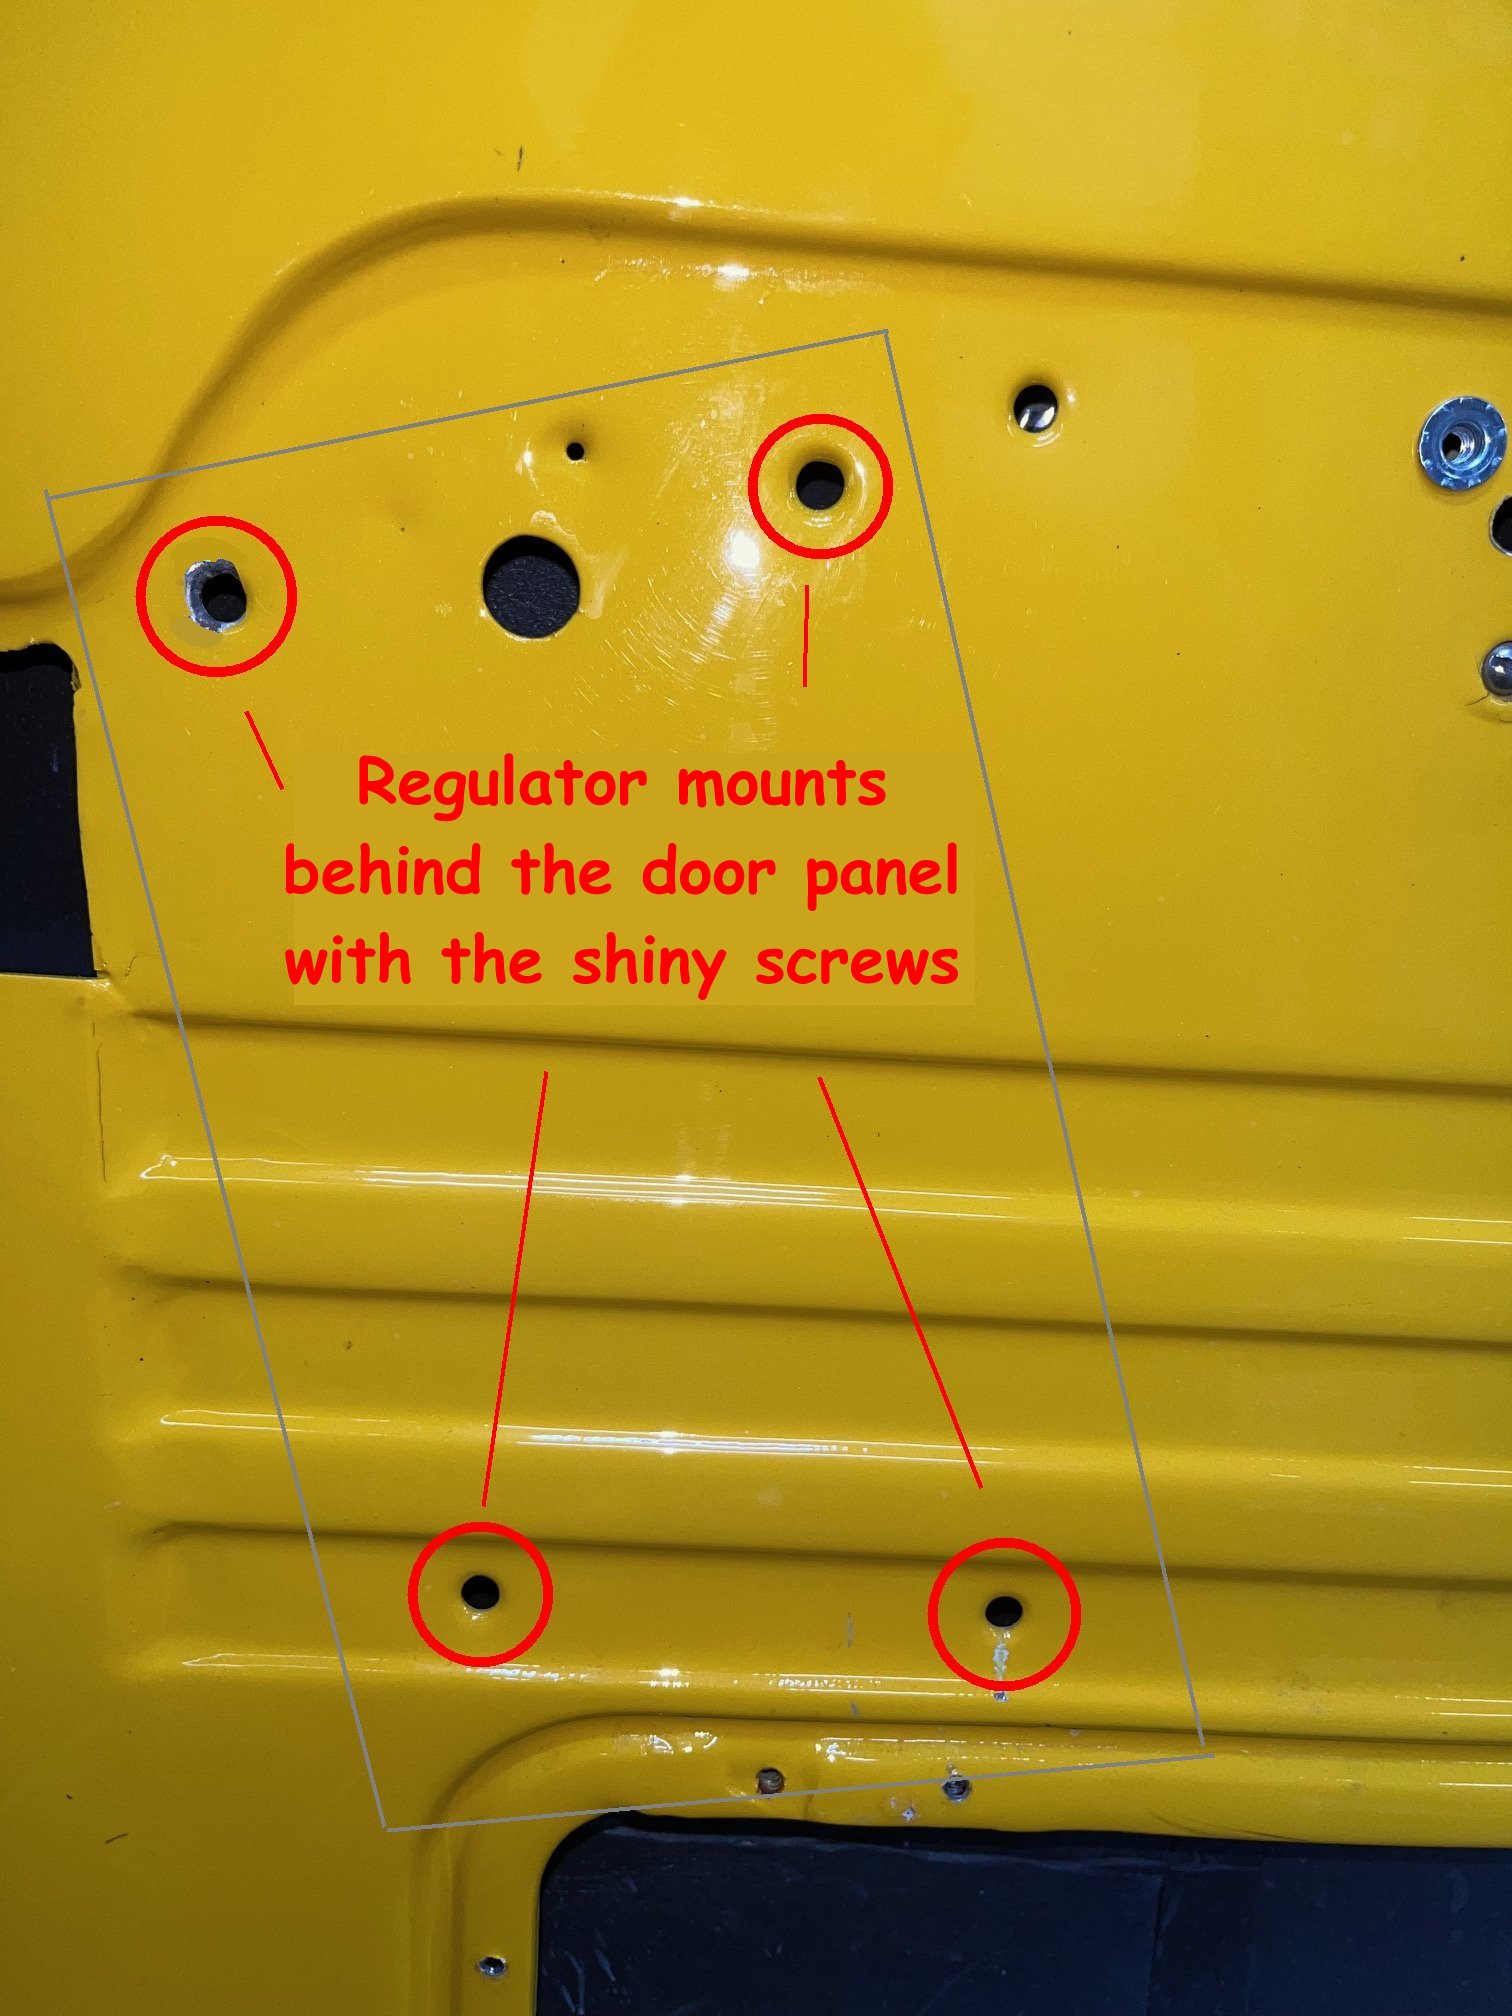
| Next step is installing the regulator piece into the lower door section. You'll notice in the picture below there are 4 shiny screws on the face plate of the regulator. Remove those screws and wrangle the regulator into the door and line it up with these 4 circled holes... it works best with the regulator in the down position... (Hook up your power source and lower the unit...you have a 50/50 chance of getting the down part on the first try... if it goes up, switch the leads and try again) put the shiny screws in and snug them up. These screws are countersunk to match the holes. I started with one of the lower screws and got it started, then I used a 2" - 1/4-20 bolt screwed into one of the upper holes to pull the mounting plate closer to the inner door surface to make starting the screws easier. | |
|
|
|
| Got the mechanism in the door pretty easily, but you need to lower the regulator to the bottom to squish down the profile. Otherwise, it's like trying to stuff a cat into a sack. | |
|
|
|
| When you have the regulator installed... hook up your power to the unit. You're gonna have to move the roller track back and forth to line up the screw holes and to attach the window track and insert the 4 small screws you removed | |
|
|
|
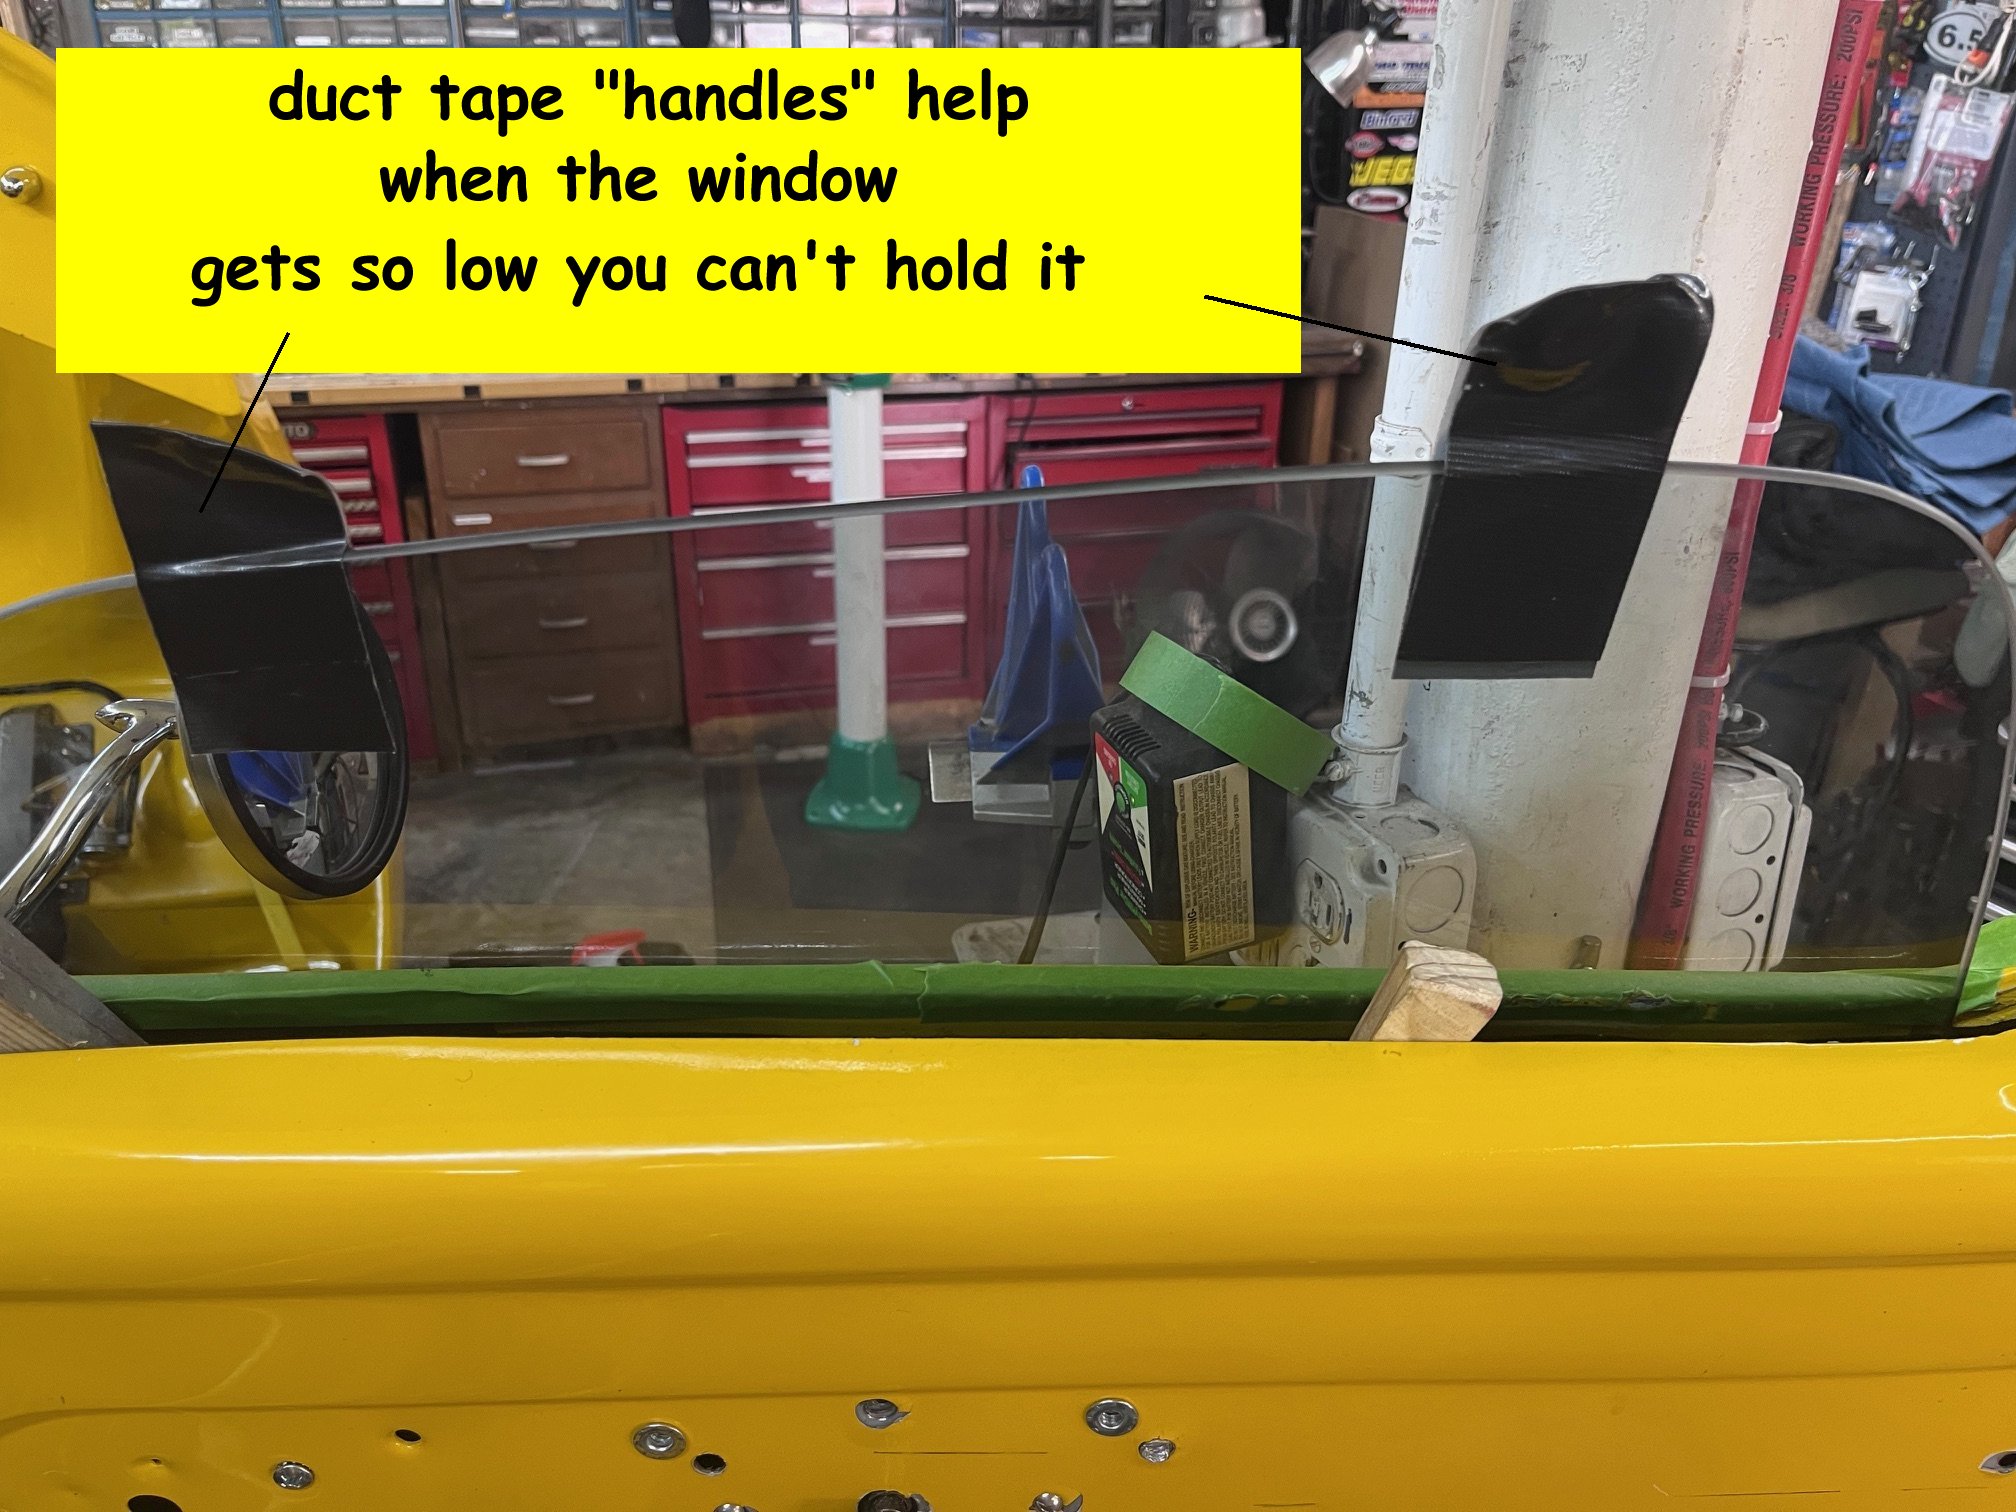
| this shows the windows up and the motor/regulator at it's lowest position. Now carefully lower the window keeping it in the felt tracks on the hinge and latch side until the installed window channel is sitting on the roller channel on the regulator |
|
|
|
|
| The picture above shows the window in place at the top of the door held with tape and wedges AND the motor/regulator in it's lowest position | |
| You will have to slide the roller channel one way or the other to get the holes for the screws lined up... put in the little screws and you're pretty much done...except for adjustments if needed. Of course you need to do all this stuff on the other door too. |
|
| Carefully raise the window with the regulator slowly and watch/listen for binding or sticking. I used some dry lube on the felts in the channels in the door. My passenger door needed some channel adjustment. There are two screws on the latch side door edge that allows you to adjust the channel. The drivers side was just right. |
|
| Now, take a drive and see if I have any wind noise or rattles and bangs to deal with. | |
|
Boilerplate denial of liability
statement… i.e. the
fine print This project is something I had to do to fix a problem and although it was expensive it was the best solution, it is not patented, engineered or even perfect… it is what it is, a home done project. I’m sure there are alternatives to this design, some even better/cheaper/easier, I just didn’t think of them or warrant them necessary... there are several similar ideas on the internet waiting behind Google for you to see/copy/build…(just like I did) This work was done by me and for me or by friends who were nice enough to help me out. I only ask that if you reproduce it give me credit for it and if you make money from it… give me my percentage. Since I have no way of knowing your level of competence, welding or cutting skills, mechanical ability or estimated intelligence, there are no guaranties or warranties either verbal, written or implied with this article. Along with this article I am giving you absolutely free of charge…that’s right ! FREE !!...the liability, total and complete liability for the use or misuse of this idea will be yours and yours alone. It belongs to you with that in mind… I am in no way responsible for any damage, injury or embarrassment you may suffer from the use or misuse of this homemade thing. If it doesn’t look like something you’d be comfortable using… don’t build/use it. If you’re not intelligent enough to make that decision about your comfort level… ask a family member or friend.. but here’s a hint… if you have to ask someone… don’t build it ! Pictures were made at different stages of construction and all assemblies in pictures may not be complete in each shot. I.e.. a picture showing ‘some parts’ only means that it was not finished, but I’ve tried to make the idea complete to the best of my ability. If you have questions or see mistakes or problems, let me know by e-mail and I’ll make the corrections if possible.. Use these ideas at your own risk. Modify them at your discretion and to suit your purpose. Your mileage may vary, batteries not included, much assembly required... wait one hour after building to enter the water, additional charges may apply. not all applicants will qualify for advertised A.P.R., for ages 10 to adult…side effects are comparable to placebos. Do not take drugs when building or operating machinery. JUST SAY NO. Copyright . 2024 John Niolon, All International Rights Reserved. This document may not be copied or published without prior written consent of the author- jniolon@att.net |
|
