Installing 3 point Seat Belts in a '53 F-100 |
|||
by John Niolon |
|||
| If
you're gonna cruise in your truck... you need to be safe and seat belts are safe... they
are like gravity.. it's not just a suggestion.. IT'S THE LAW. I'm trying to finish
up all the little stuff that needs holes and such before paint and installing the belts
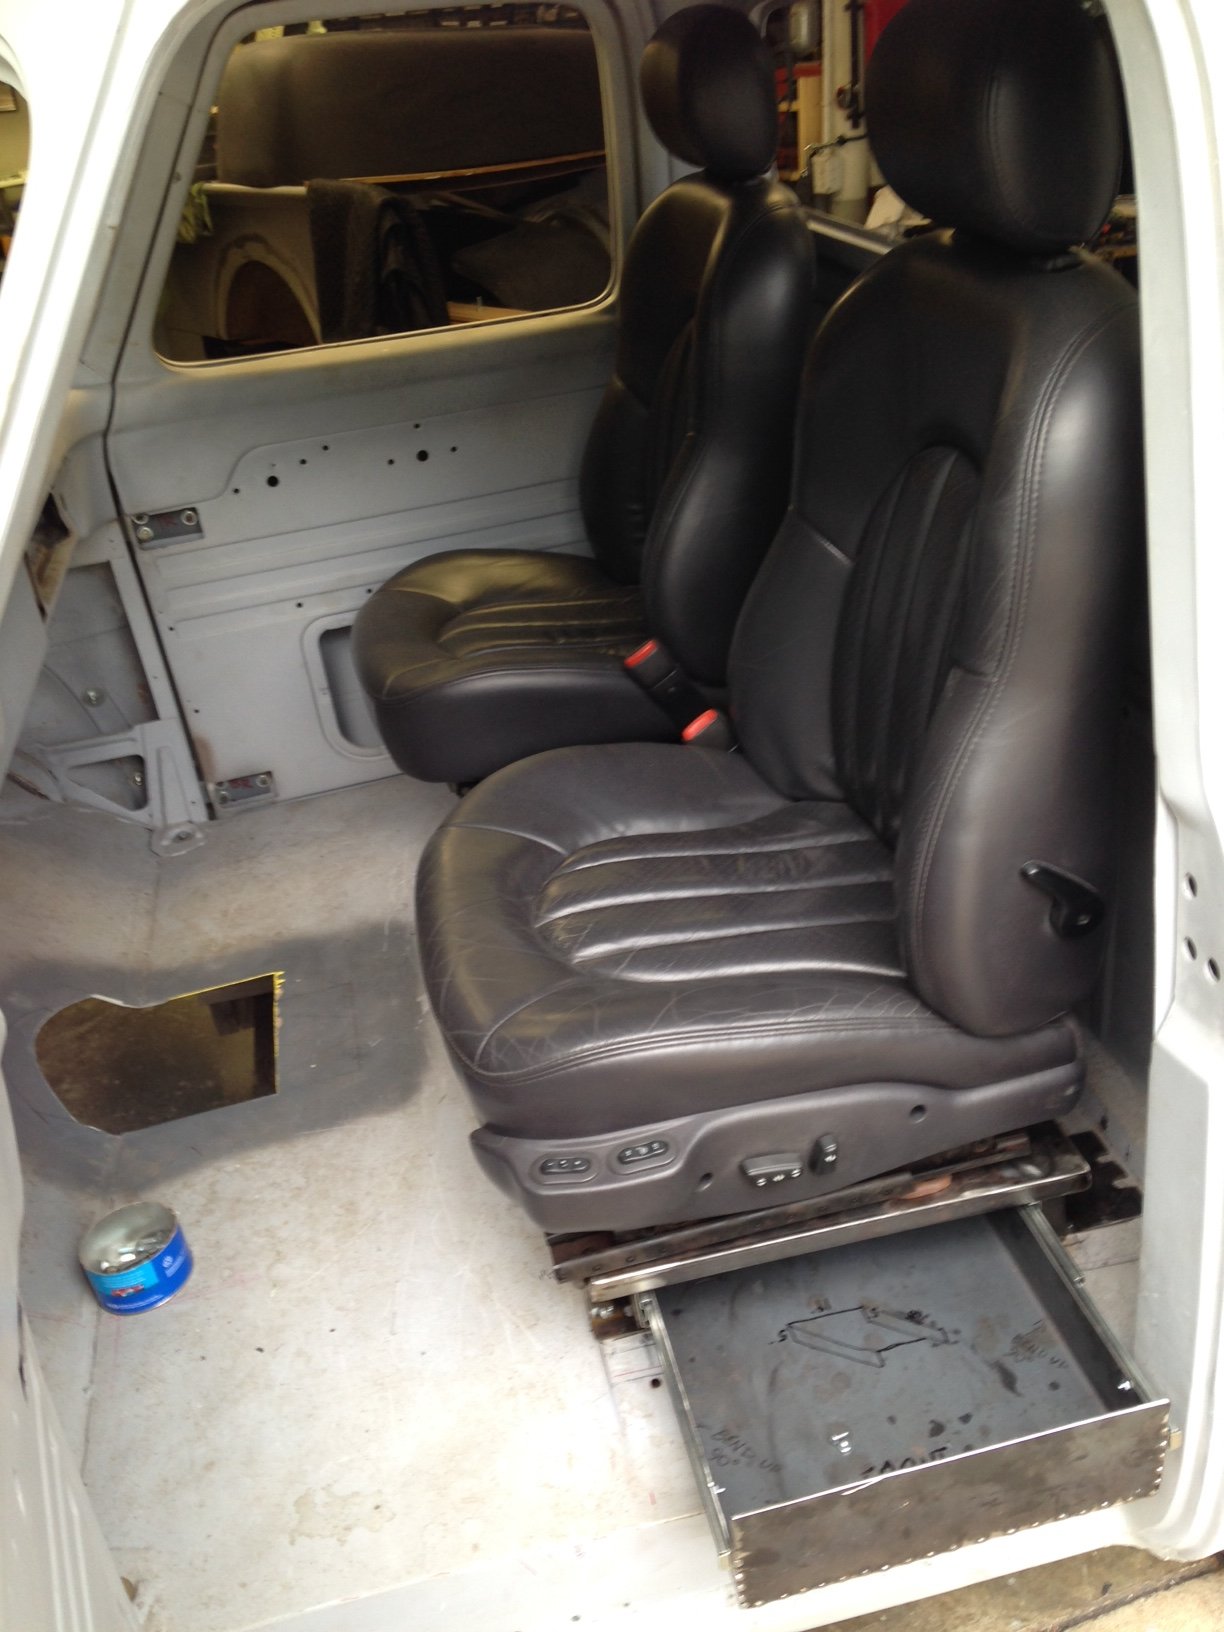
was one check mark I needed to make. Months ago I ordered a set of belts from Sportsman's Guide that were military surplus... belts from a military humvee and they price was great. They looked good so they went on the shelf. Now today installing them and THEY ARE TOO SHORT ! Part of the problem is MY extended frame. But they are shorter than normal I think. One issue was that the Hummer belts mounted on a raised portion of the floor which shortened them also. Another problem is my seat is sitting on a drawer unit that is about 6" high.
|
|||
|
|||
| So.... anyway... here's how I did mine...
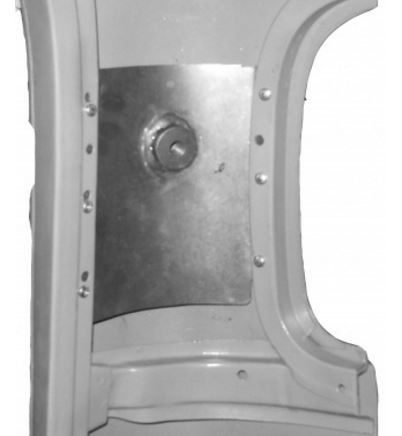
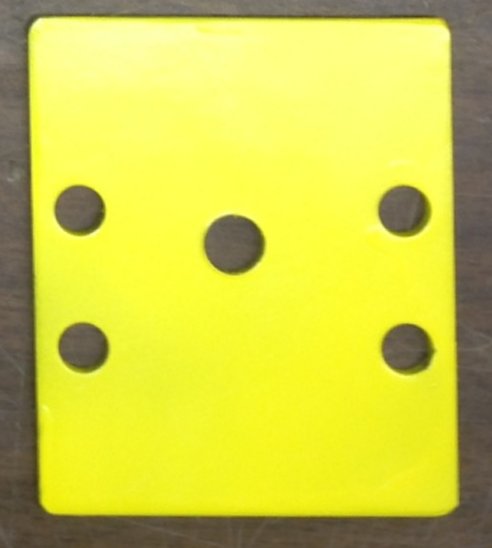
You need to create a mount point on the back corner of the cab up above seat back level, and it should be pretty substantial. You can fabricate something or buy a set of mounts from one of the vendors... Mid-50 F-100 ( www.midfifty.com) has these.
|
|||
|
|||
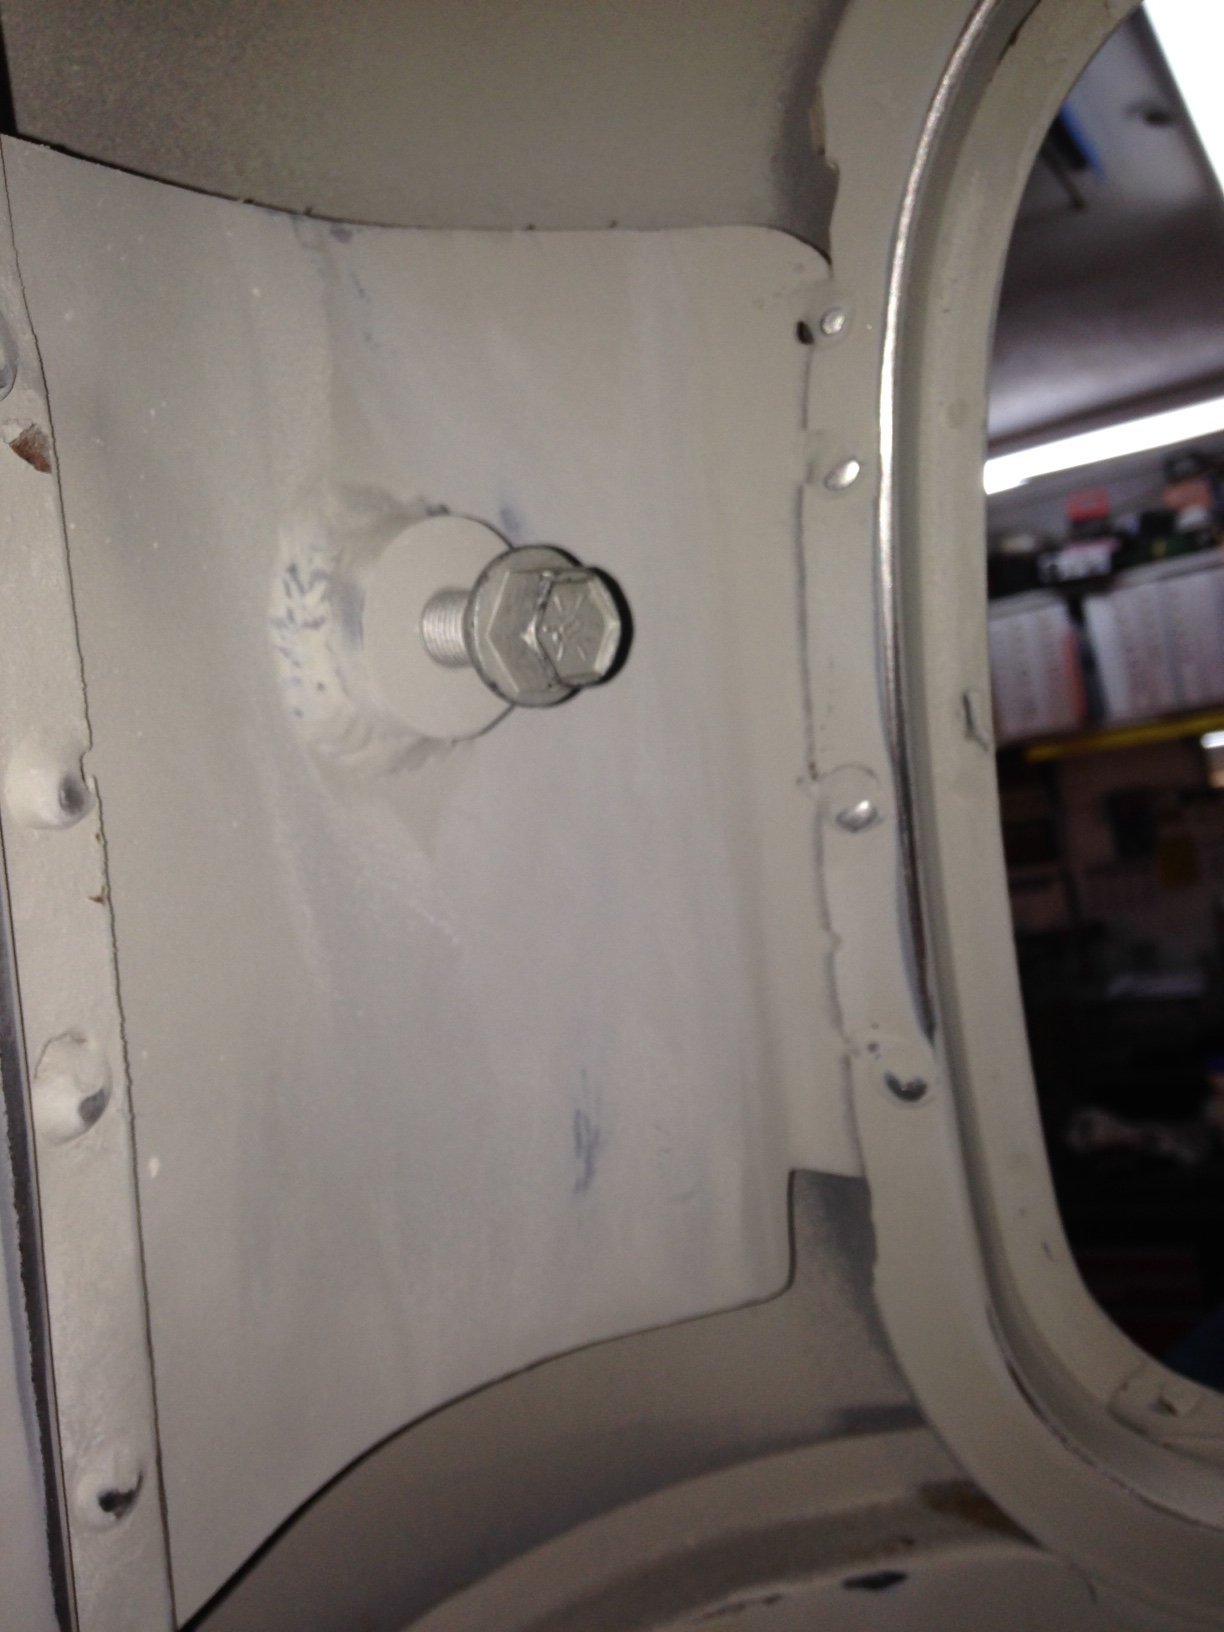
| You can make em or buy em... their pic shows them bolted in... below are mine I welded in. The ones from Mid-50 are probably 1/16" thick. If you fabricate I wouldn't use less... but I tend to overbuild. But consider how much stress these plates will be under during a crash. | |||
|
|||
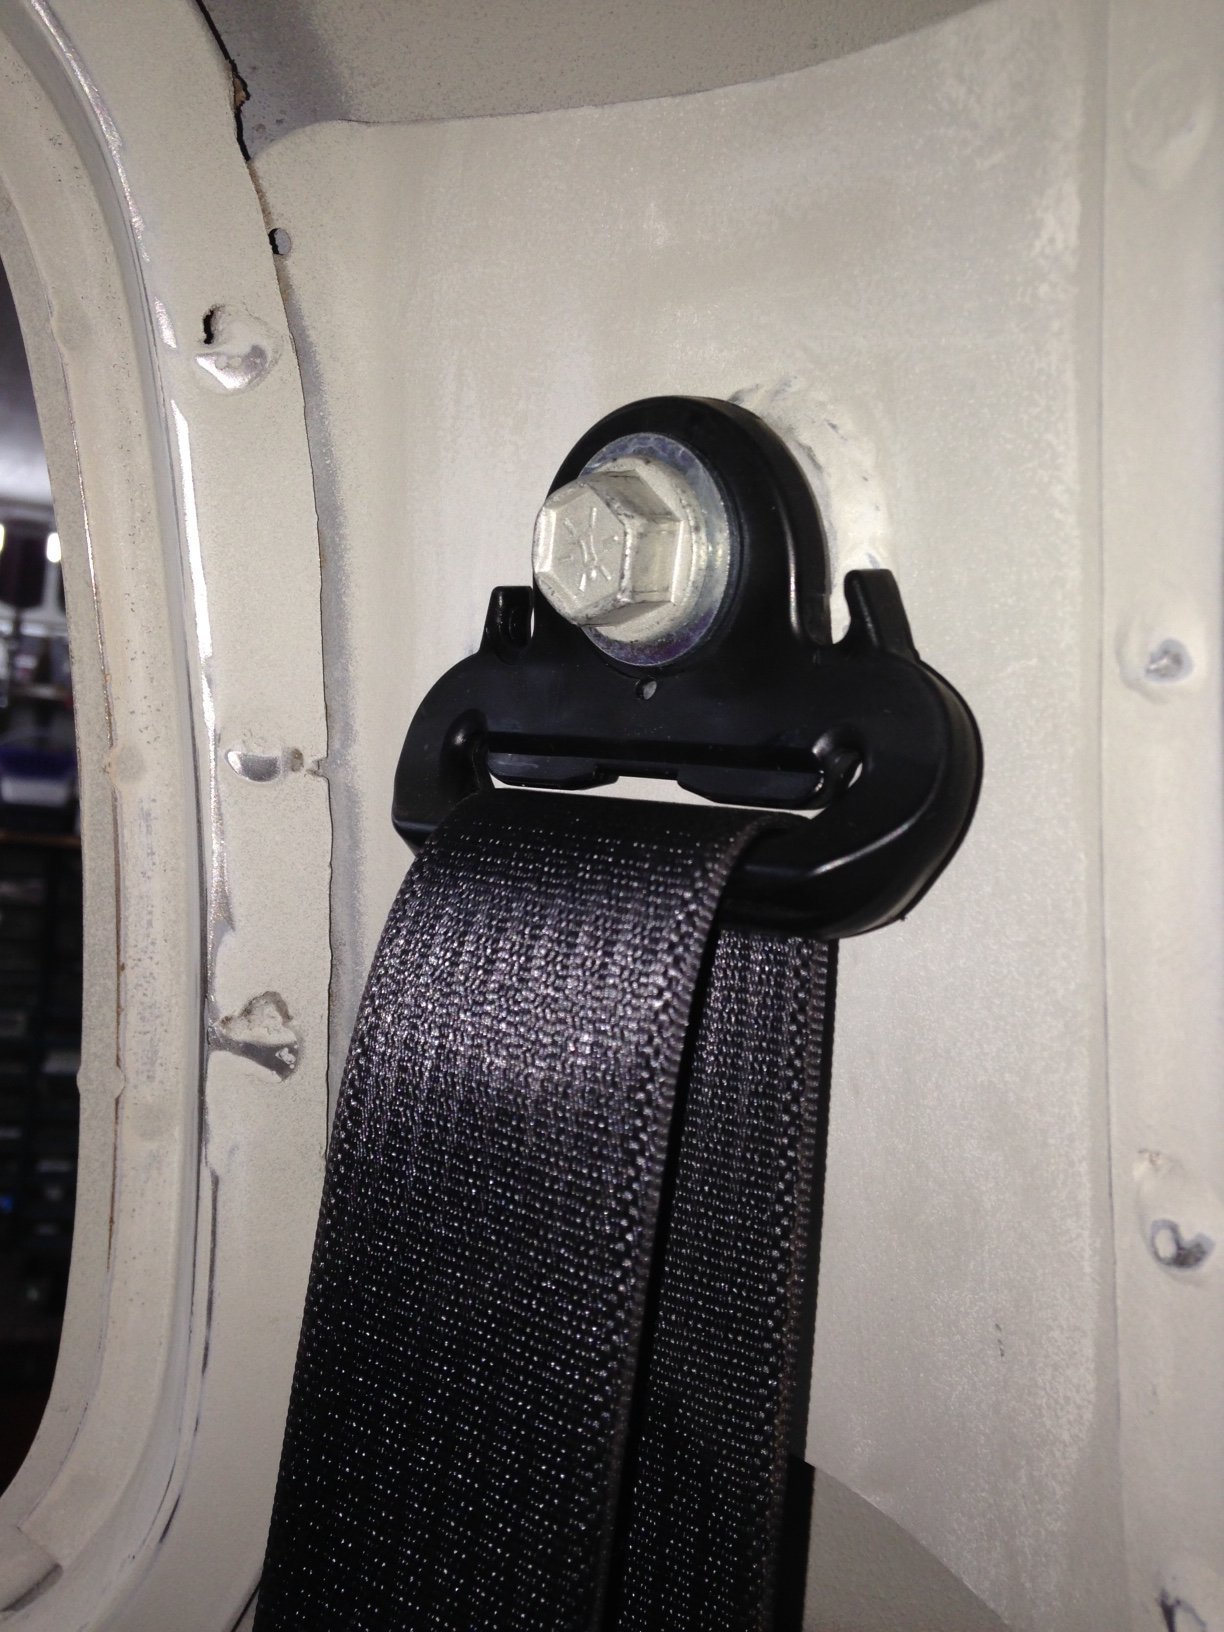
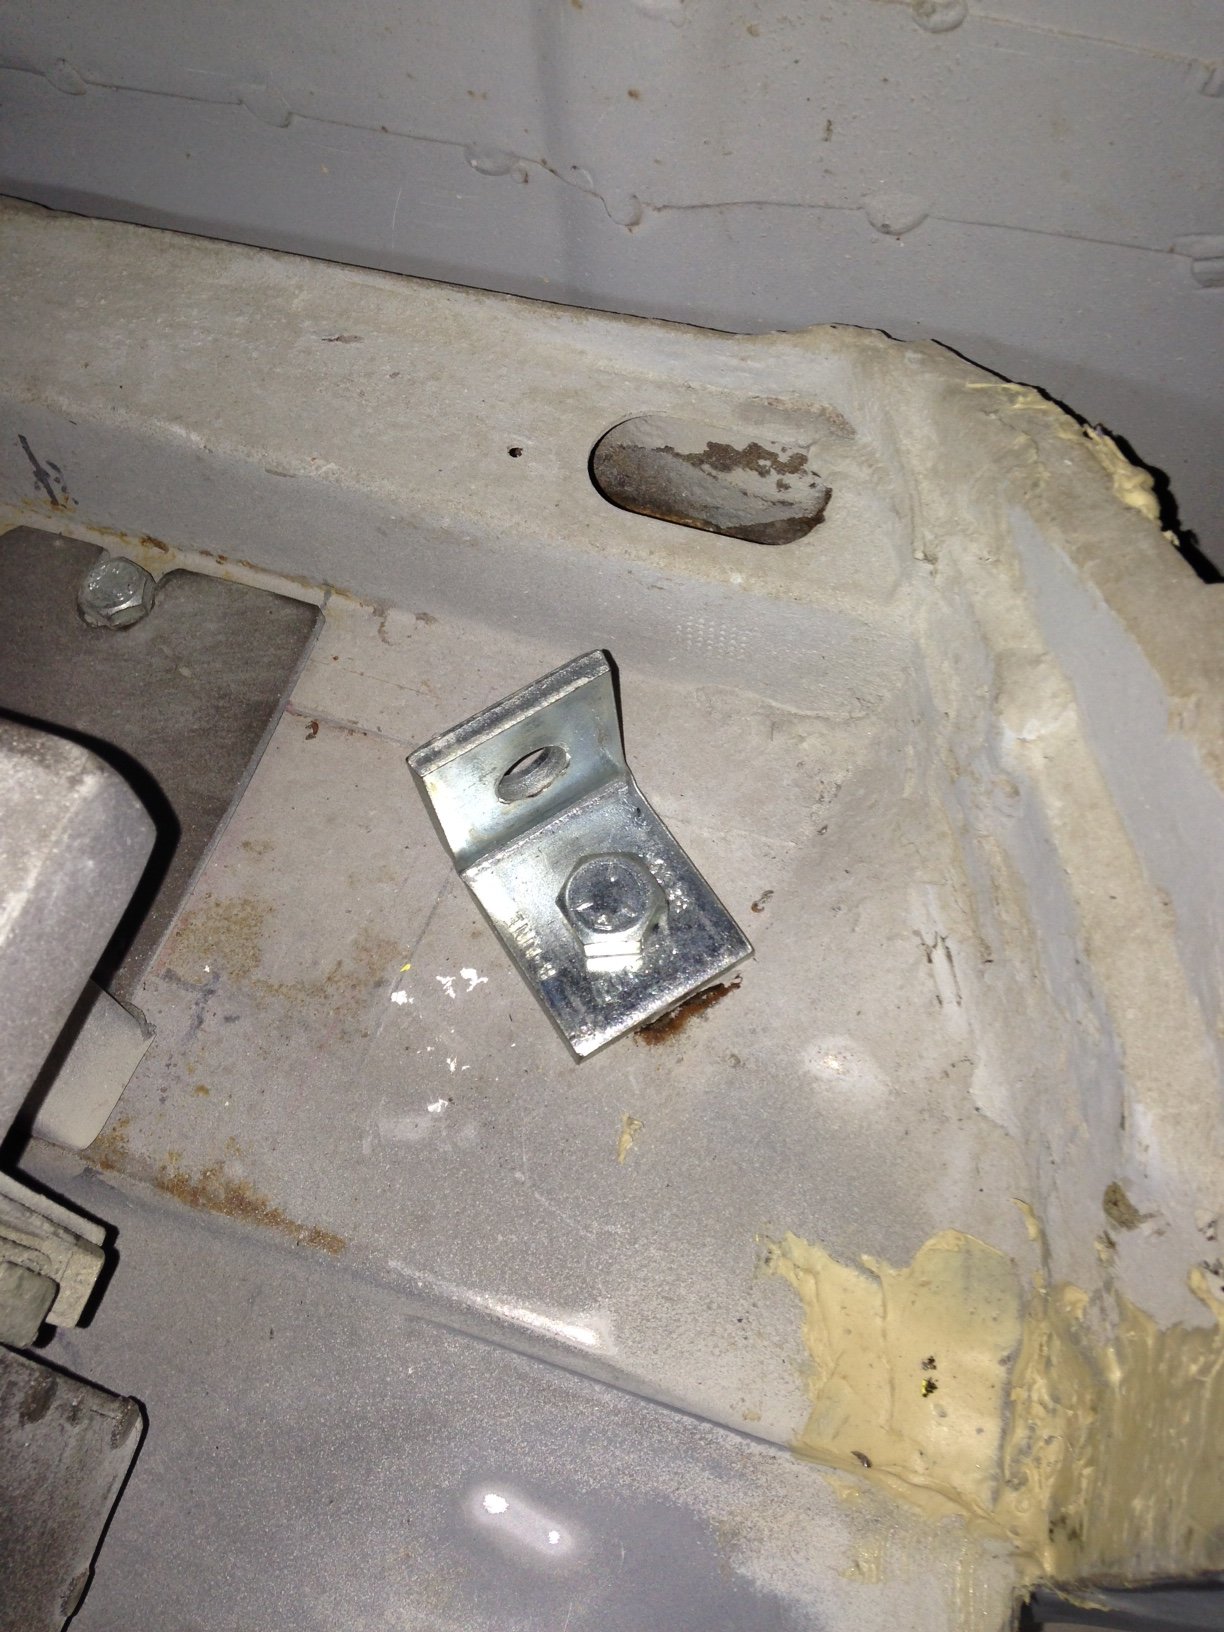
| It doesn't really matter which end you anchor first, so I'm showing the top mount first. For one reason, it gets about half the stuff up and out of the way. In between the two ends of the seat belt is a sliding metal brackets which serves as the top anchor point of the system. It attaches to the top cab mount you mounted earlier using a 7/16 shoulder bolt. When the shoulder bolt is snugged down it still allows the bracket to swivel for adjustment. | |||
|
|||
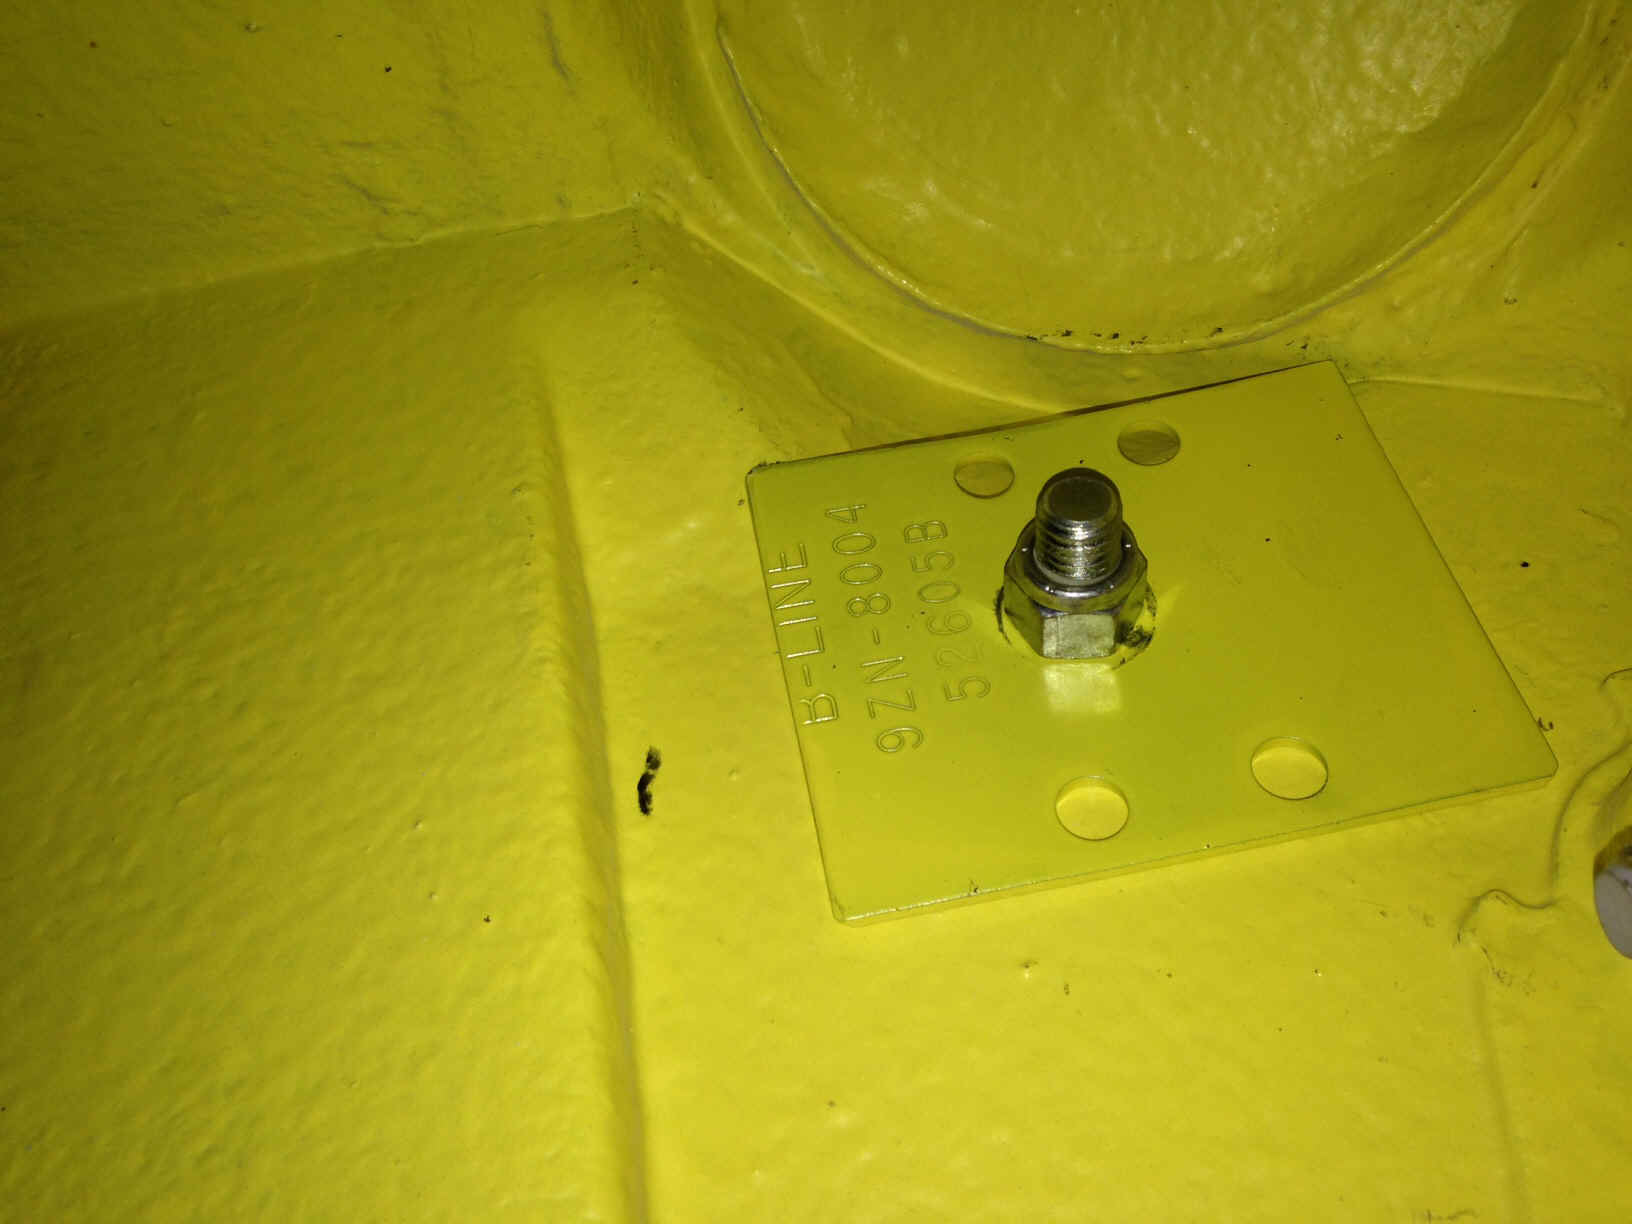
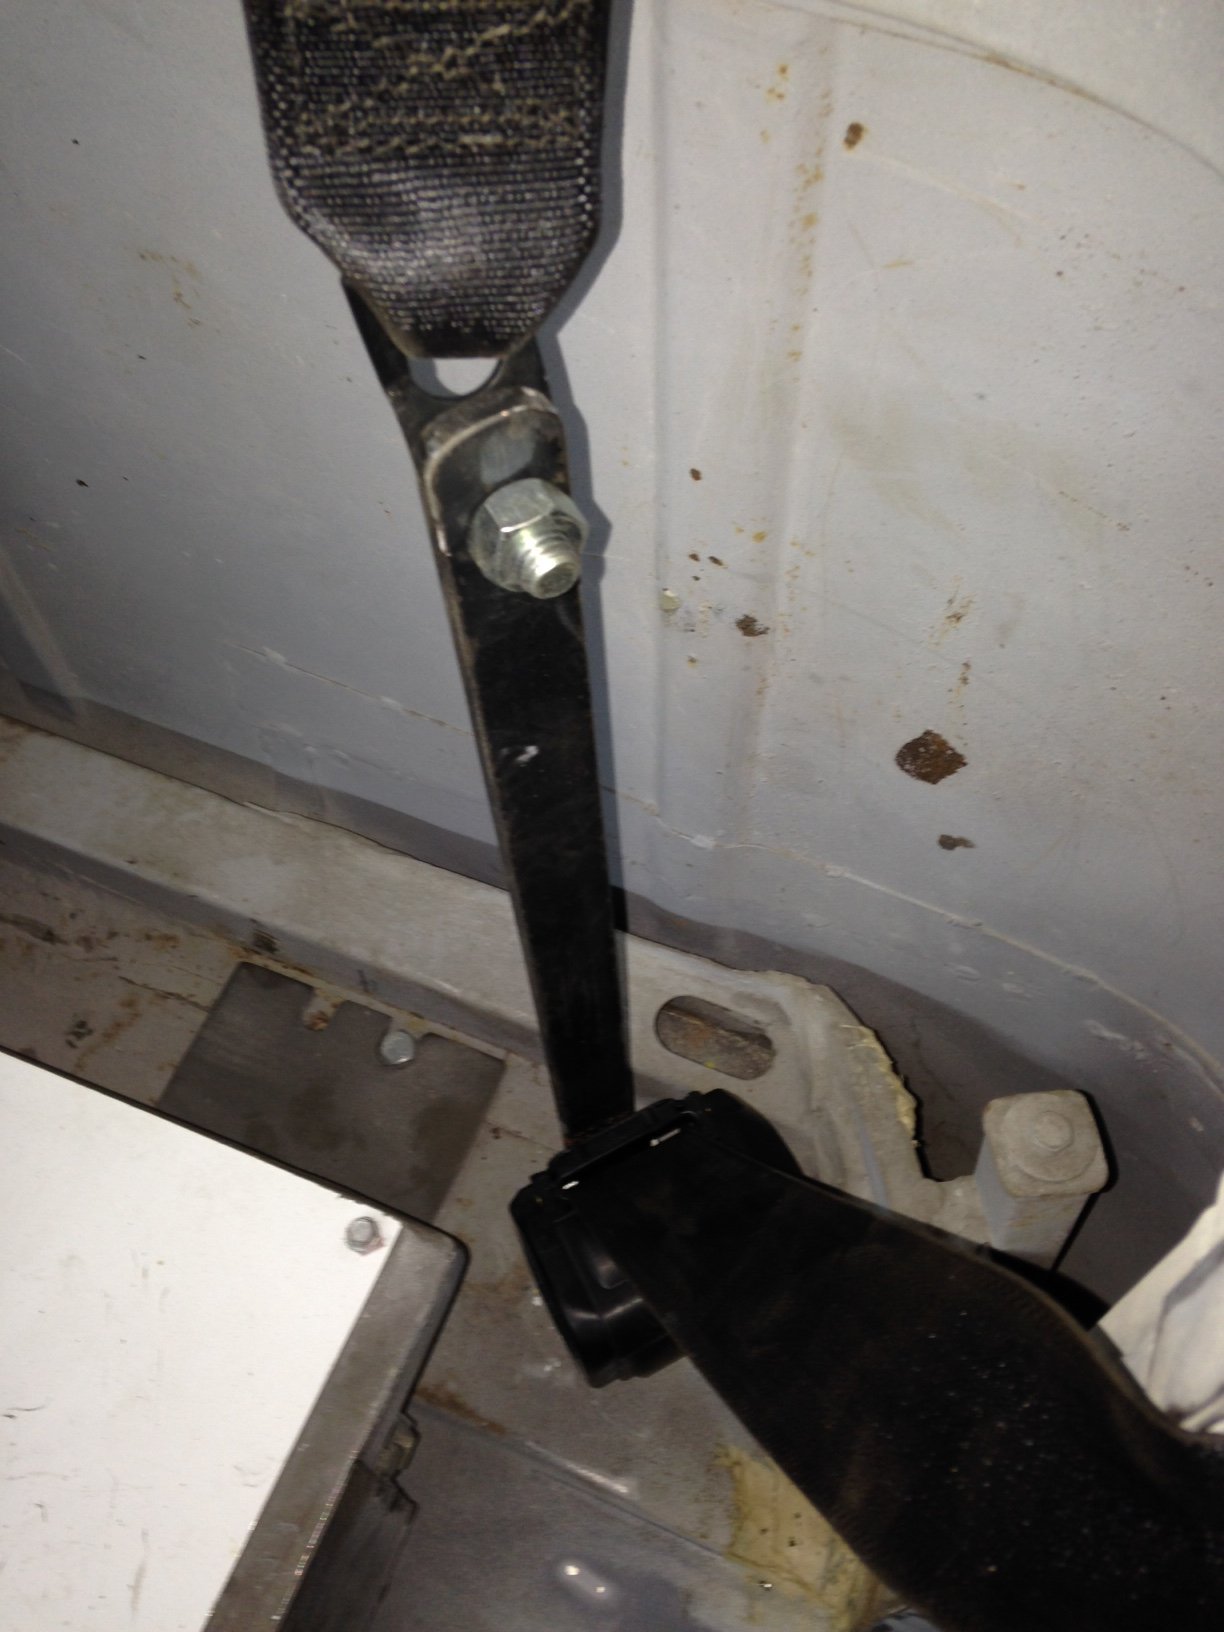
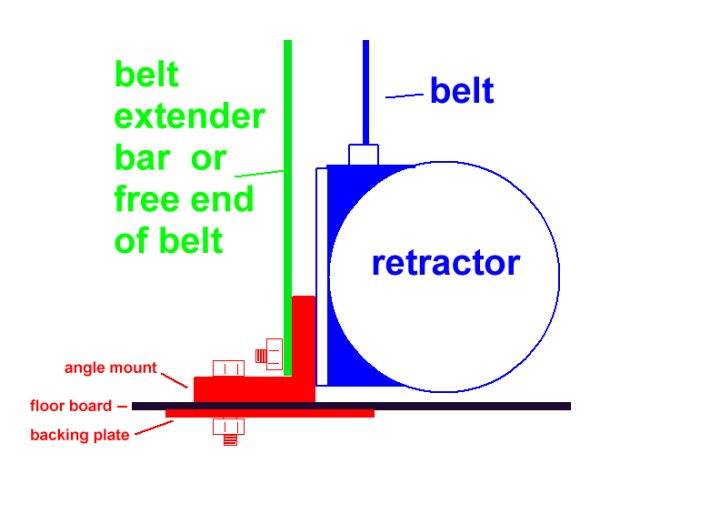
| The next
part is locating the lower mounting point for the retractable part. I choose the
area behind the seat in the curve of the cab floor, directly below the top mount. I
used 1/2" mounting hardware (grade 5), a sturdy mount bracket (actually a 90 degree
fitting used on unistrut channel...about 3/16" thick and bent from 1-1/4" flat
bar) and a backing plate for under the cab. In case you decide to test the
strength of your mount by having an accident, the backing plates function is keeping the
floor from tearing out from the impact. Don't just put a lock washer and nut under
the floor. No, really... just don't. There could be some significant force applied
there during a 'test'.
|
|||
| I made
the backing plate from some 1/8 plate brackets I had... one piece was large enough to cut
in two for both pieces needed. Ignore the holes around the sides, they were already
in the plate ... I just drilled the center hole 1 /2", primed and painted it to
match. It's about 3" x 4" and 1/8" thick.
|
|||
|
|||
|
|||
|
|||
|
|||
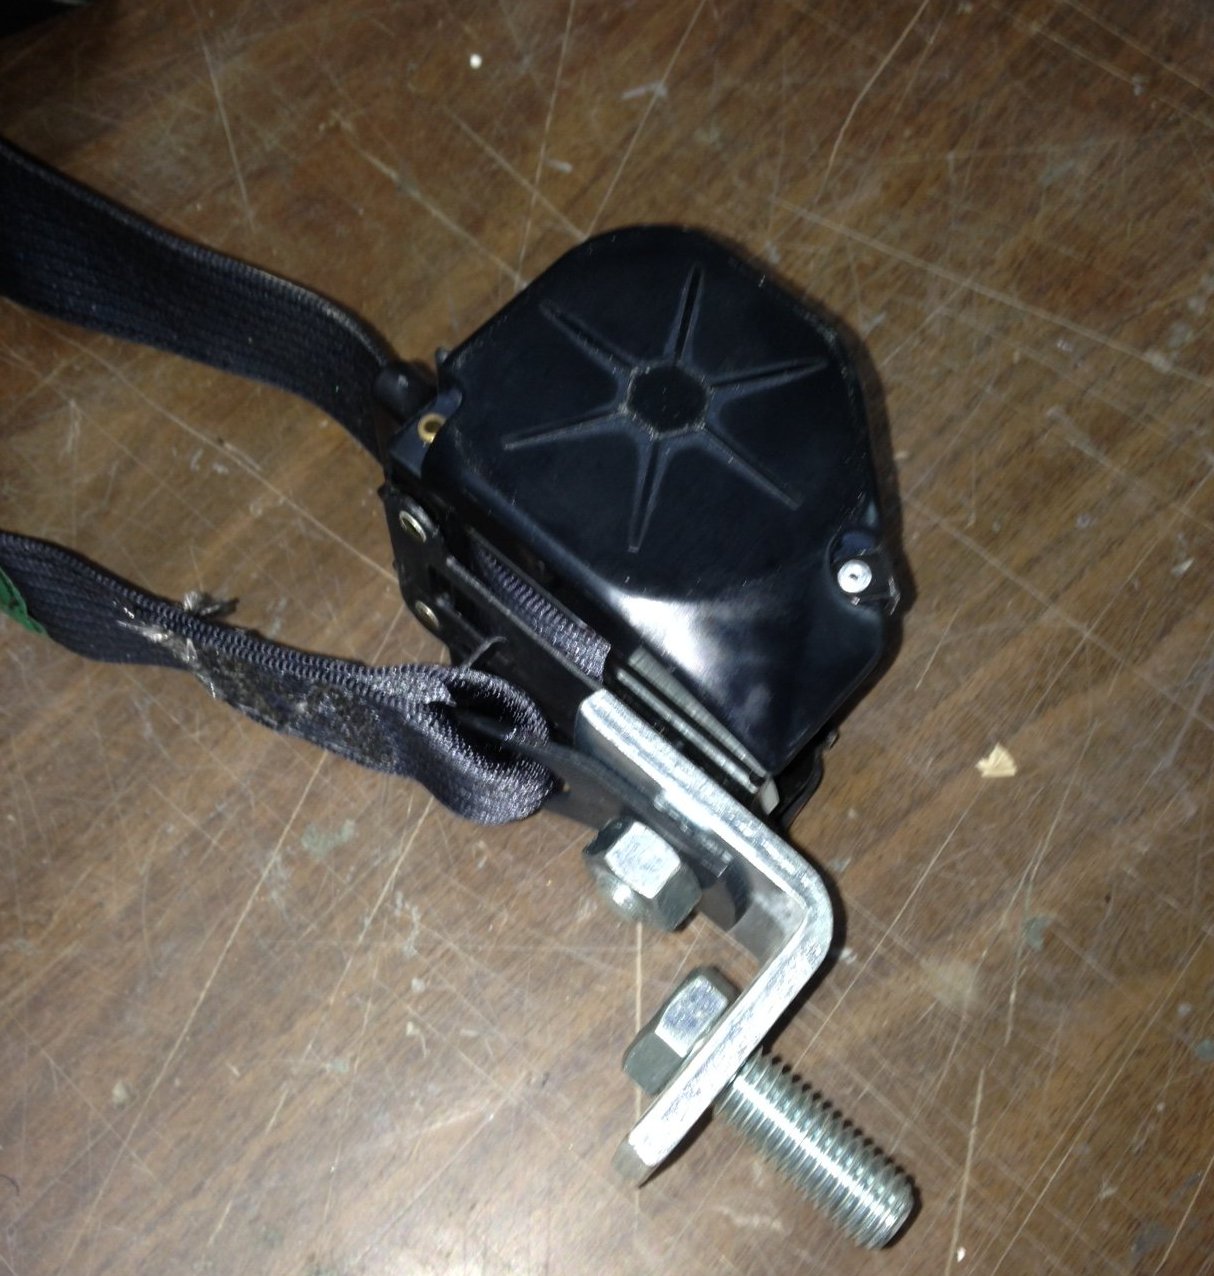
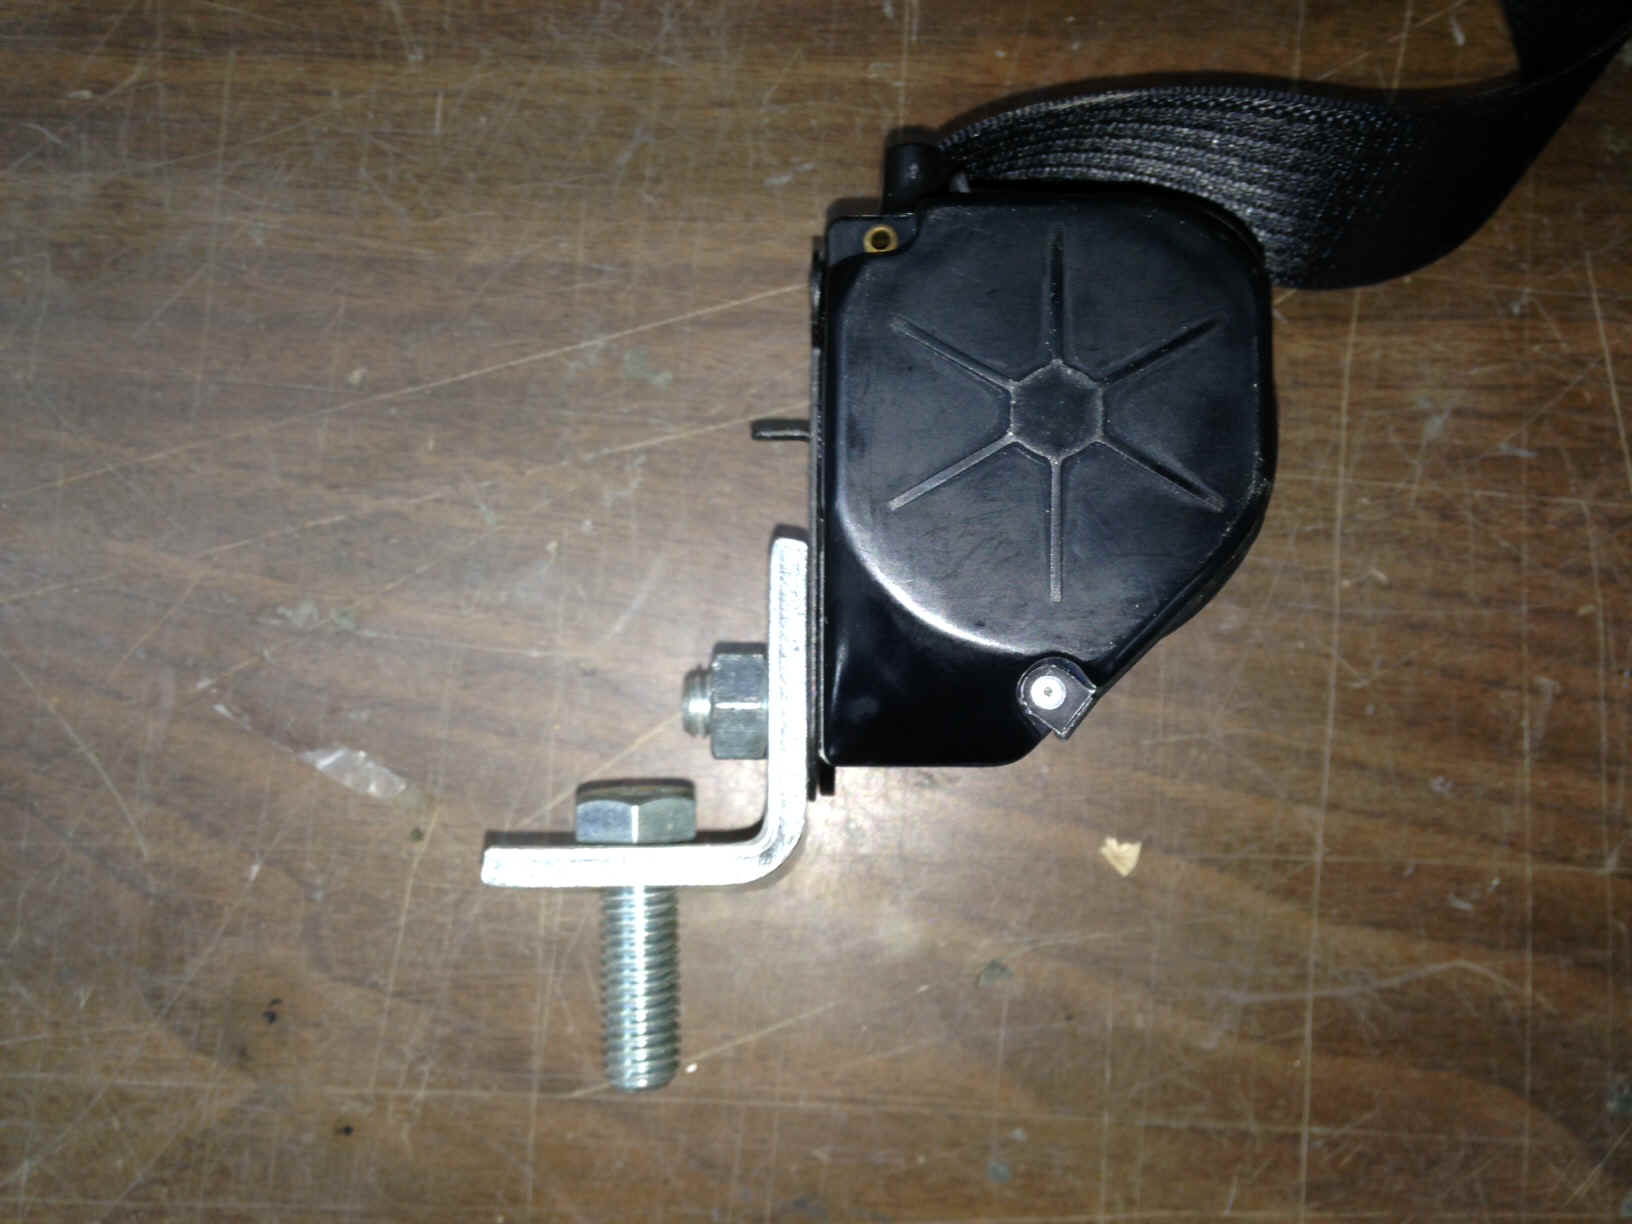
| The next step is attaching the retractable end of the belt assembly to the anchor in the floor board. I used 7/16" grade 5 hardware | |||
| It's a little easier putting all the pieces together first.. it's a little crowded when it's assembled and even more so when you start working in that corner of the cab. Mount the retractor to the angle then put the 1/2" bolt thru the hole in the floor. The first two pics below show how the retractor mounts to the anchor angle...7/16 bolt holds the retractor and the 1/2" bolt goes thru the floor to the backup plate. The third picture shows the opposite end of the seat belt attached to the 7/16" bolt. Nylock nuts will replace the standard nuts when everything is complete. That ties both ends down and when you pull the latch across your mid section and latch it... you're secure. |
|||
 |
|
|
|
| Depending on how your seat is made the other part of the seat belt is the called the buckle and it's where the latch is inserted on the other side of the seat... | |||
|
|||
| My seats
came from a Chrysler product and the buckle looks like the one above... a strong cable
with an eye on one end and a latch on the other. Others are made from the same
webbing as the seat belt. On the Chrysler seat there is a mount point for the eye
and it's securely bolted to the bottom back corner of the seat. If your seats don't
have this option you'll have to duplicate the floor anchor just like the retractor is
mounted ... angle mount... serious hardware thru the mount and the backup plate under the
floor. Make sure you turn the buckle in the right direction with the release outside
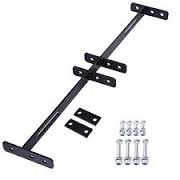
the belt latch or it's cumbersome to unlatch the belt. If you're not into all the fabricating and stuff there are options... such as this mount bar... but you still have to mount it securely... just showing you an option. You can find them behind Google.
|
|||
|
|||
| So,
everything you've read so far is what you'll want to do to install your seatbelts if you
seat is sitting on the cab floor and your seatbelt choice is of average length ...even
with an oversized mid section....if you have the retractor, the free end and the upper
mount and the buckle securely mounted... you're done... well, do
the same thing on the other side... ride safely.
|
|||
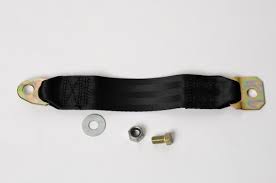
| If anyone is interested in my solution for my 'too short' belt situation... continue reading. | |||
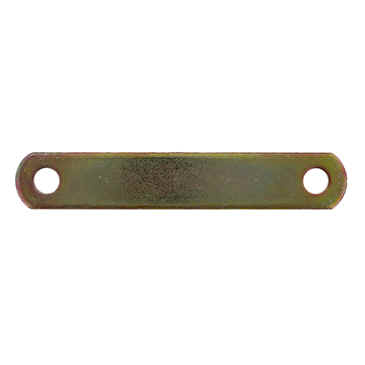
| I looked around the internet for options and saw several... but only two that I'd be satisfied with. Both are called 'extensions'. Normally they are used for persons with a larger than normal body size and sometimes for soldiers who must ride with a significant amount of equipment and armor strapped to their body. One style is a web design that matches the seat belt material and bolts between the floor mount for the loose end and the loose end you unbolted. The other is simply a strong flat bar that works in the same manner 'extending' the free end of the belt. Most come in either 8" or 12" lengths | |||
 |
|
||
| I had need for something a little longer so I used 1/4" thick 1" wide flat bar - 16" long. It's secured just as the original free end was and added the needed length. I used the same bolt at the bottom where the retractor is mounted and 7/16" bolt at the top.. A nylock nut will be used at the other end after I'm sure everything is how I want it. | |||
 |
|||
Boilerplate denial of liability statement… i.e. the fine print This project is something I came up with to prevent me from spending too many dollars on a high dollar commercial solution, it is not patented, engineered or even perfect… it is what it is, a home made project. I’m sure there are alternatives to this design, some even better/cheaper/easier, I just didn’t think of them or warrant them necessary... there are several similar ideas on the internet waiting behind Google for you to see/copy/build…(just like I did) This work was done by me and for me or by friends who were nice enough to help me out. I only ask that if you reproduce it give me credit for it and if you make money from it… give me my percentage. Since I have no way of knowing your level of competence, welding or cutting skills, mechanical ability or estimated intelligence, there are no guaranties or warranties either verbal, written or implied with this article. Along with this article I am giving you absolutely free of charge…that’s right ! FREE !!...the liability, total and complete liability for the use or misuse of this idea will be yours and yours alone. It belongs to you with that in mind… I am in no way responsible for any damage, injury or embarrassment you may suffer from the use or misuse of this homemade thing. If it doesn’t look like something you’d be comfortable using… don’t build/use it. If you’re not intelligent enough to make that decision about your comfort level… ask a family member or friend.. but here’s a hint… if you have to ask someone… don’t build it ! Pictures were made at different stages of construction and all assemblies in pictures may not be complete in each shot. I.e.. a picture showing ‘some parts’ only means that it was not finished, but I’ve tried to make the idea complete to the best of my ability. If you have questions or see mistakes or problems, let me know by e-mail and I’ll make the corrections if possible.. Use these ideas at your own risk. Modify them at your discretion and to suit your purpose. Your mileage may vary, batteries not included, much assembly required... wait one hour after building to enter the water, additional charges may apply. not all applicants will qualify for advertised A.P.R., for ages 10 to adult…side effects are comparable to placebos. Do not take drugs when building or operating machinery. JUST SAY NO. Copyright . 2017 John Niolon, All International Rights Reserved. This document may not be copied or published without prior written consent of the author- jniolon@att.net |
|||