|
|


|
1-2-20 Pictures I haven't posted yet |
|
   
|
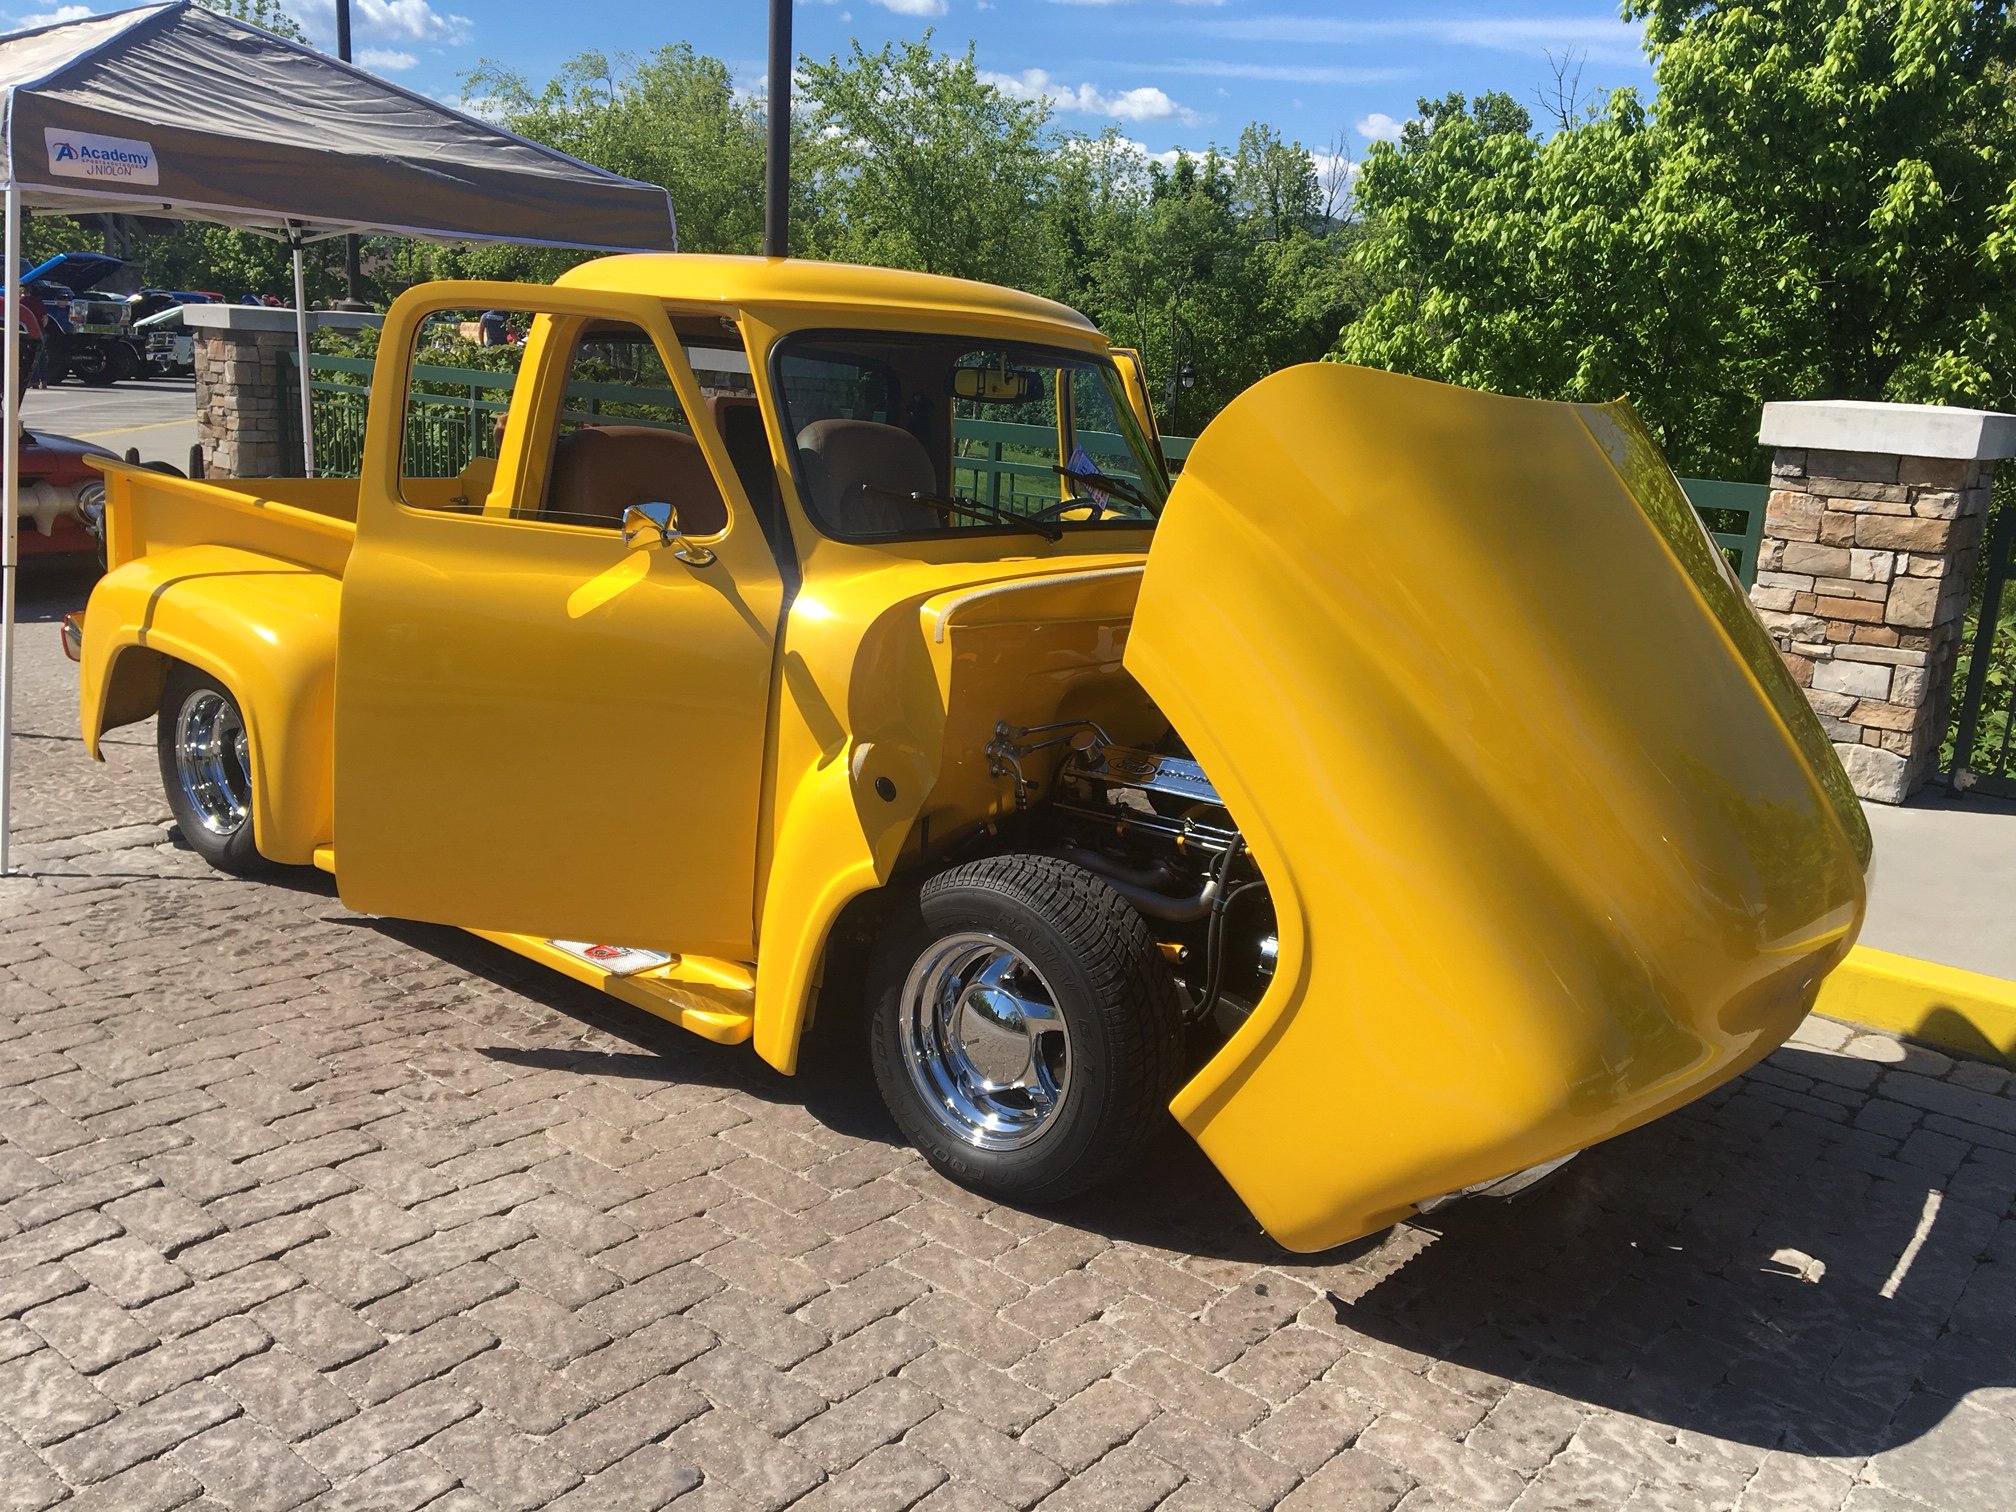
10-21-2019--- well, it's been a long time coming..rolled it off the trailer on August 7, 1995, and the end is so close |
| 9-17-18
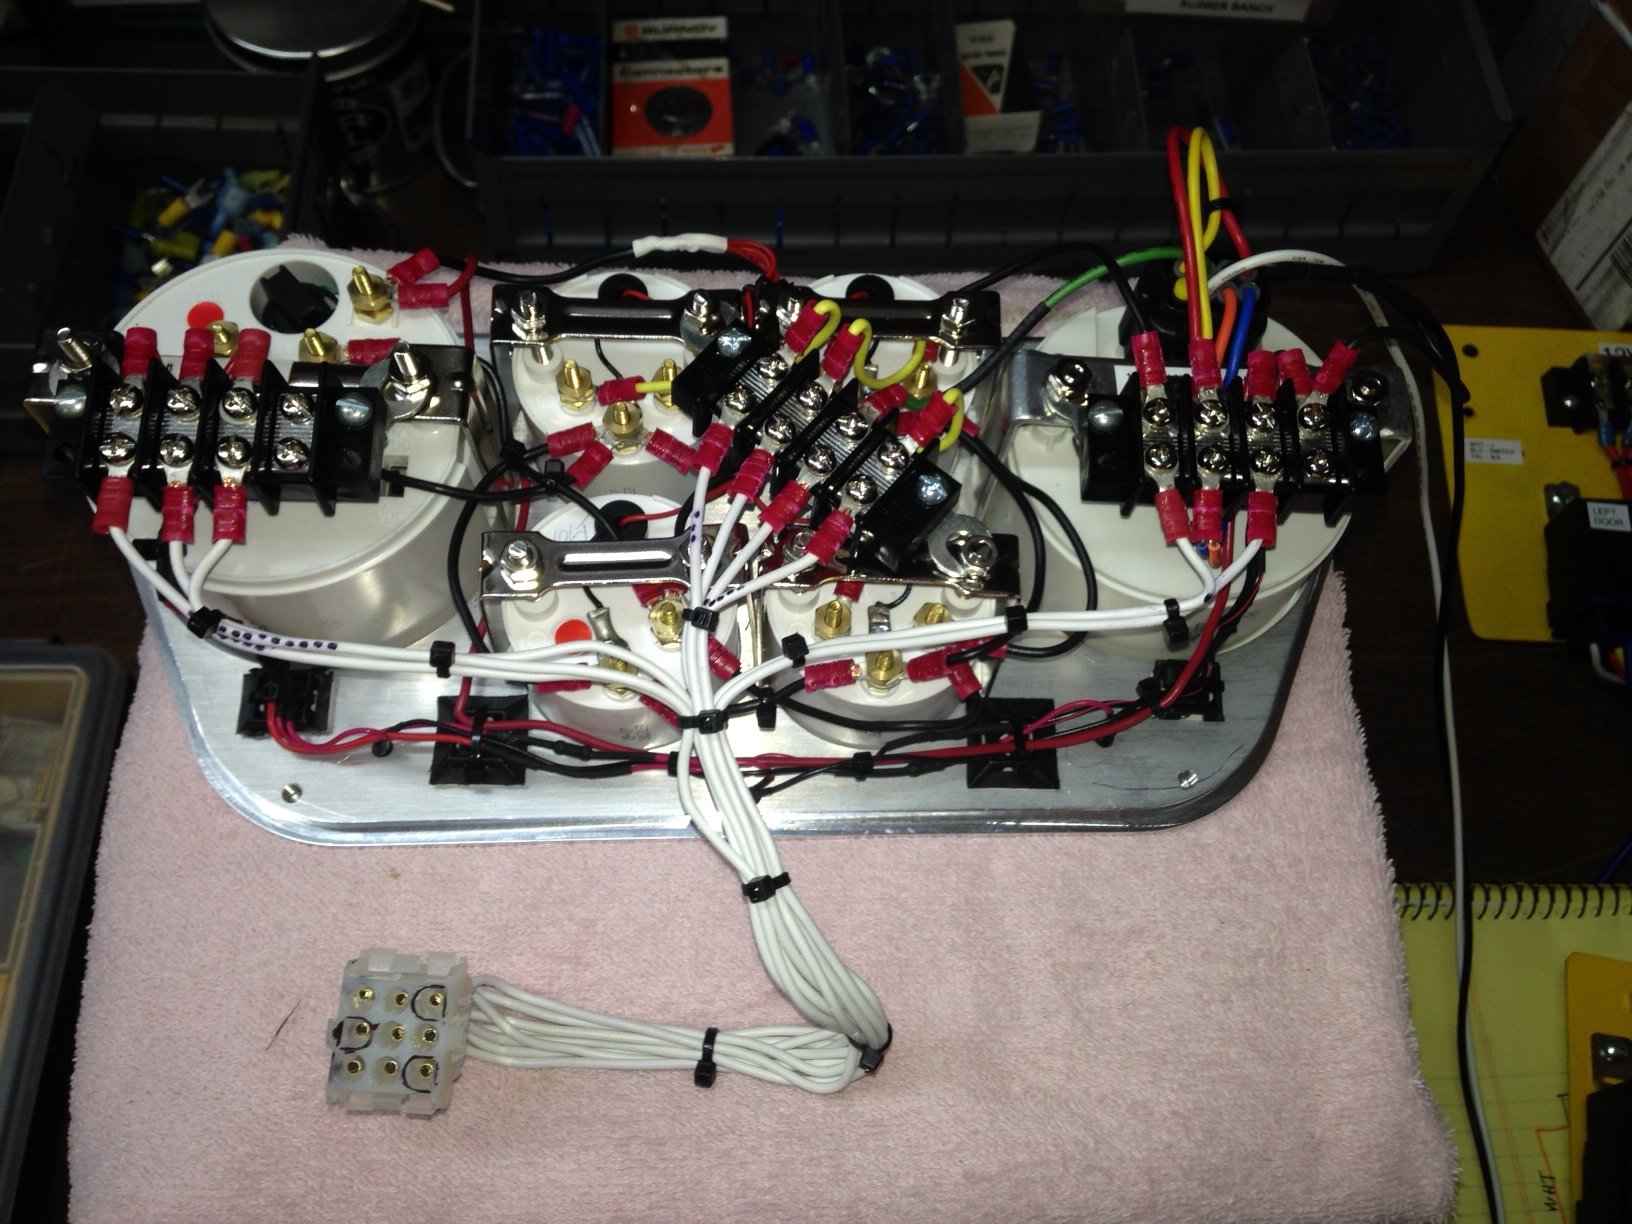
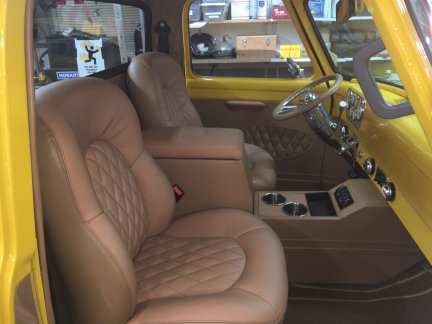
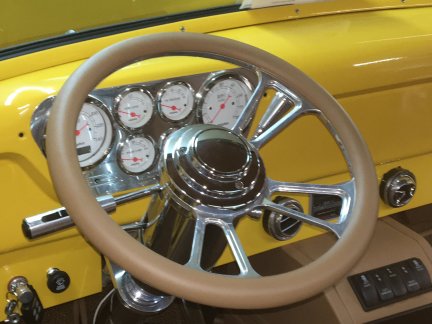
got tired of looking at the dash panel . .. this is a better
picture... it makes me smile
|
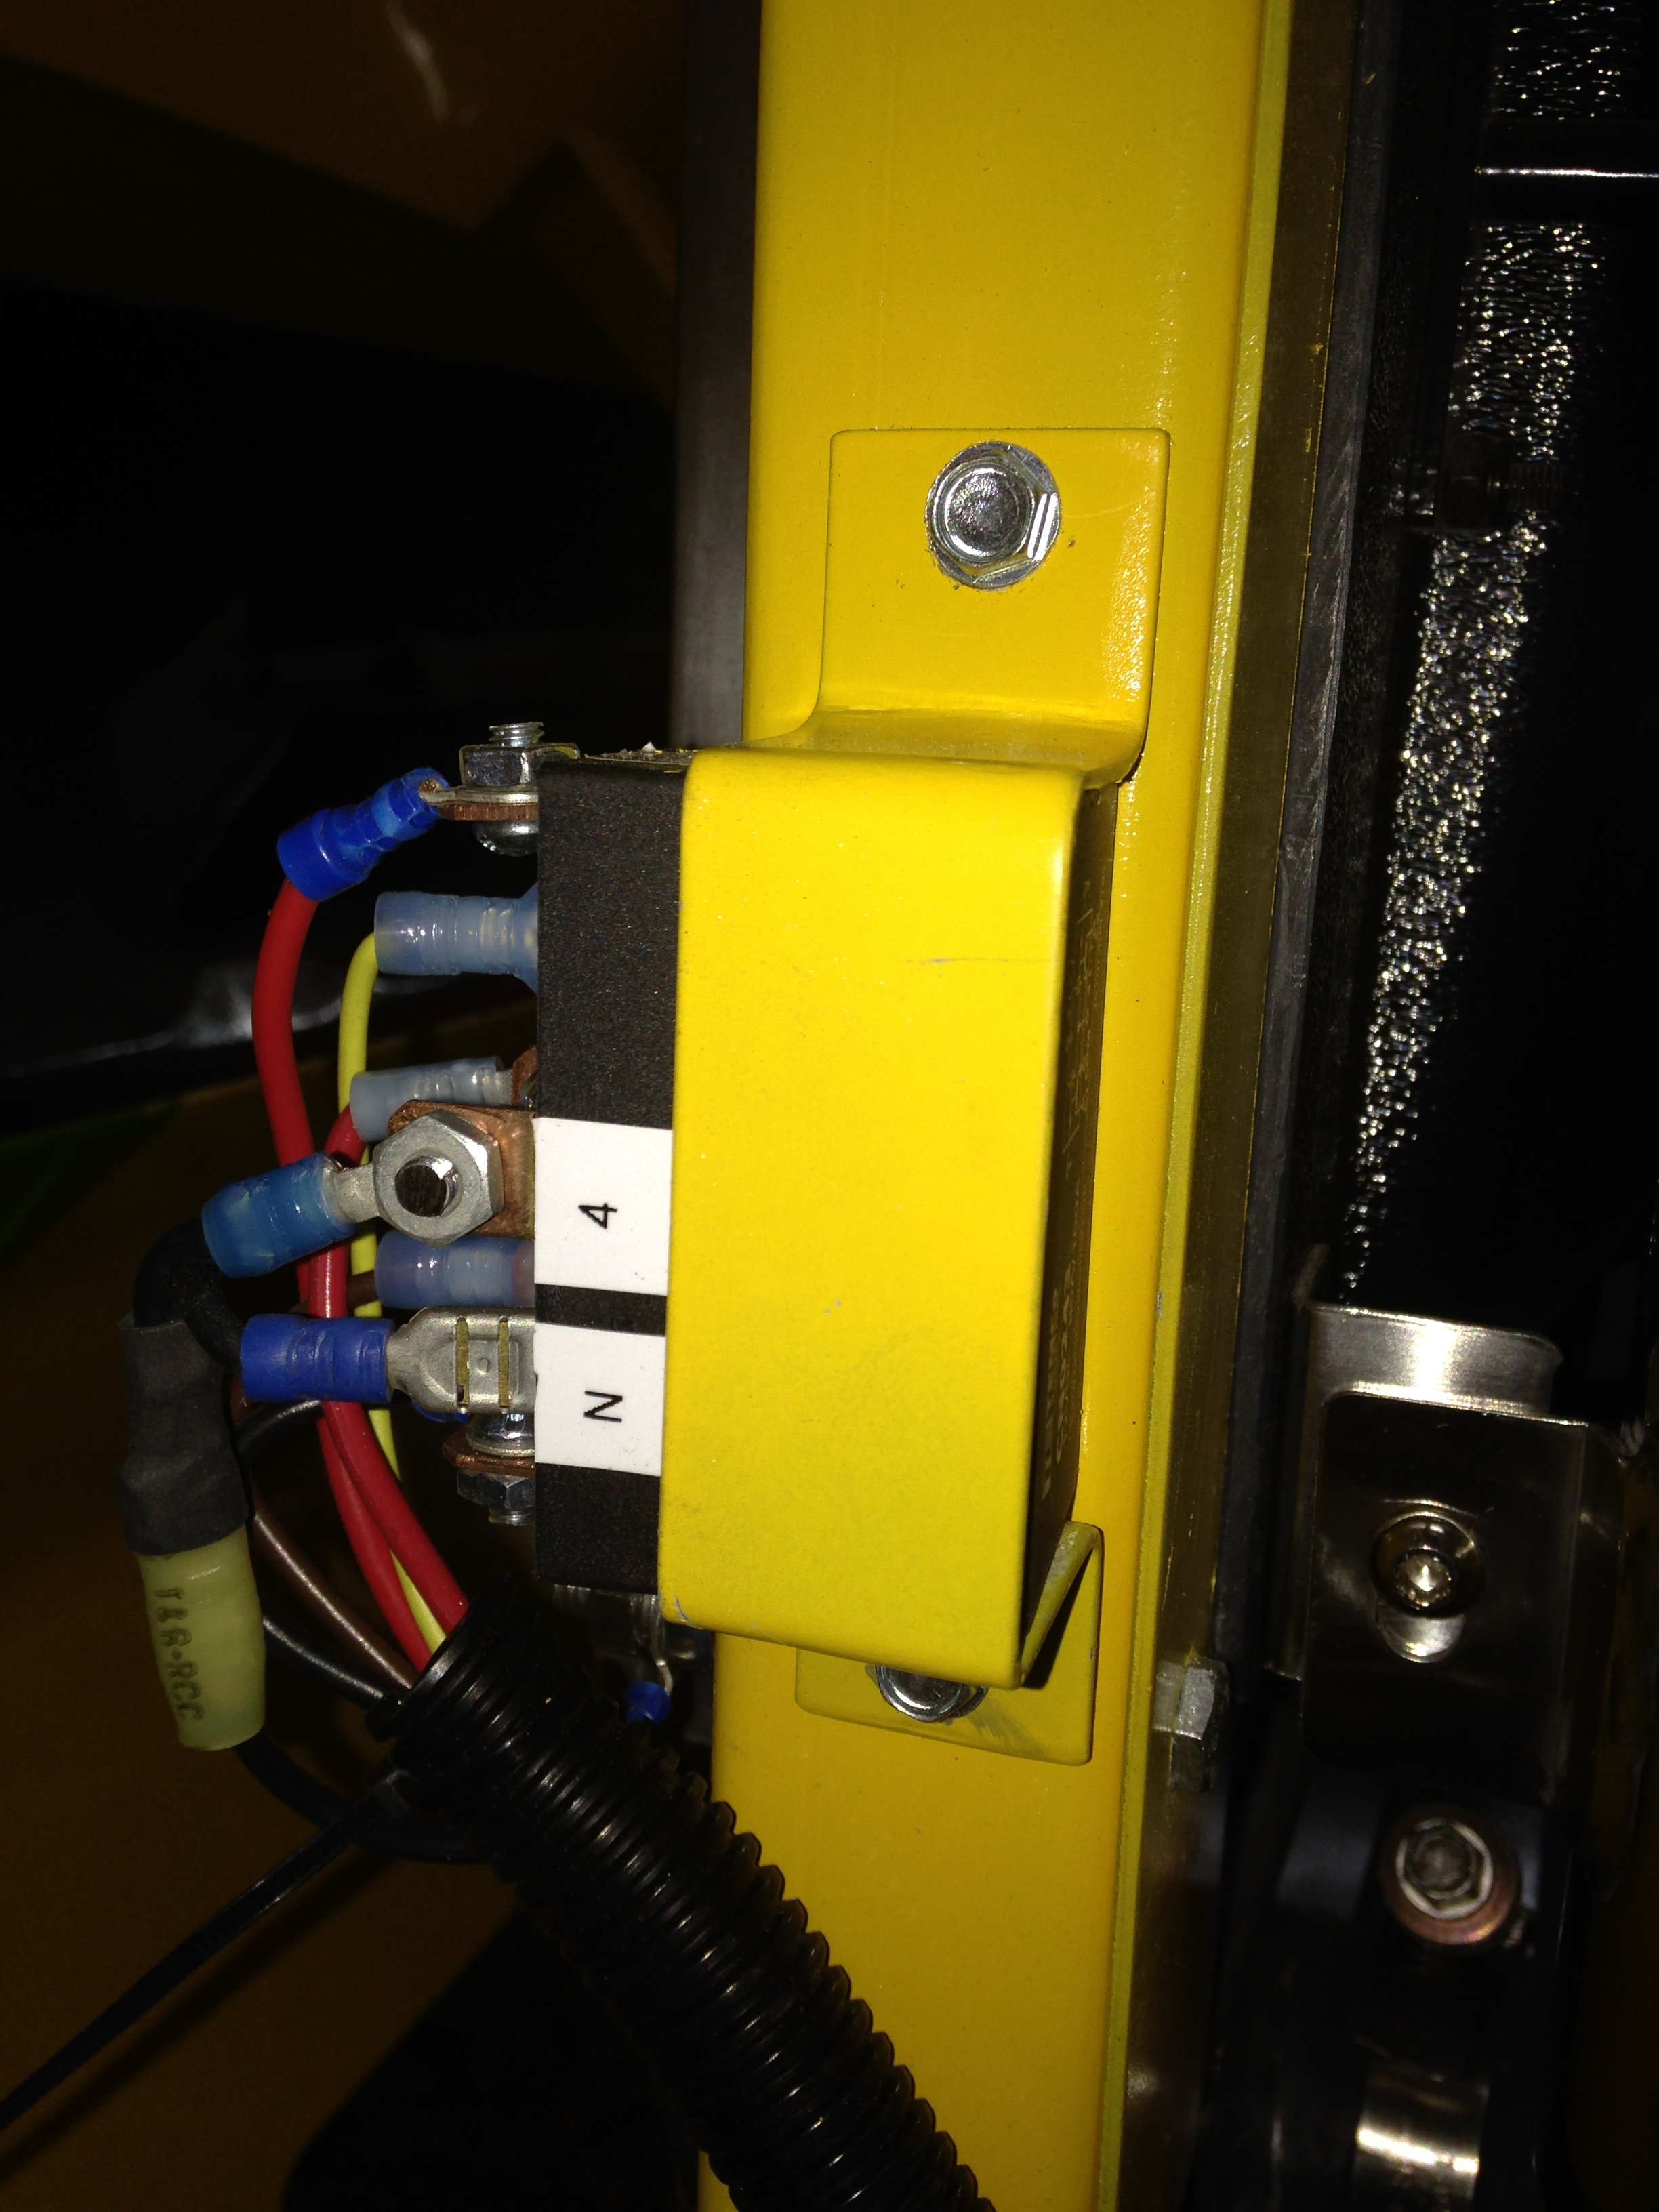
| 8-7-18 Seems like I have less and less time to work on the truck... but slowly progress is being made. Wiring still in progress. Everything but a few wires that terminate in the console is done. The new dash panel is complete and will connect with two connectors. |
|
|
| I've learned a
few lessons with this project.... don't make anything tight till you finish.
I've had to back up several times and add wiring that was forgotten or added after the
looms were secured... and even remove looms and go to a larger size.. Power should
be applied soon and tests will be made on each circuit. I did hook up a jump pack
and saw no smoke from anywhere, so that's a good start. Now, individual circuits and
connections will be checked. After that it's pretty much time to put the wheels back
on, get her off the jack stands and fire her up.. The next two steps require taking
the truck to the muffler shop for the exhaust system and then to upholstery. It
might be finished this year !!!!!!!!!!!! WooHoo !!! Unless, as usual,
something interferes.
|
| One more trip was added this week... back to the paint shop. Put the first scratch on the cab and it's a doozy. |
|
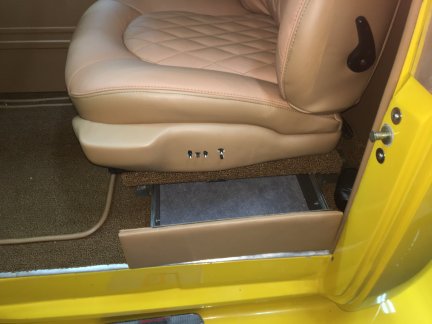
| I built a seat
frame with drawers for storage and had put it in the cab to work in the wiring under
it.
|
| I was taking the drawer frame out of the cab and I'm limited on door opening space and was wrestling it around the wiring on the cab floor. I'm old with bad shoulders and it was a chore handling that much weight in that small area. I had it part way out of the door and I raised it up (about the length of the scratch ) and the foot on the frame was closer to the cab than I thought... My biggest hurdle now is paint. Jim was down to a thin layer in the bottom of the third gallon when he finished... I know I gotta buy another can... hopefully a quart. and that will probably be 300+ |
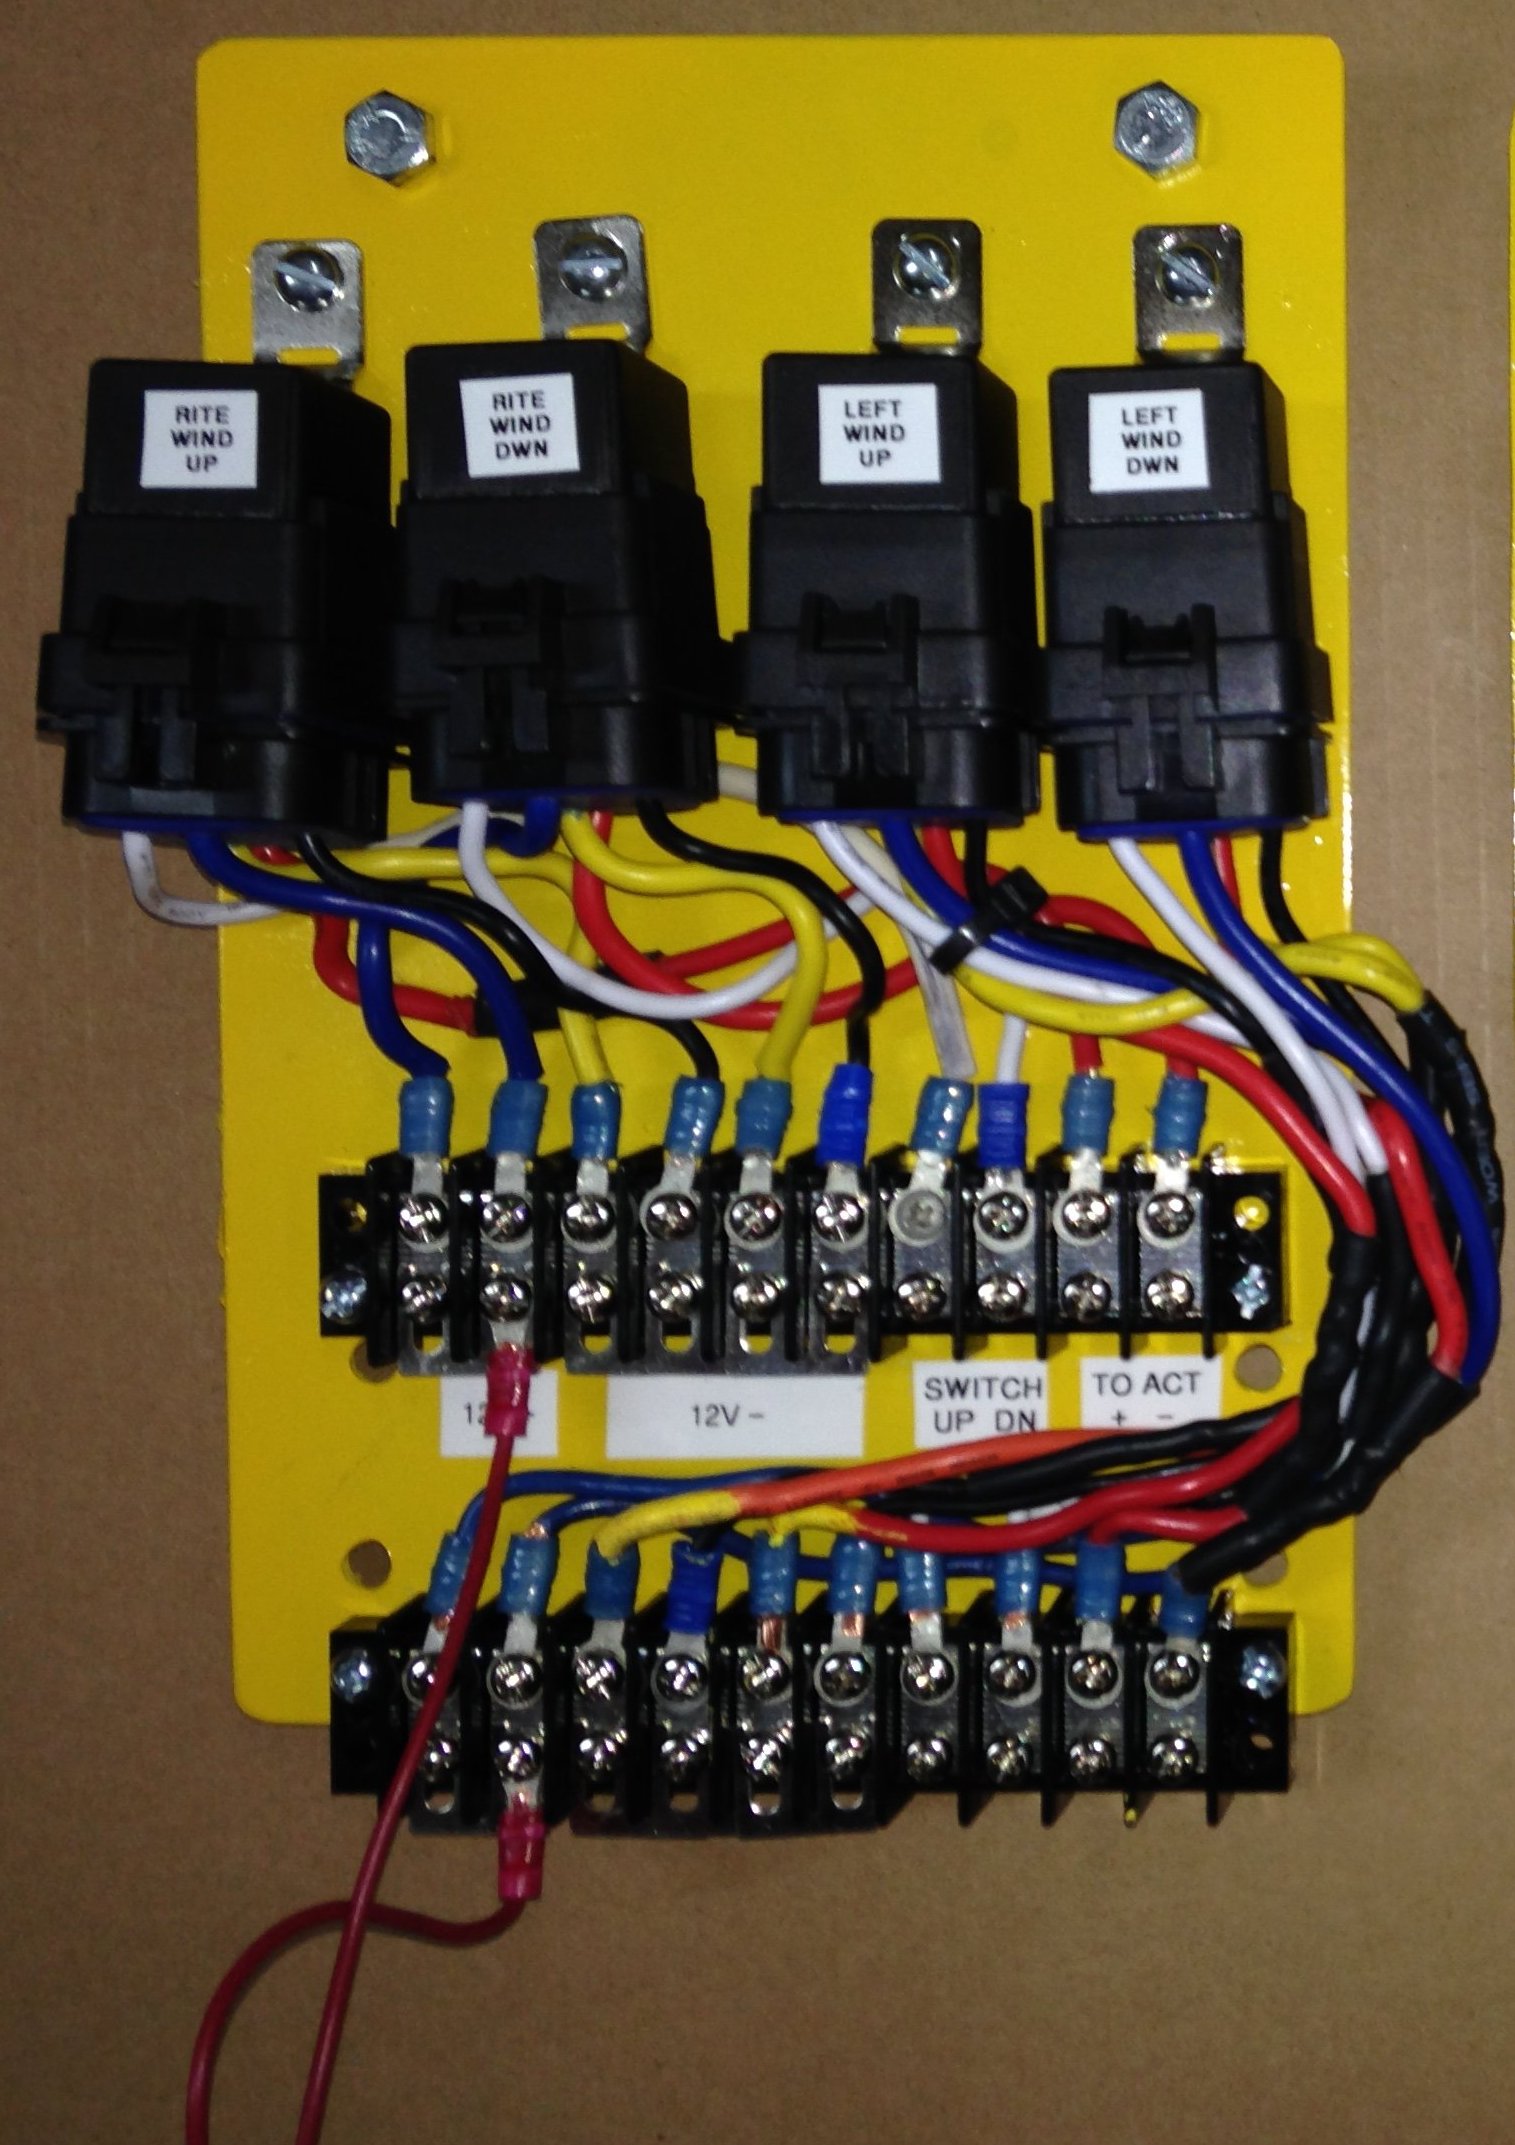
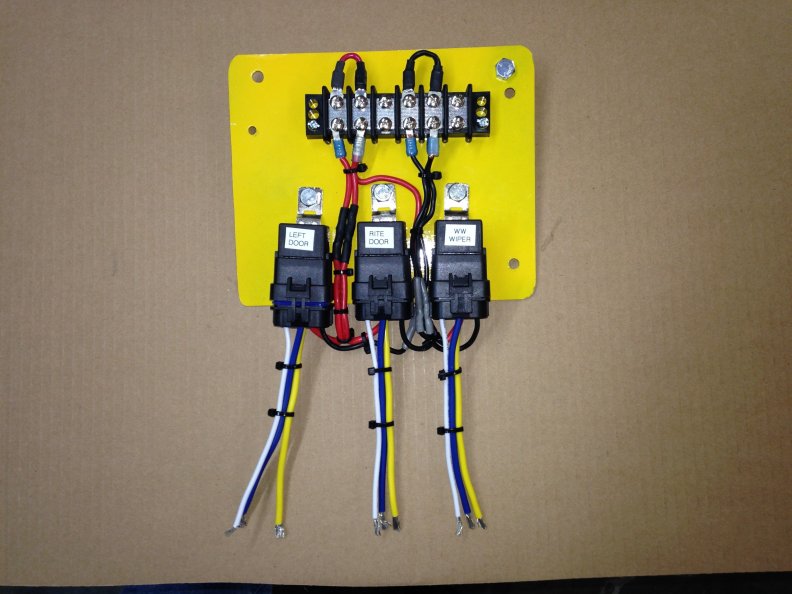
| 6-1-18 You
don't think about some stuff until you realize you hadn't thought of that stuff... When
wiring a car/truck there are circuits that need relays to handle high current. The
switch wiring can be small gauge but the actual voltage/current applications need heavier
gauge wire and a relay to handle the switching. Things like cooling fans and
actuators for the hood and headlights and wipers, doors, windows, etc.. So you have to wire up relay circuits... not terribly complicated but you have to think some..,. here's what I came up with.
|
| Hood actuator
circuit
|
| headlight
circuit
|
| doors, wipers
and windows
|
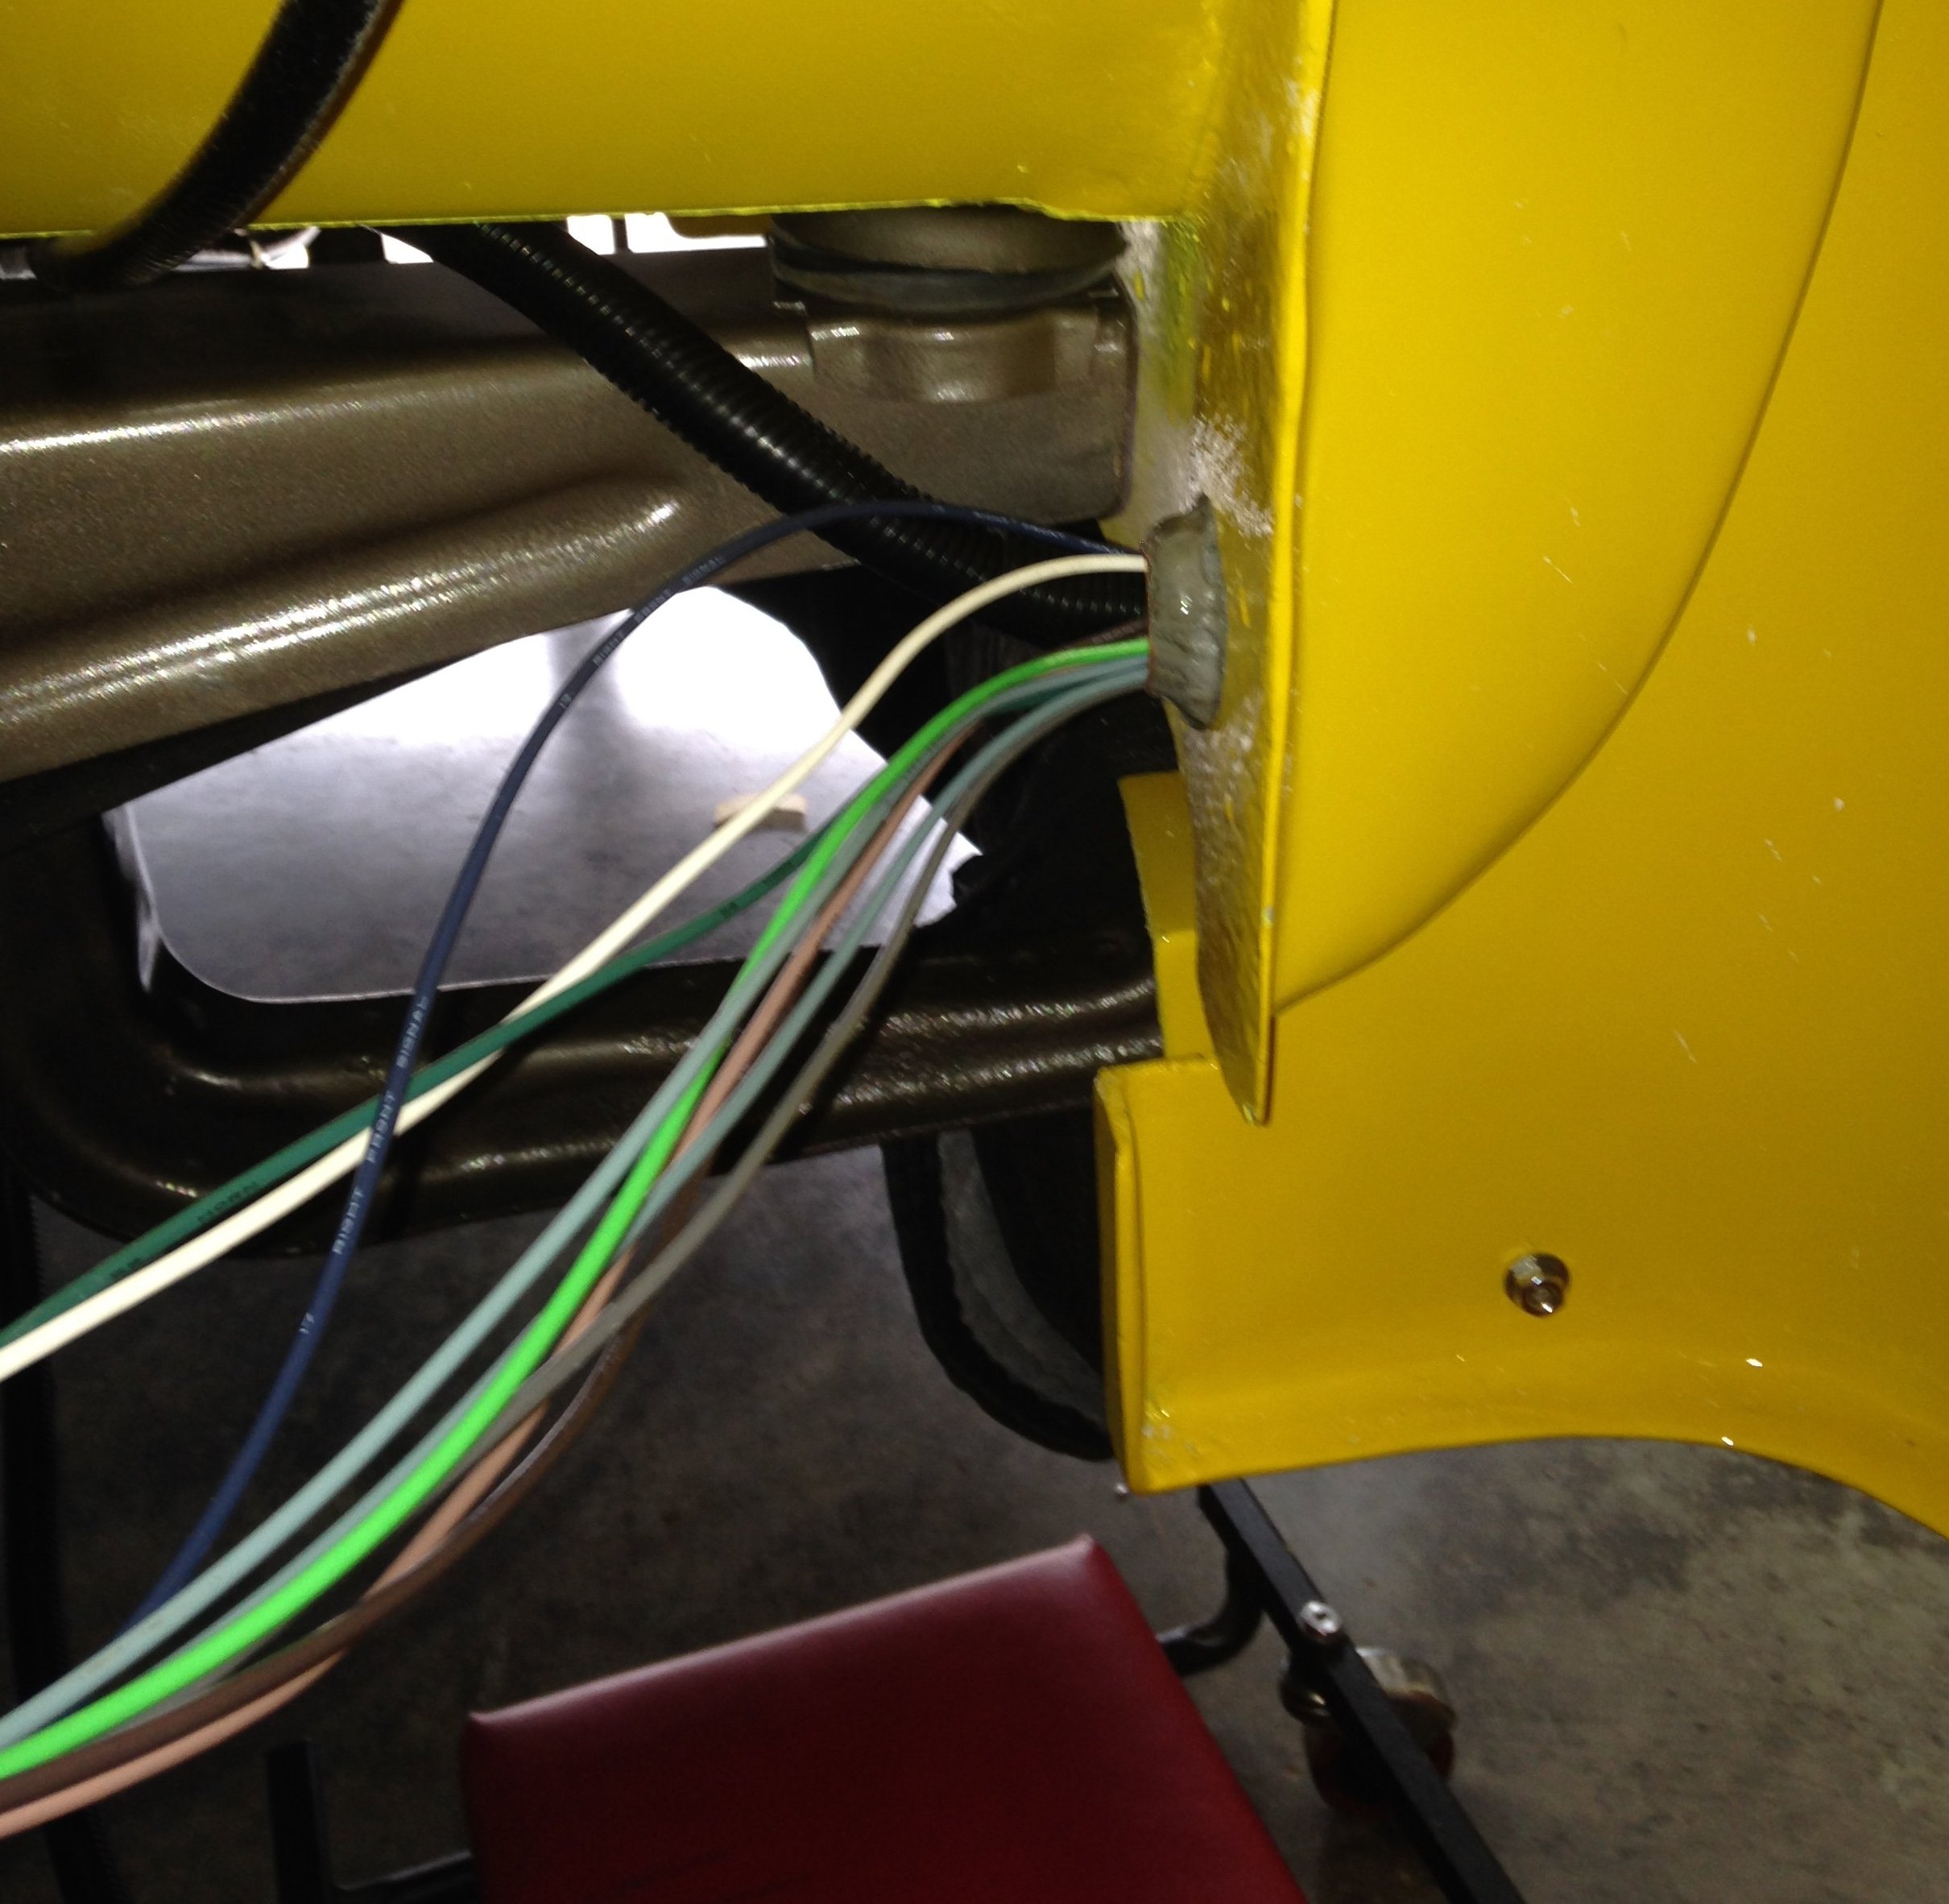
| 4-20-18
Still working on the wiring.. it's slow and tedious. I've never done a complete from
scratch job like this so I'm trying to be extra careful. Here's some detail on what
I'm doing. After mounting the fuse panel under the dash, left of the column I took
the three sections of wiring and sorta pointed them where they should be. I wanted a
clean firewall so I routed the front section down thru the kick panel and out under the
cab. I used a section of 1" copper tubing with a 90 degree ell on the bottom.
The reason I used copper is that it has the shortest radius 90.. it gets tight down in
that lower part of the kick. Put bushings on each opening and then drilled a
1-1/4" hole in the kickpanel from under the truck. The top was clamped to the
kick panel brace and the bottom was secure so I just filled around it with roofing sealing
tape... a very tacky self adhesive buytl product that comes in a 1/2" strip.
When all the wires are routed I'll seal the hole and wire loom completely with the same
thing. It will be waterproof then.
|
|
| In the picture
above you see one piece of loom headed toward the back of the truck... this is the 'right
hand front' section. (it actually crosses under the cab at the floor brace) I split the
front section into two groups depending on where they needed to be terminated...
i.e. alternator and a/c on right... oil pressure and hood on the left... it's easier
for me to keep up with and the bundles are smaller. I'm trying to hide all the
wiring from casual notice. I routed the rear section of wiring to the center of the cab
and down the transmission tunnel to the back of the cab. Please ignore the duct
tape... it will be covered with something more permanent and will be completely hidden by
the console. I used watertite flexible electrical conduit fittings thru the floor.
The wiring is terminated under the back of the cab into a weatherproof junction
box.. normally used for trailer connections. Then from that box I used 7 conductor
color coded trailer wire (thanks for the deal, Pete) to the rear of the truck and
another junction box. A lot easier than routing all that wiring. I've also put
labels inside the covers on each box to remind me what goes where.... ( i.e. #3 brown tail
lights).. One suggestion... some of my wires were too short the way I routed them... so I
added to them with wire from another circuit that was too long....if you reuse wire from
the kit, make a note to yourself.. that the light blue left turn signal wire is now brown
and labeled right rear backup lite. All of my wiring is in that devilish plastic
corregated loom and it's a bear to trace after it's clamped to the frame... Don't ask me
how I know.
|
|
|
| 3-17-18 The next step was wiring. I was so not looking forward to this. Not that it's above my paygrade, but I'm totally ignorant about all the little tricks and short cuts that the gurus know. But, I'm making my way through it. I started by seperating all the groups and making sure the wires I needed were in the group they should be... there's a lot of wire to sort out. |
|
| so far I've got the groups going to their specific places and started wire looming some of it... trying to hide as much as possible so it takes a little planning. It's coming out from under the cab in the kickpanel... that itself was a hurdle. working on the engine side now and figuring how to make it invisible |
|
2-27-18 So ... I've been back on the play roster for a couple of weeks and back to truck work. Picked one day and did the first bleed on the brakes... all went well till about an hour after I bled them and noticed drips of brake fluid on the floor under the calipers. Leaks on both front calipers where the banjo bolt attaches to the caliper. Retightened and rebled... same problem... tried new copper washers... same thing ! Dang it !! Put a question out on the forum asking for suggestions and got some advice to 'anneal' the washers... Heat them to cherry red hot and let them cool... this softens the copper and makes it seal better. So I took 4 new copper washers and did just that... BINGO !! Problem fixed.. 70 years old and still learning new stuff... you gurus can go ahead and laugh at this rookie not knowing nothin.
|
| Next on the list of to dos was the interior soundproofing and insulation. I did my research and found a plethora of products and advise.... from felt mats to building products for the house to some astronomically priced sound studio stuff that would make a 737 sound like a balsa wood glider going by you. From all that I choose a product from NOICO Solutions https://noico.info/. It's a two part system with sound proofing mats that is covered by a closed cell foam insulation mat. It's 'fun' to install with all the compound curves in a '53 cab.. but I think it will be well worth it. Here's a couple of progress shots. These are the sound deadening mats.. haven't taken any of the insulation yet. There will be an article over there <- pretty soon.
|
|
After this is complete... we're (me and my wire strippers) are on to wiring. |
| 1-11-18
not much progress...some surgeries hindering me so I added a page
of paint pictures... should be back to work in 5 or 6 weeks https://jniolon.classicpickup.com/paint/finalpaint.htm |